-
![]()
At-Home Setup – V1
-
![]()
At-Home Setup w/ Modifications – V1.5
-
![]()
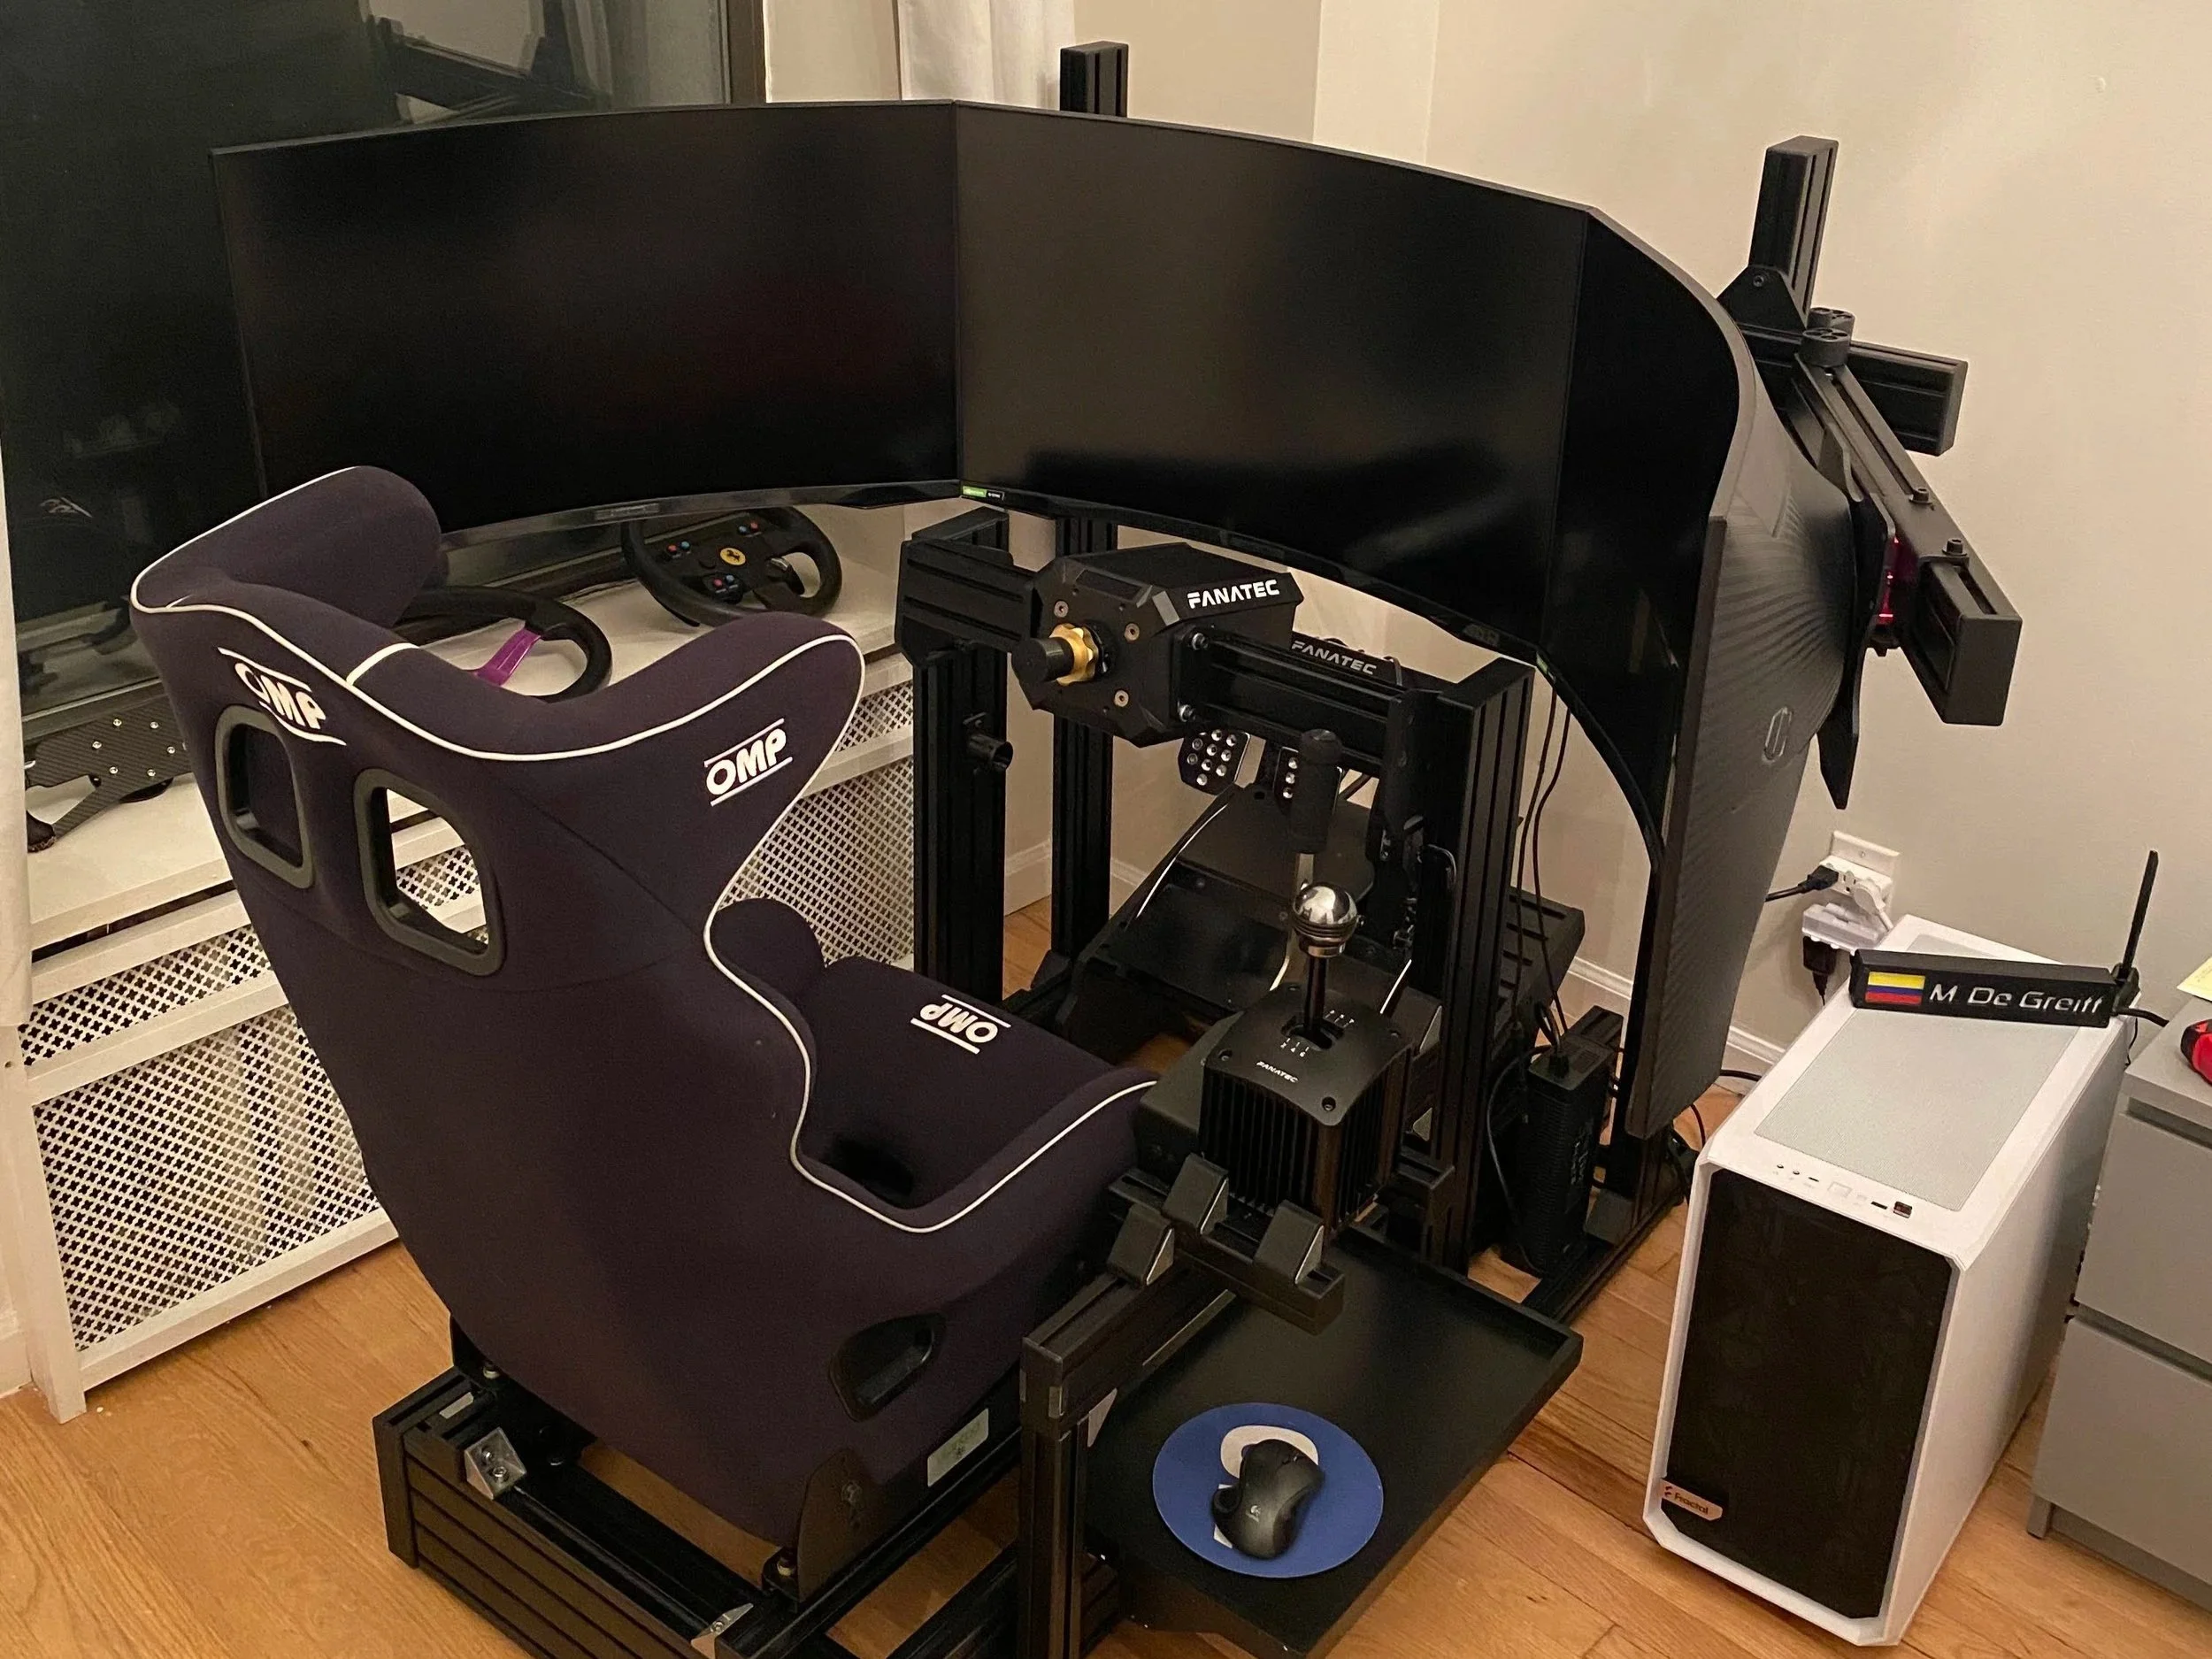
Direct Drive + Full Cockpit – V2
-
![]()
Making the move to PC – V2.5
-
![]()
Component Upgrades – V3
-
![]()
Final Form – V3.5

-
First experience driving a “simulator” was using the Xbox 360 lap mounted wheel with the pedals scotch taped to the floor, playing Project Gotham Racing 4.
Second experience was Forza Motorsport 3 driving the Audi R8 LMS Ultra. This was a significantly important moment in my life that you can learn more about on other MÁQUINAHAUS pages
Good times…
-
First wheel of my own was the Thrustmaster Ferrari 458 Spider Racing Wheel (spring loaded! noooo force feedback) for the Xbox 360.
I used my own money, and bought two so I could drive with my family. Safe to say they were not impressed. Me though… I could not get enough
-
First time experiencing my own force feedback wheel was when I purchased the Thrustmaster TMX (belt-driven) wheel base.
This was a borderline life-changing feeling to have sitting in the comfort of your own home.
-
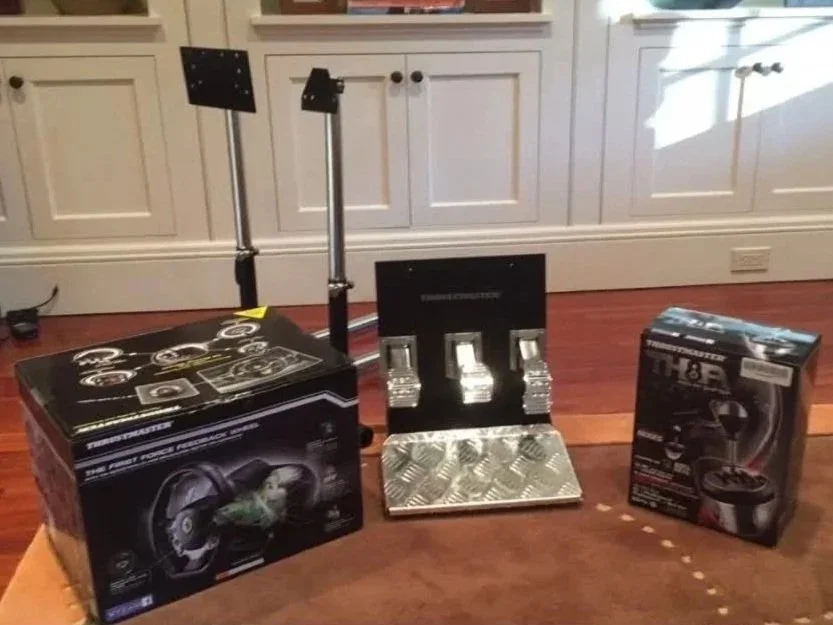
Less than two weeks after getting my first force feedback wheel, I immediately sold it and upgraded to a more powerful wheel base: the Thrustmaster TX (458 edition)
The following year, myself and MQ:HS crew began designing and fabricating our own modifications: custom handbrake, cockpit base with adjustable seating, and pedal mount
-
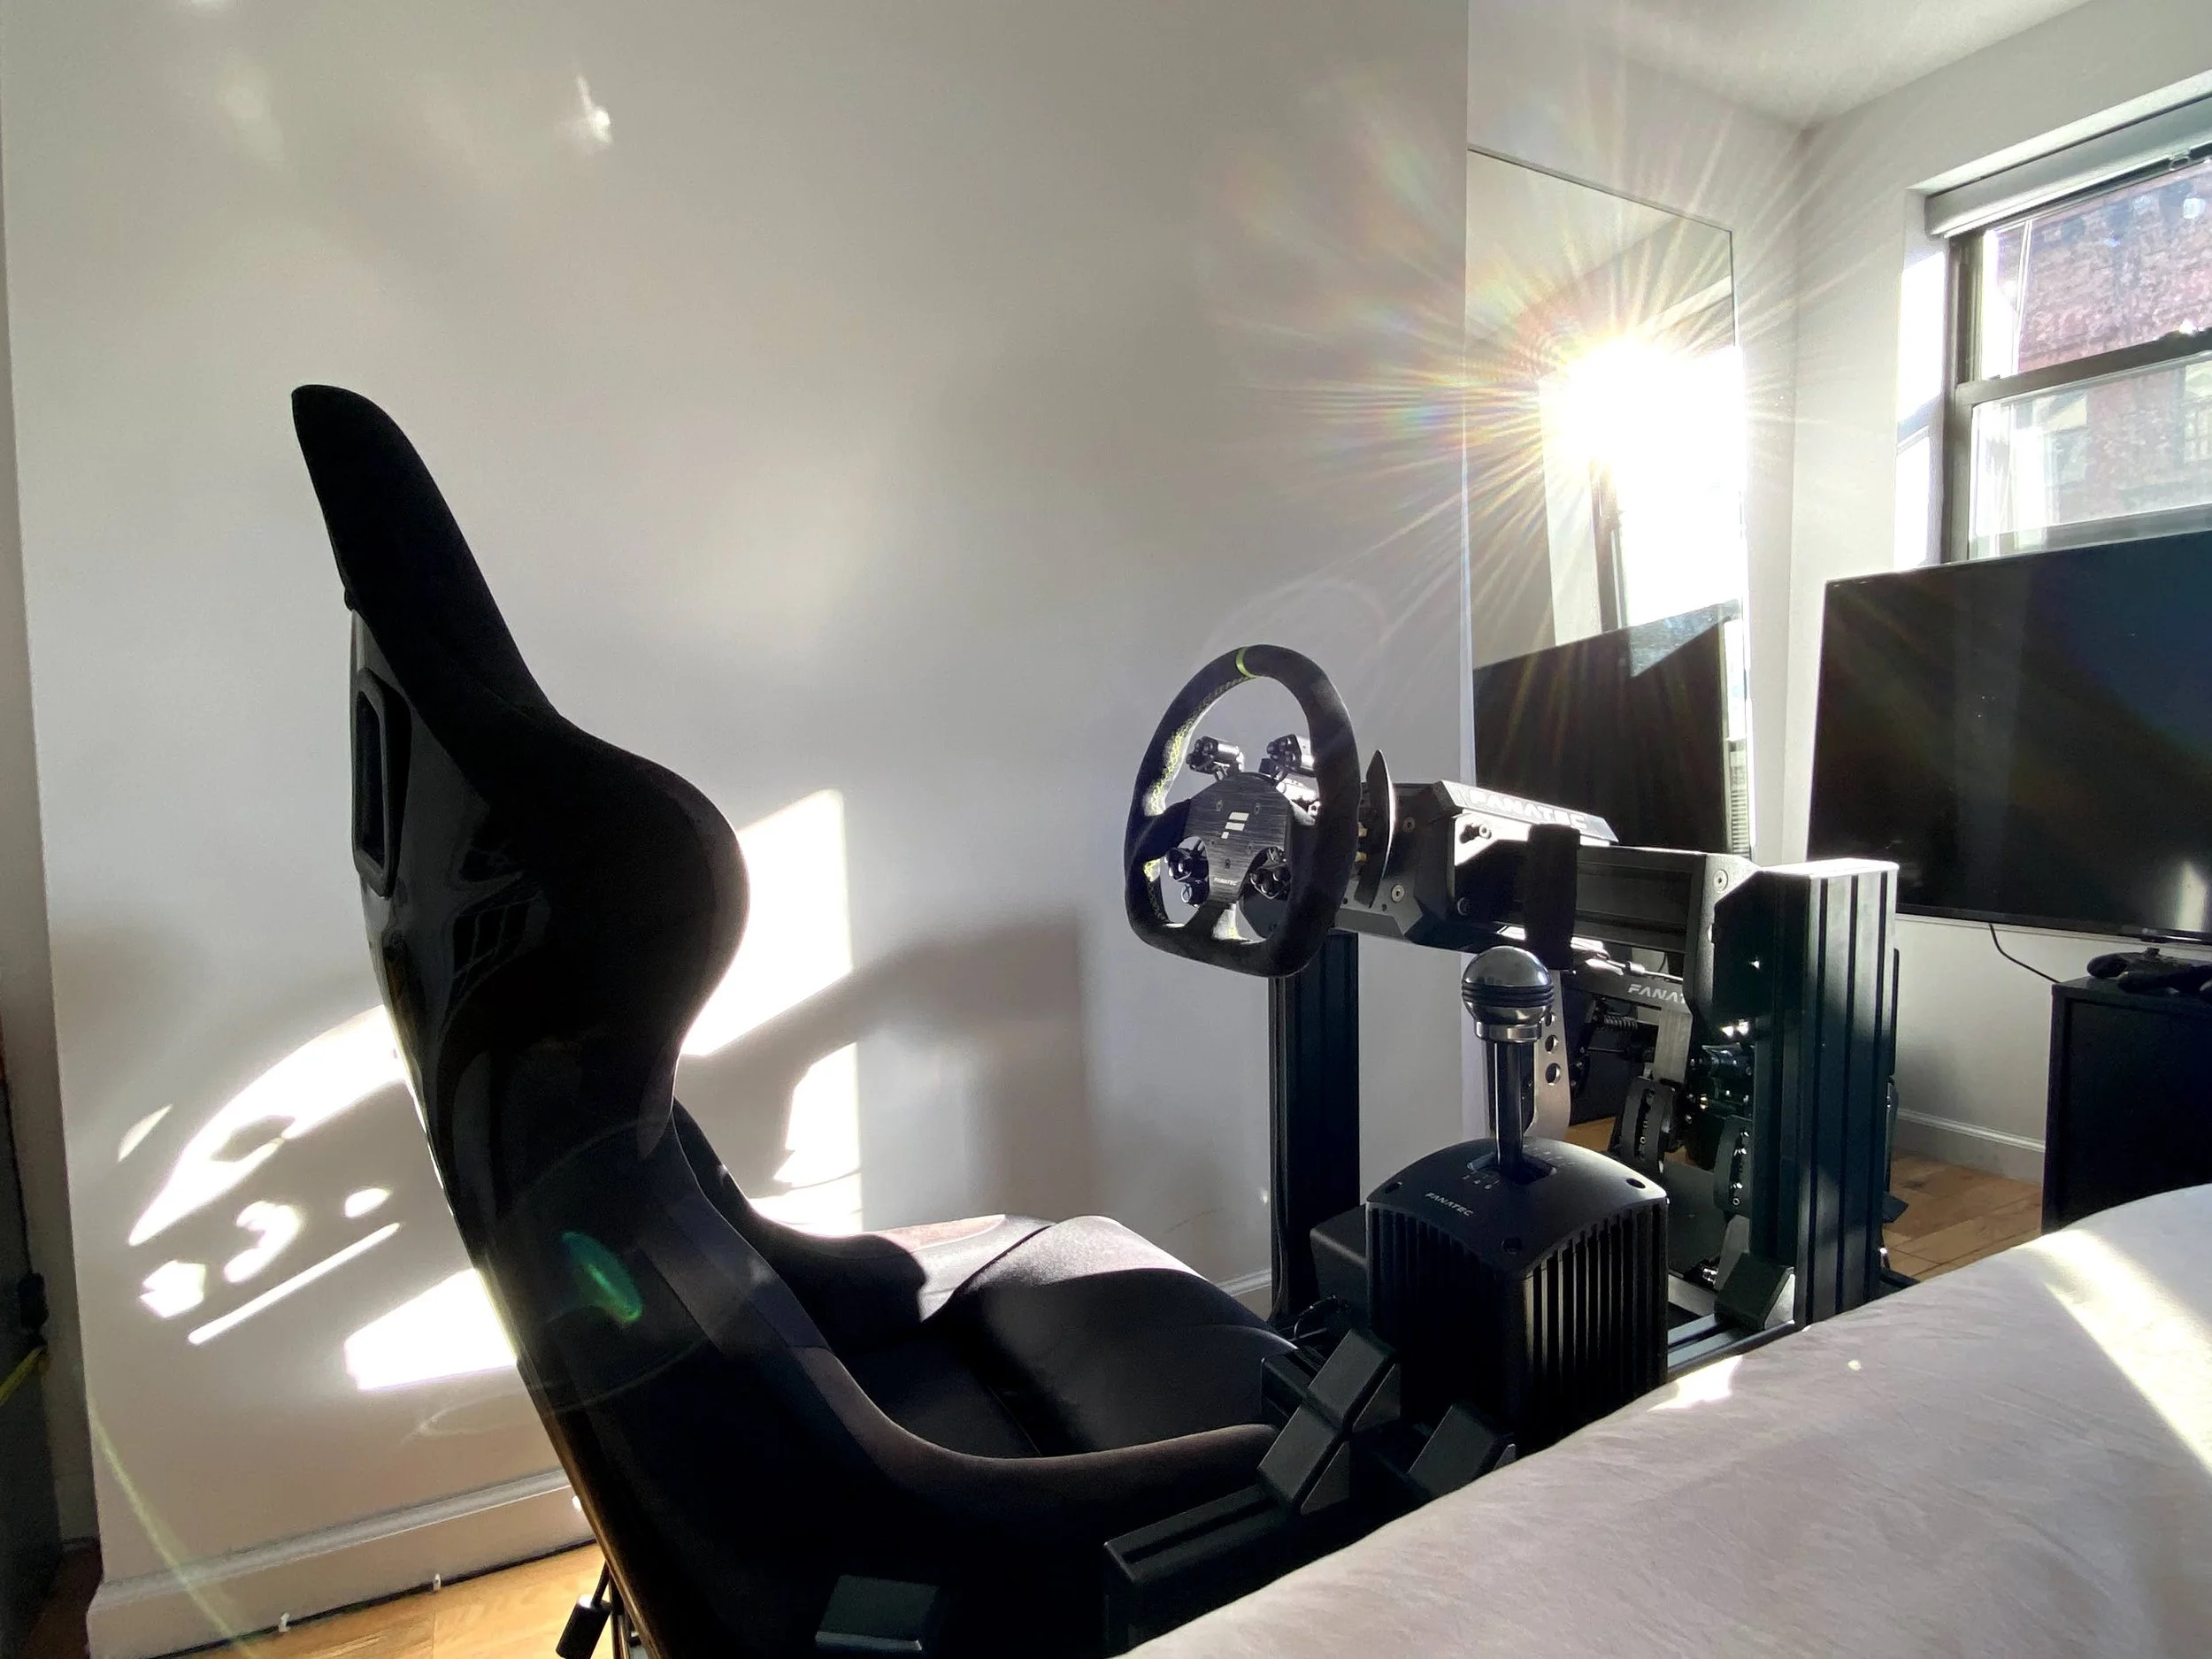
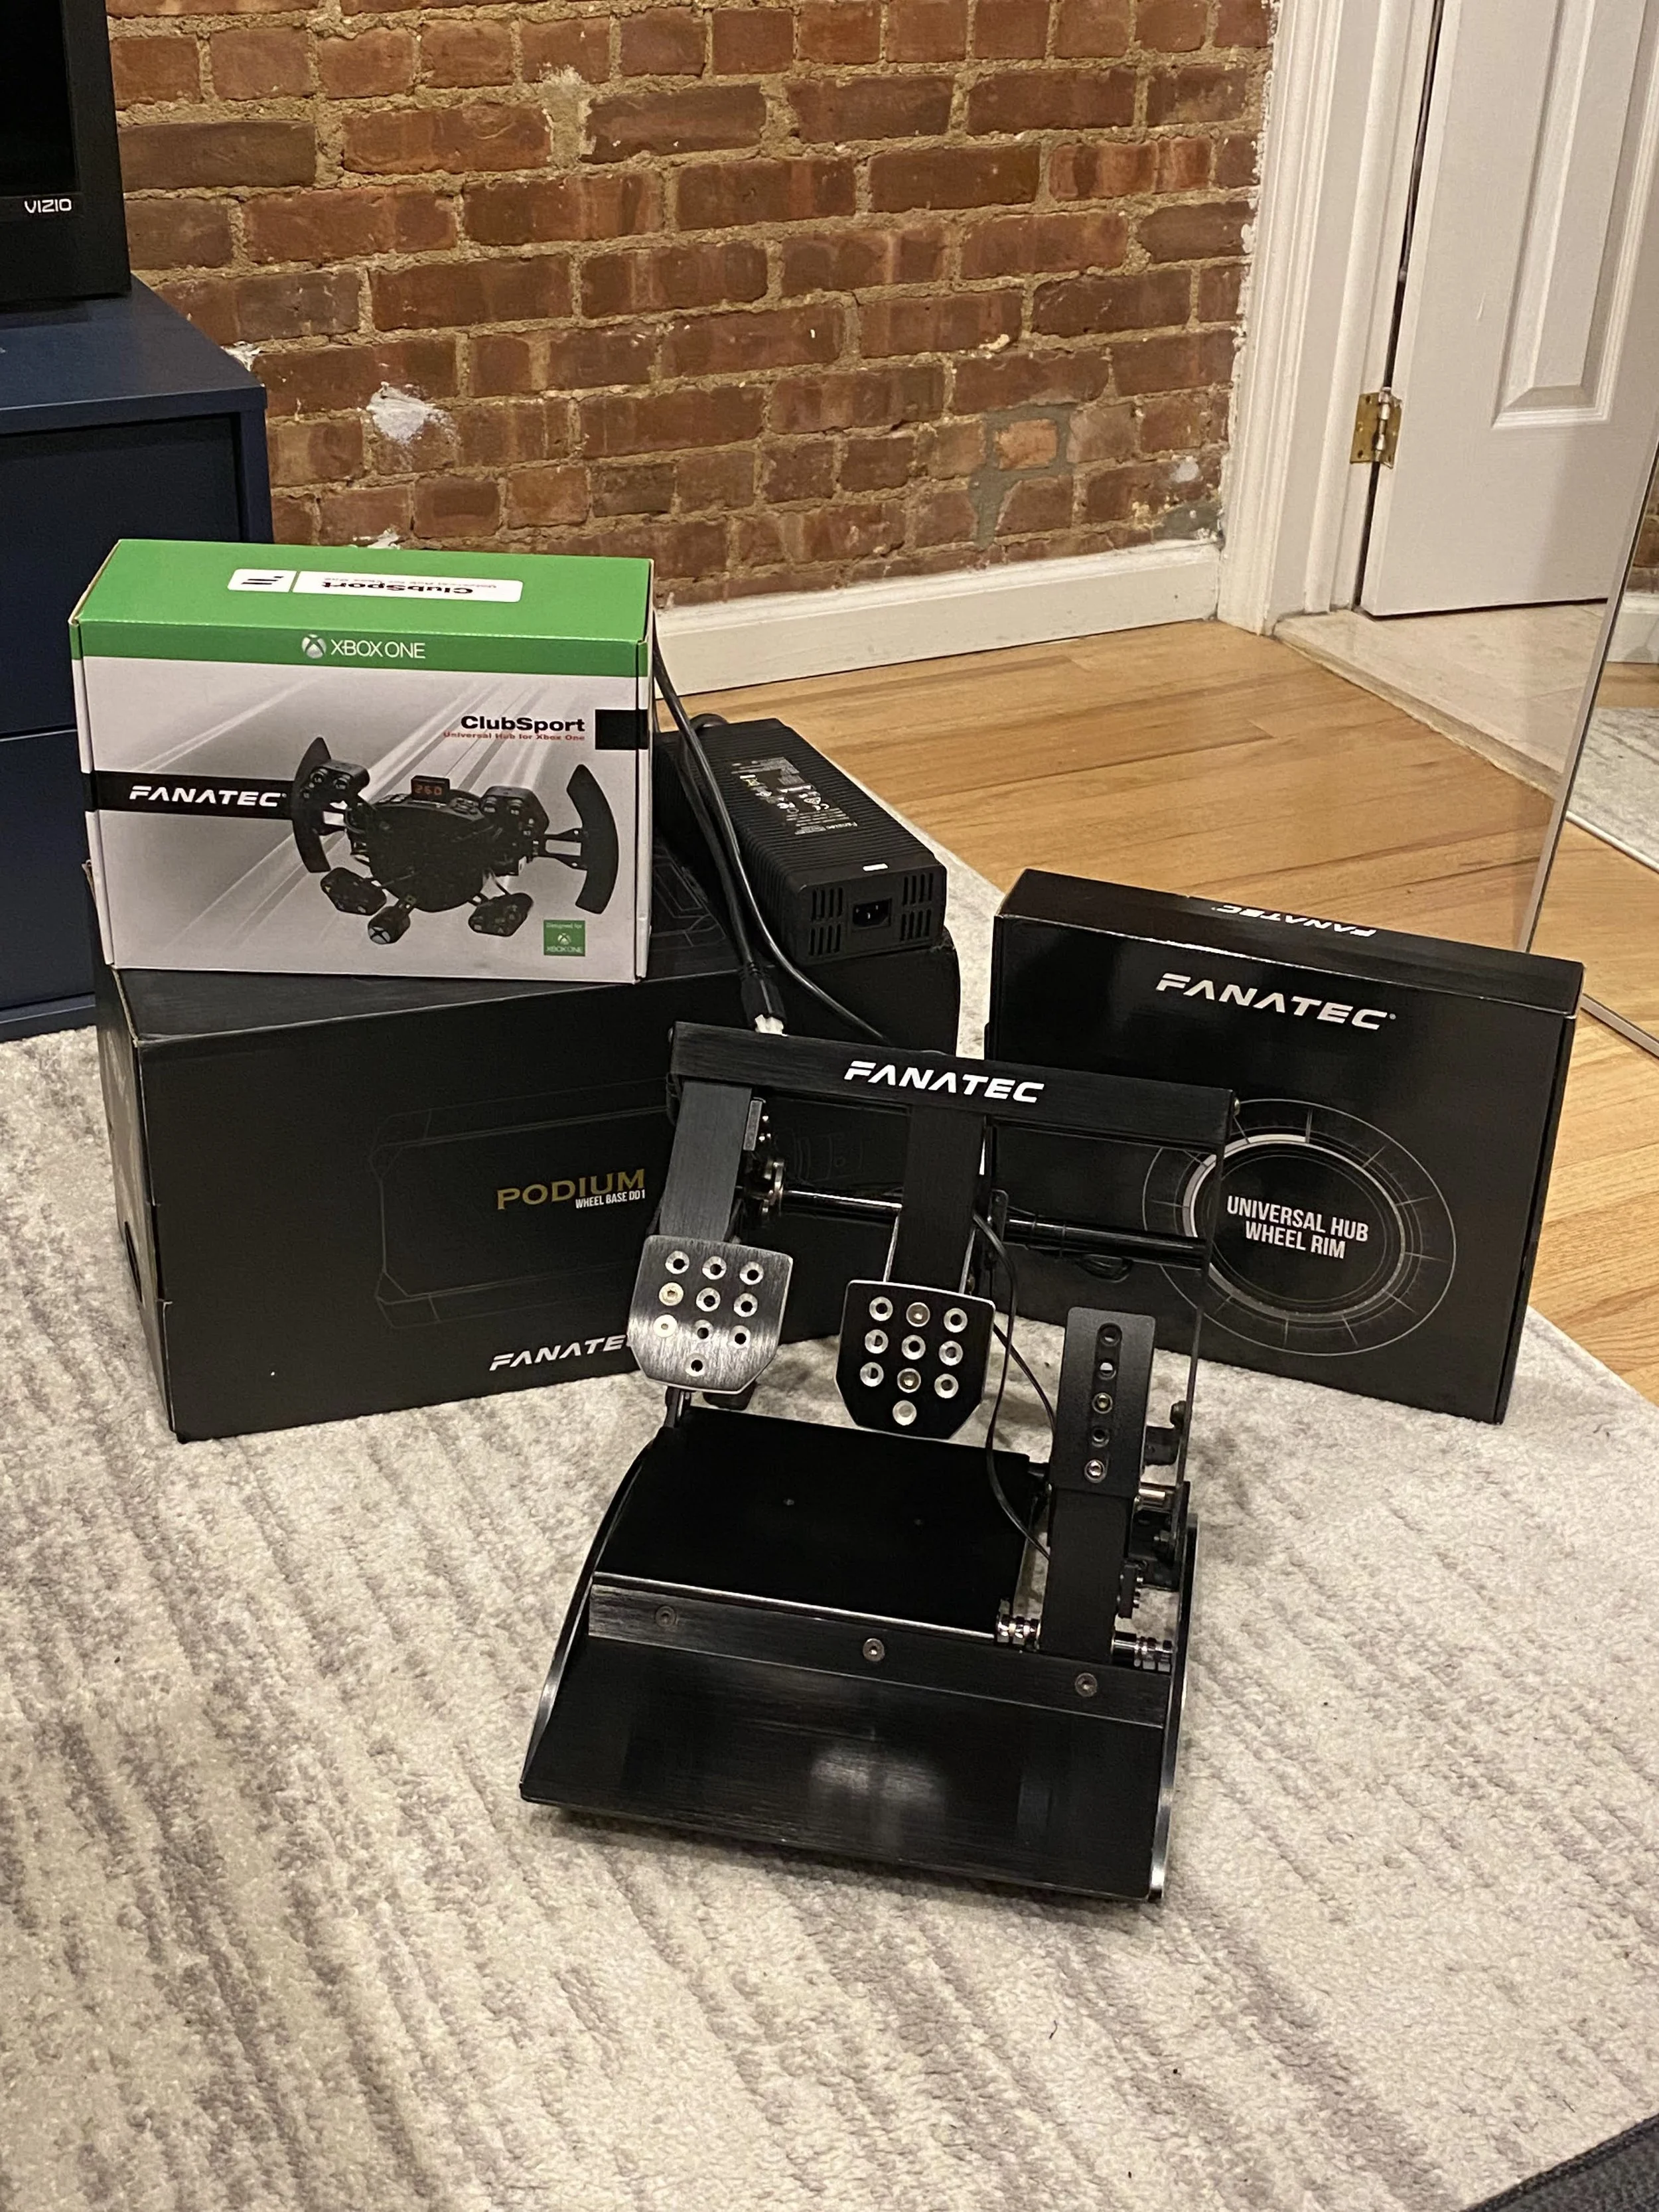
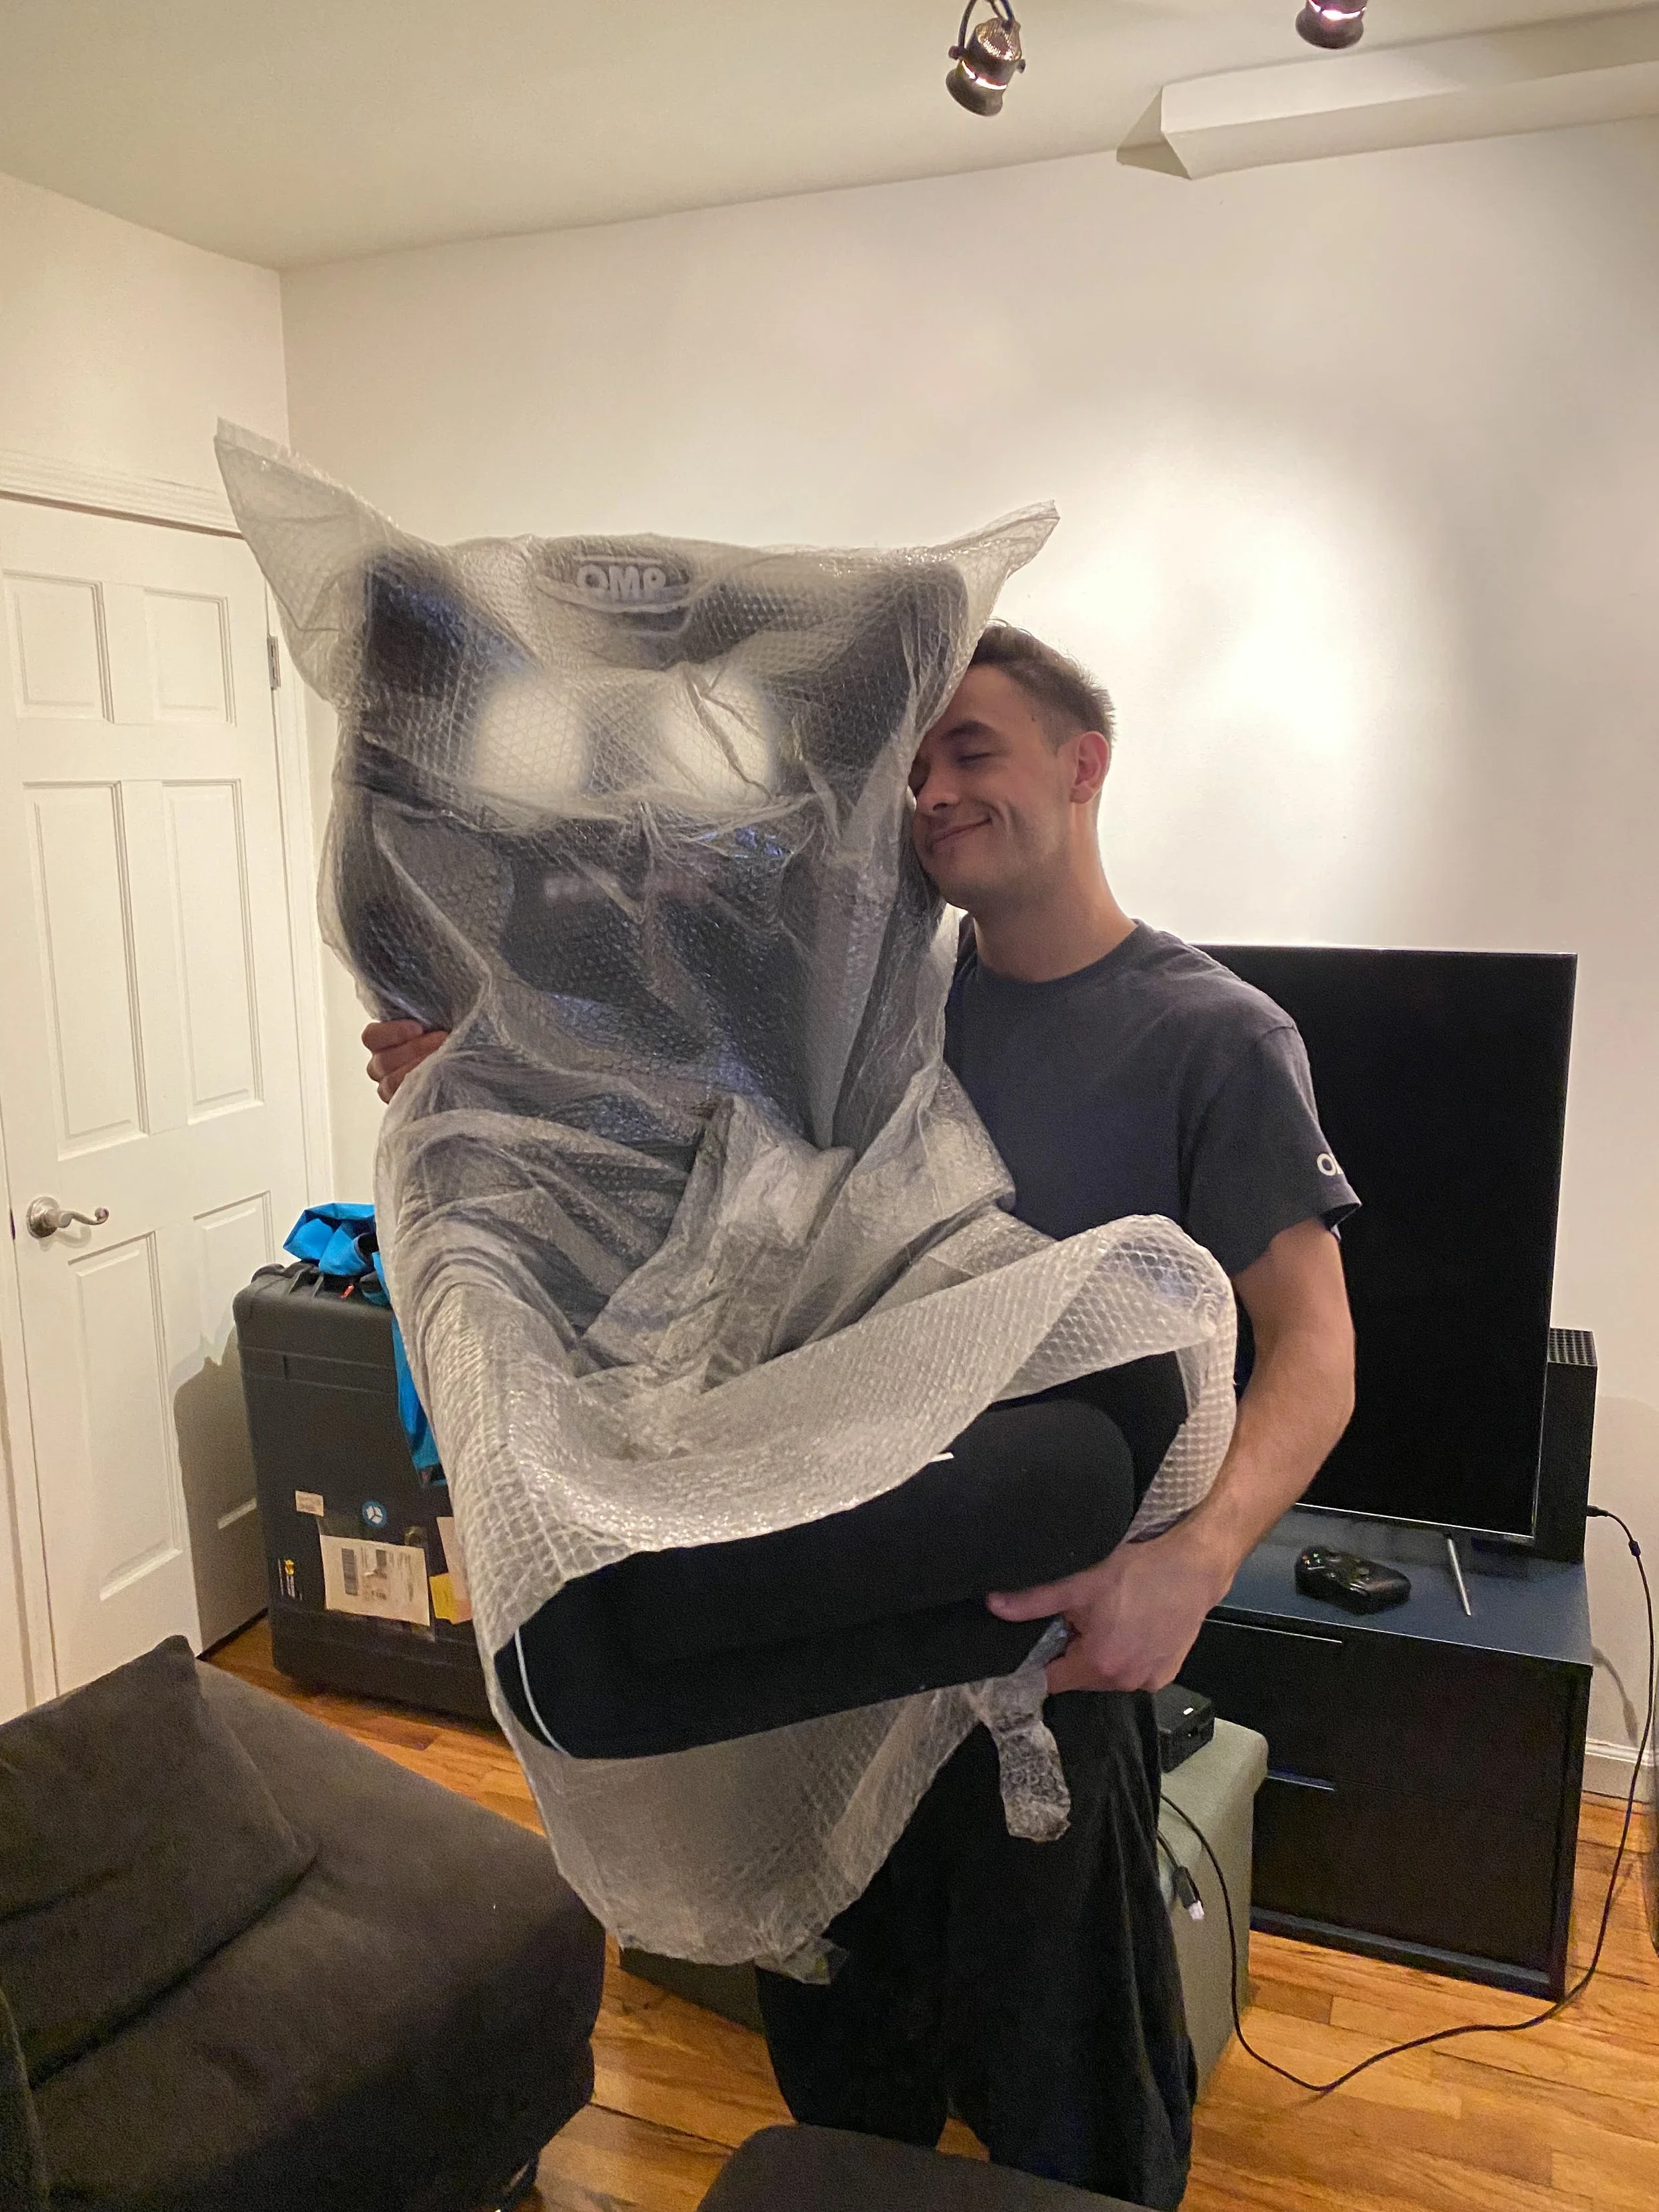
Years later, after having sold the previous V1.5 system, it was time to lay the groundwork for what was going to be the future of my sim racing career: the Sim-Lab P1-X cockpit. I had to get new driving components to fit the bill, so we did an entire ecosystem ugprade to Fanatec DD1 wheel base fit with the Universal hub (still on Xbox after all), ClubSport V3 Inverted pedals, ClubSport Shifter, and Handbrake.
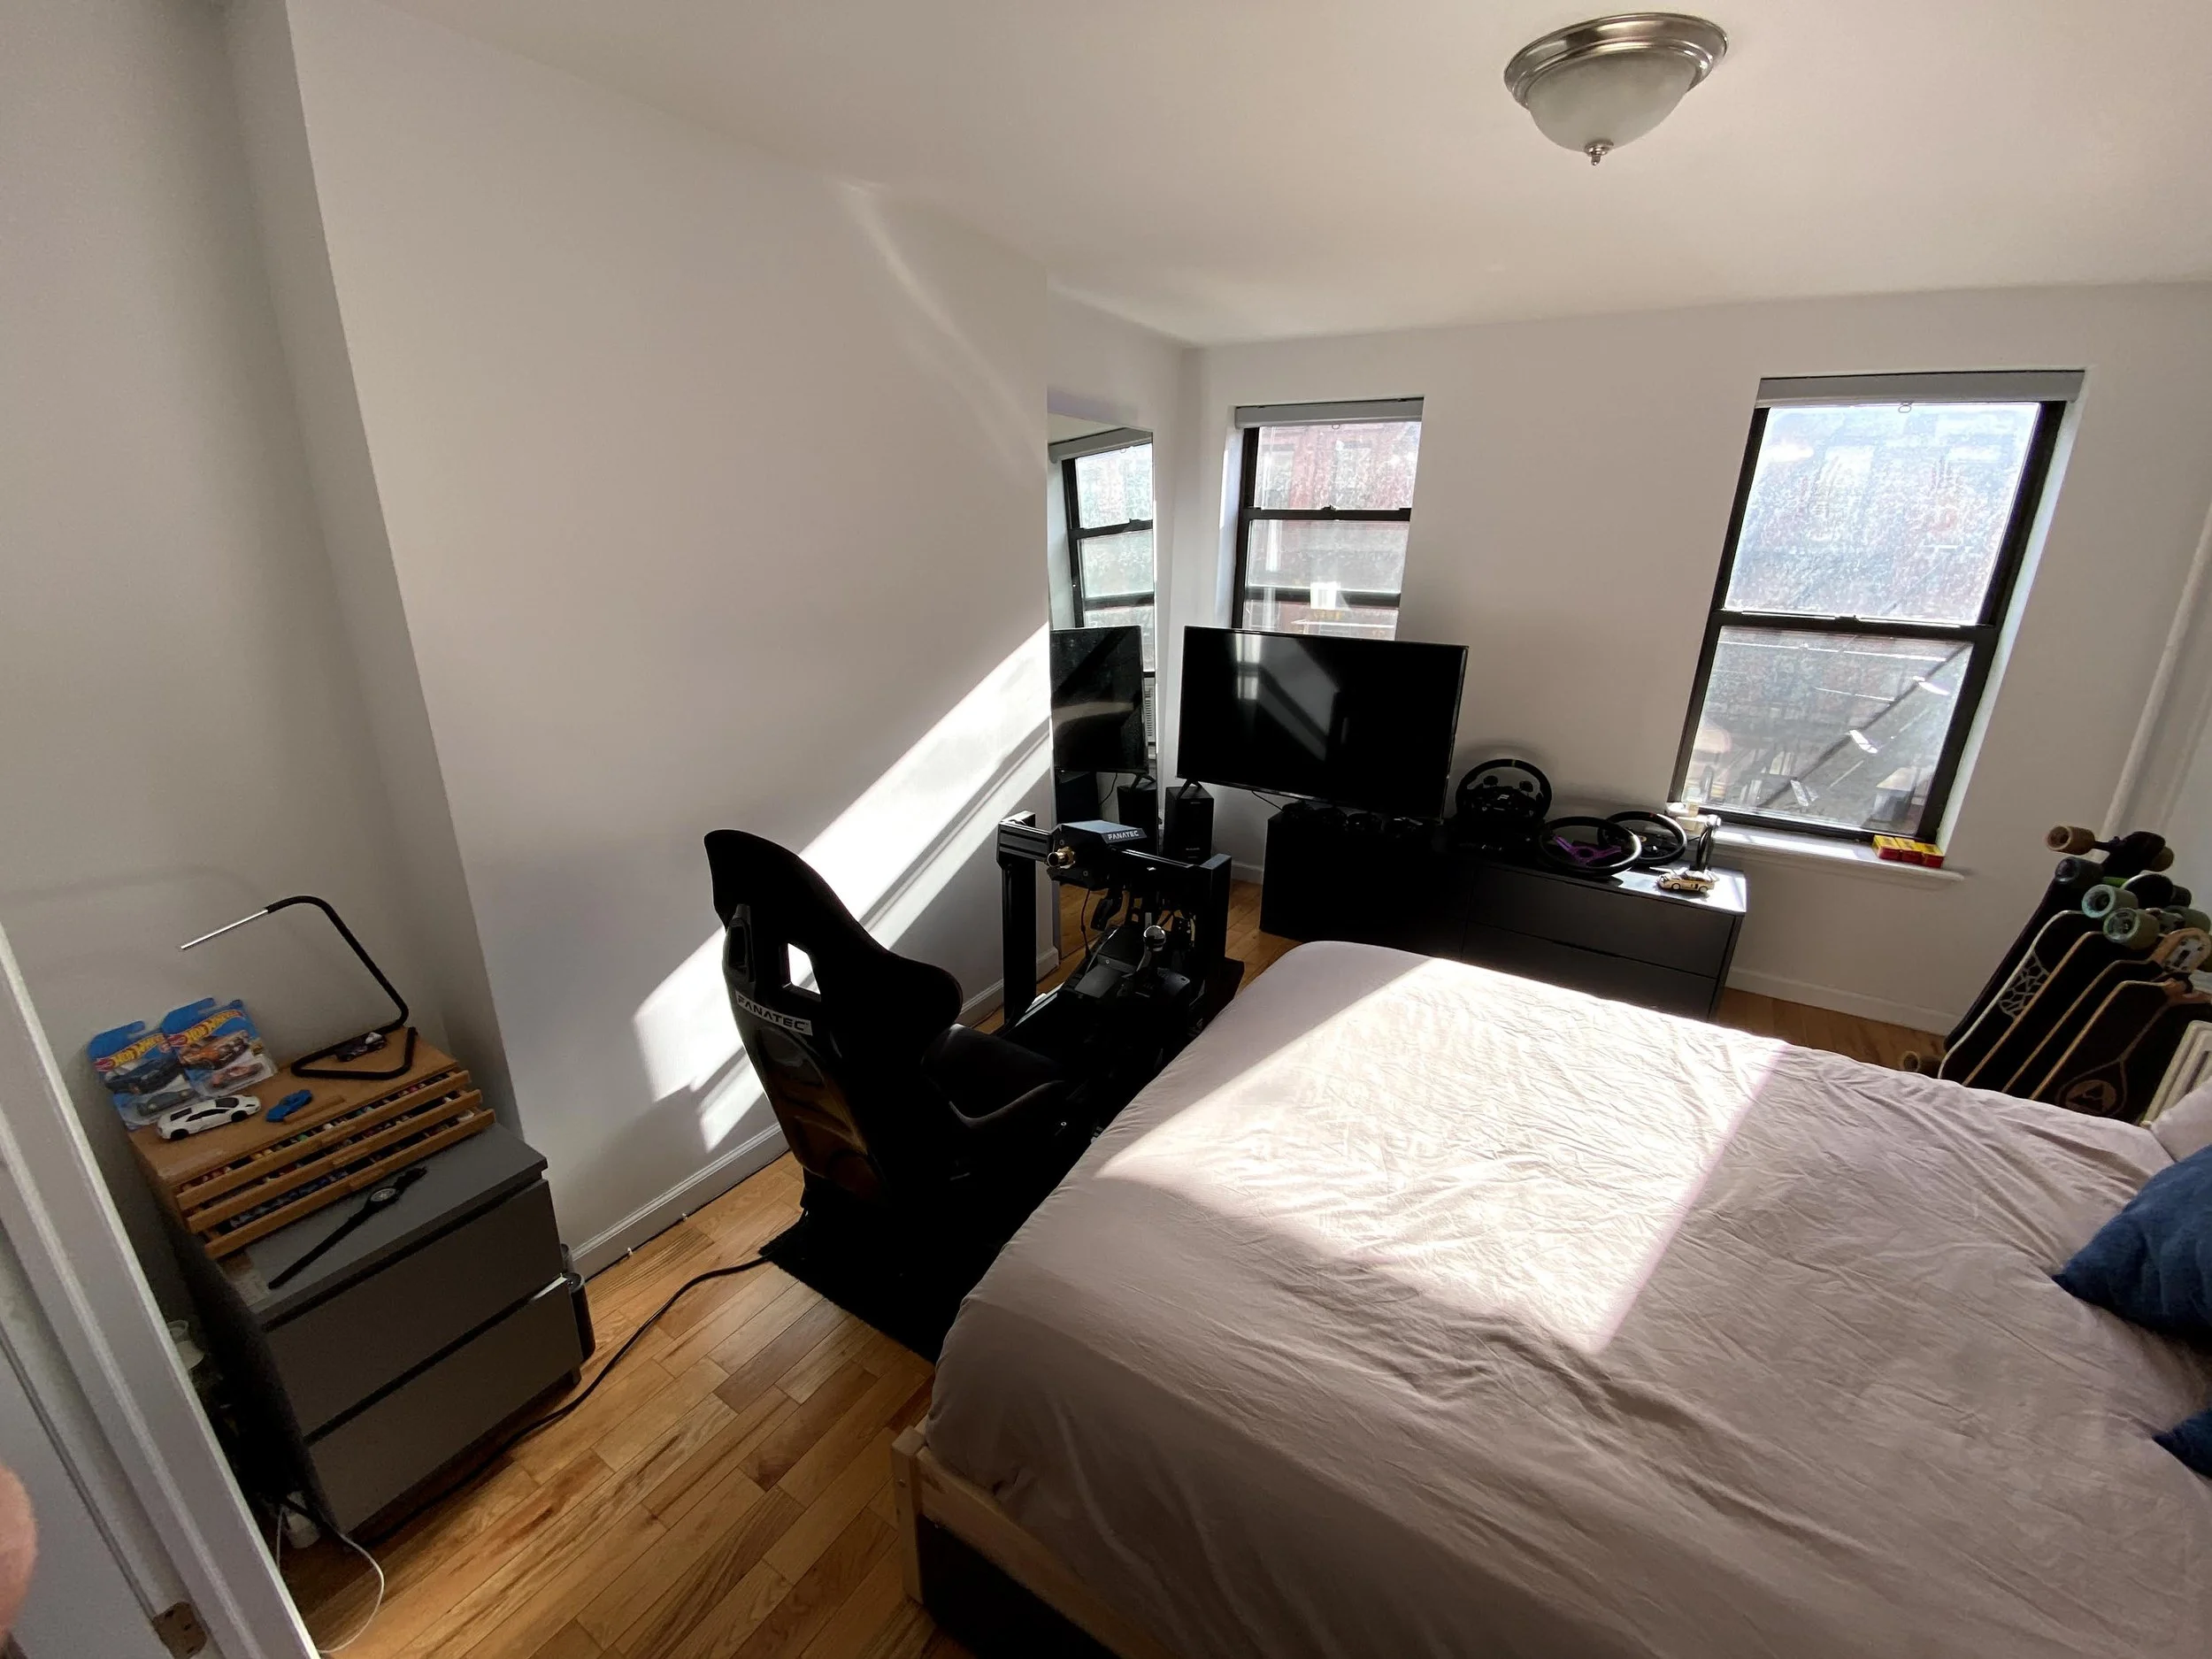
This is all shoved into my small New York Apartment bedroom. I was really living in a dream world.
-
After some time enjoying what this new gear had to offer, it was time to make the biggest move yet: switching to PC (instead of Xbox).
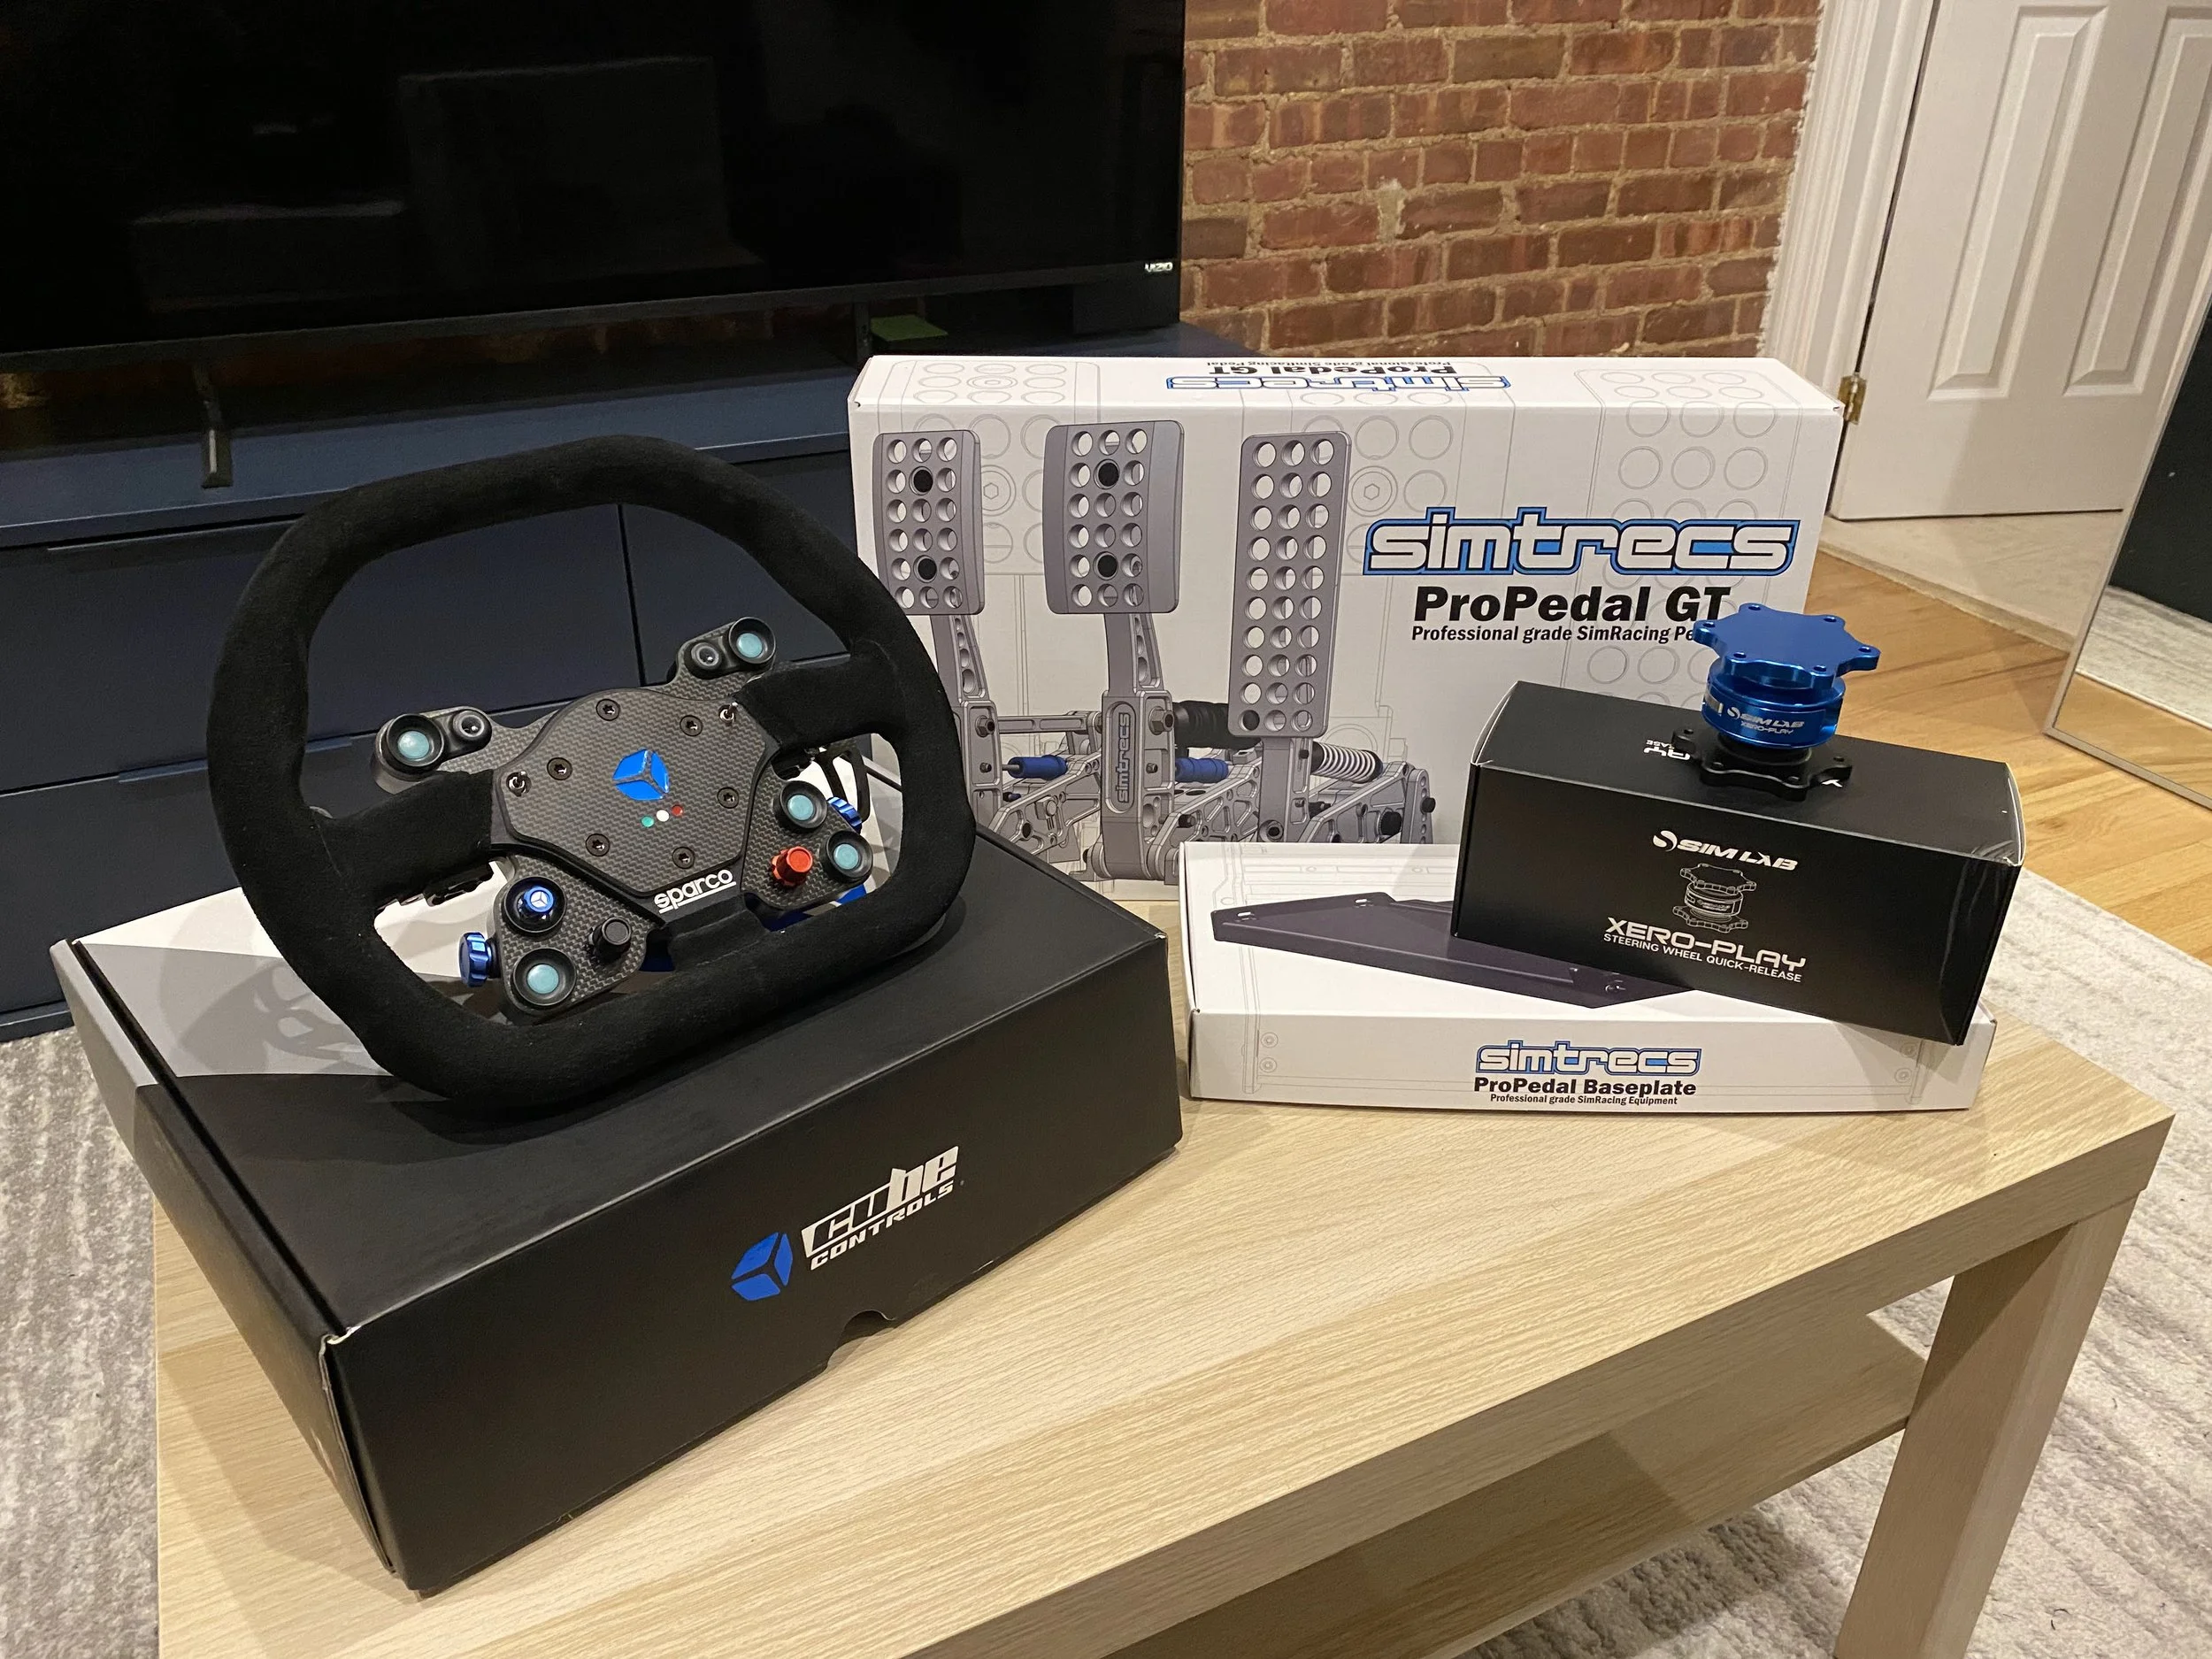
PC for sim racing are unmatched. It lets you run any piece of kit with anything. No more worrying about console compatibility, no more ecosystem lock-ins. You can mix and match whatever you want. The world is your oyster, and I took advantage of this by upgrading all of the driving-related components on the rig
-
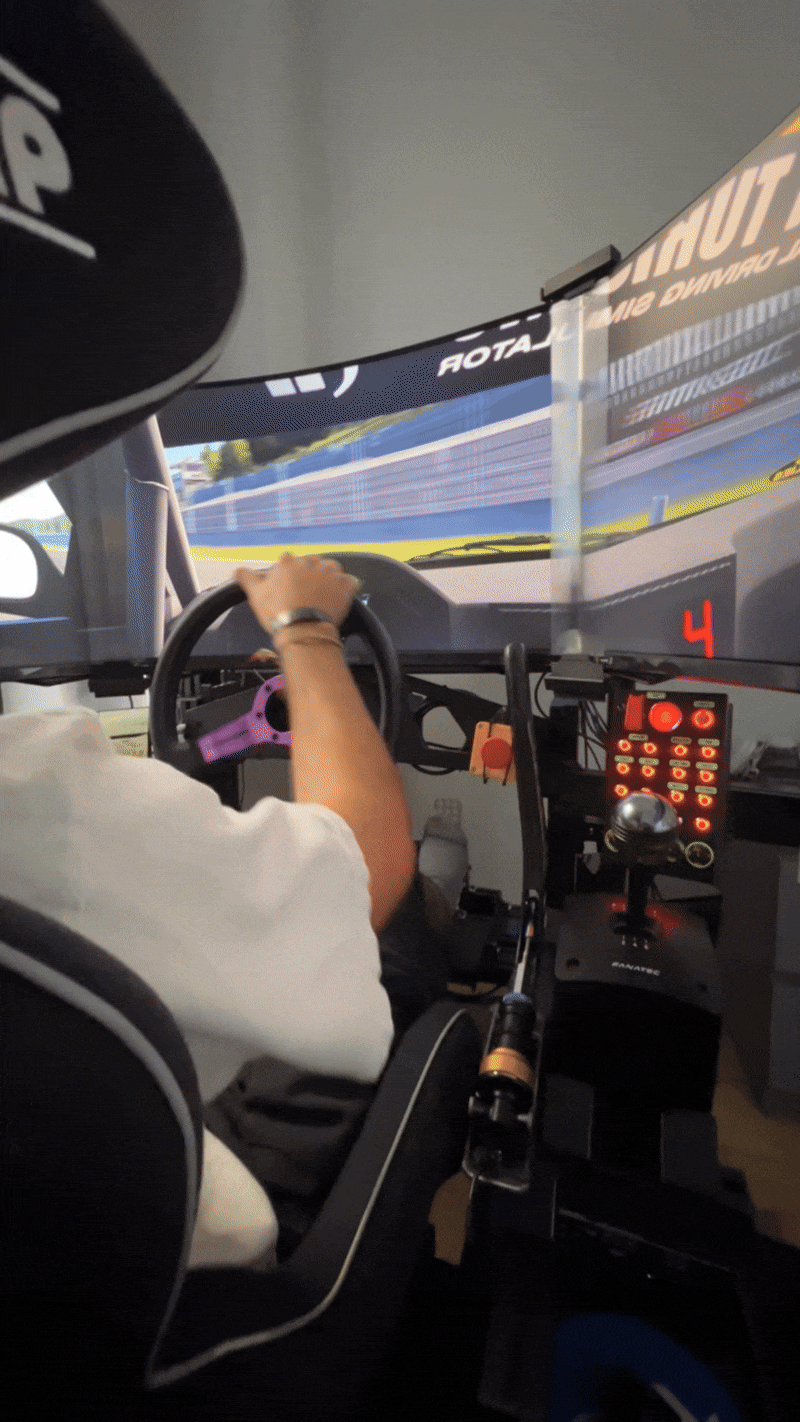
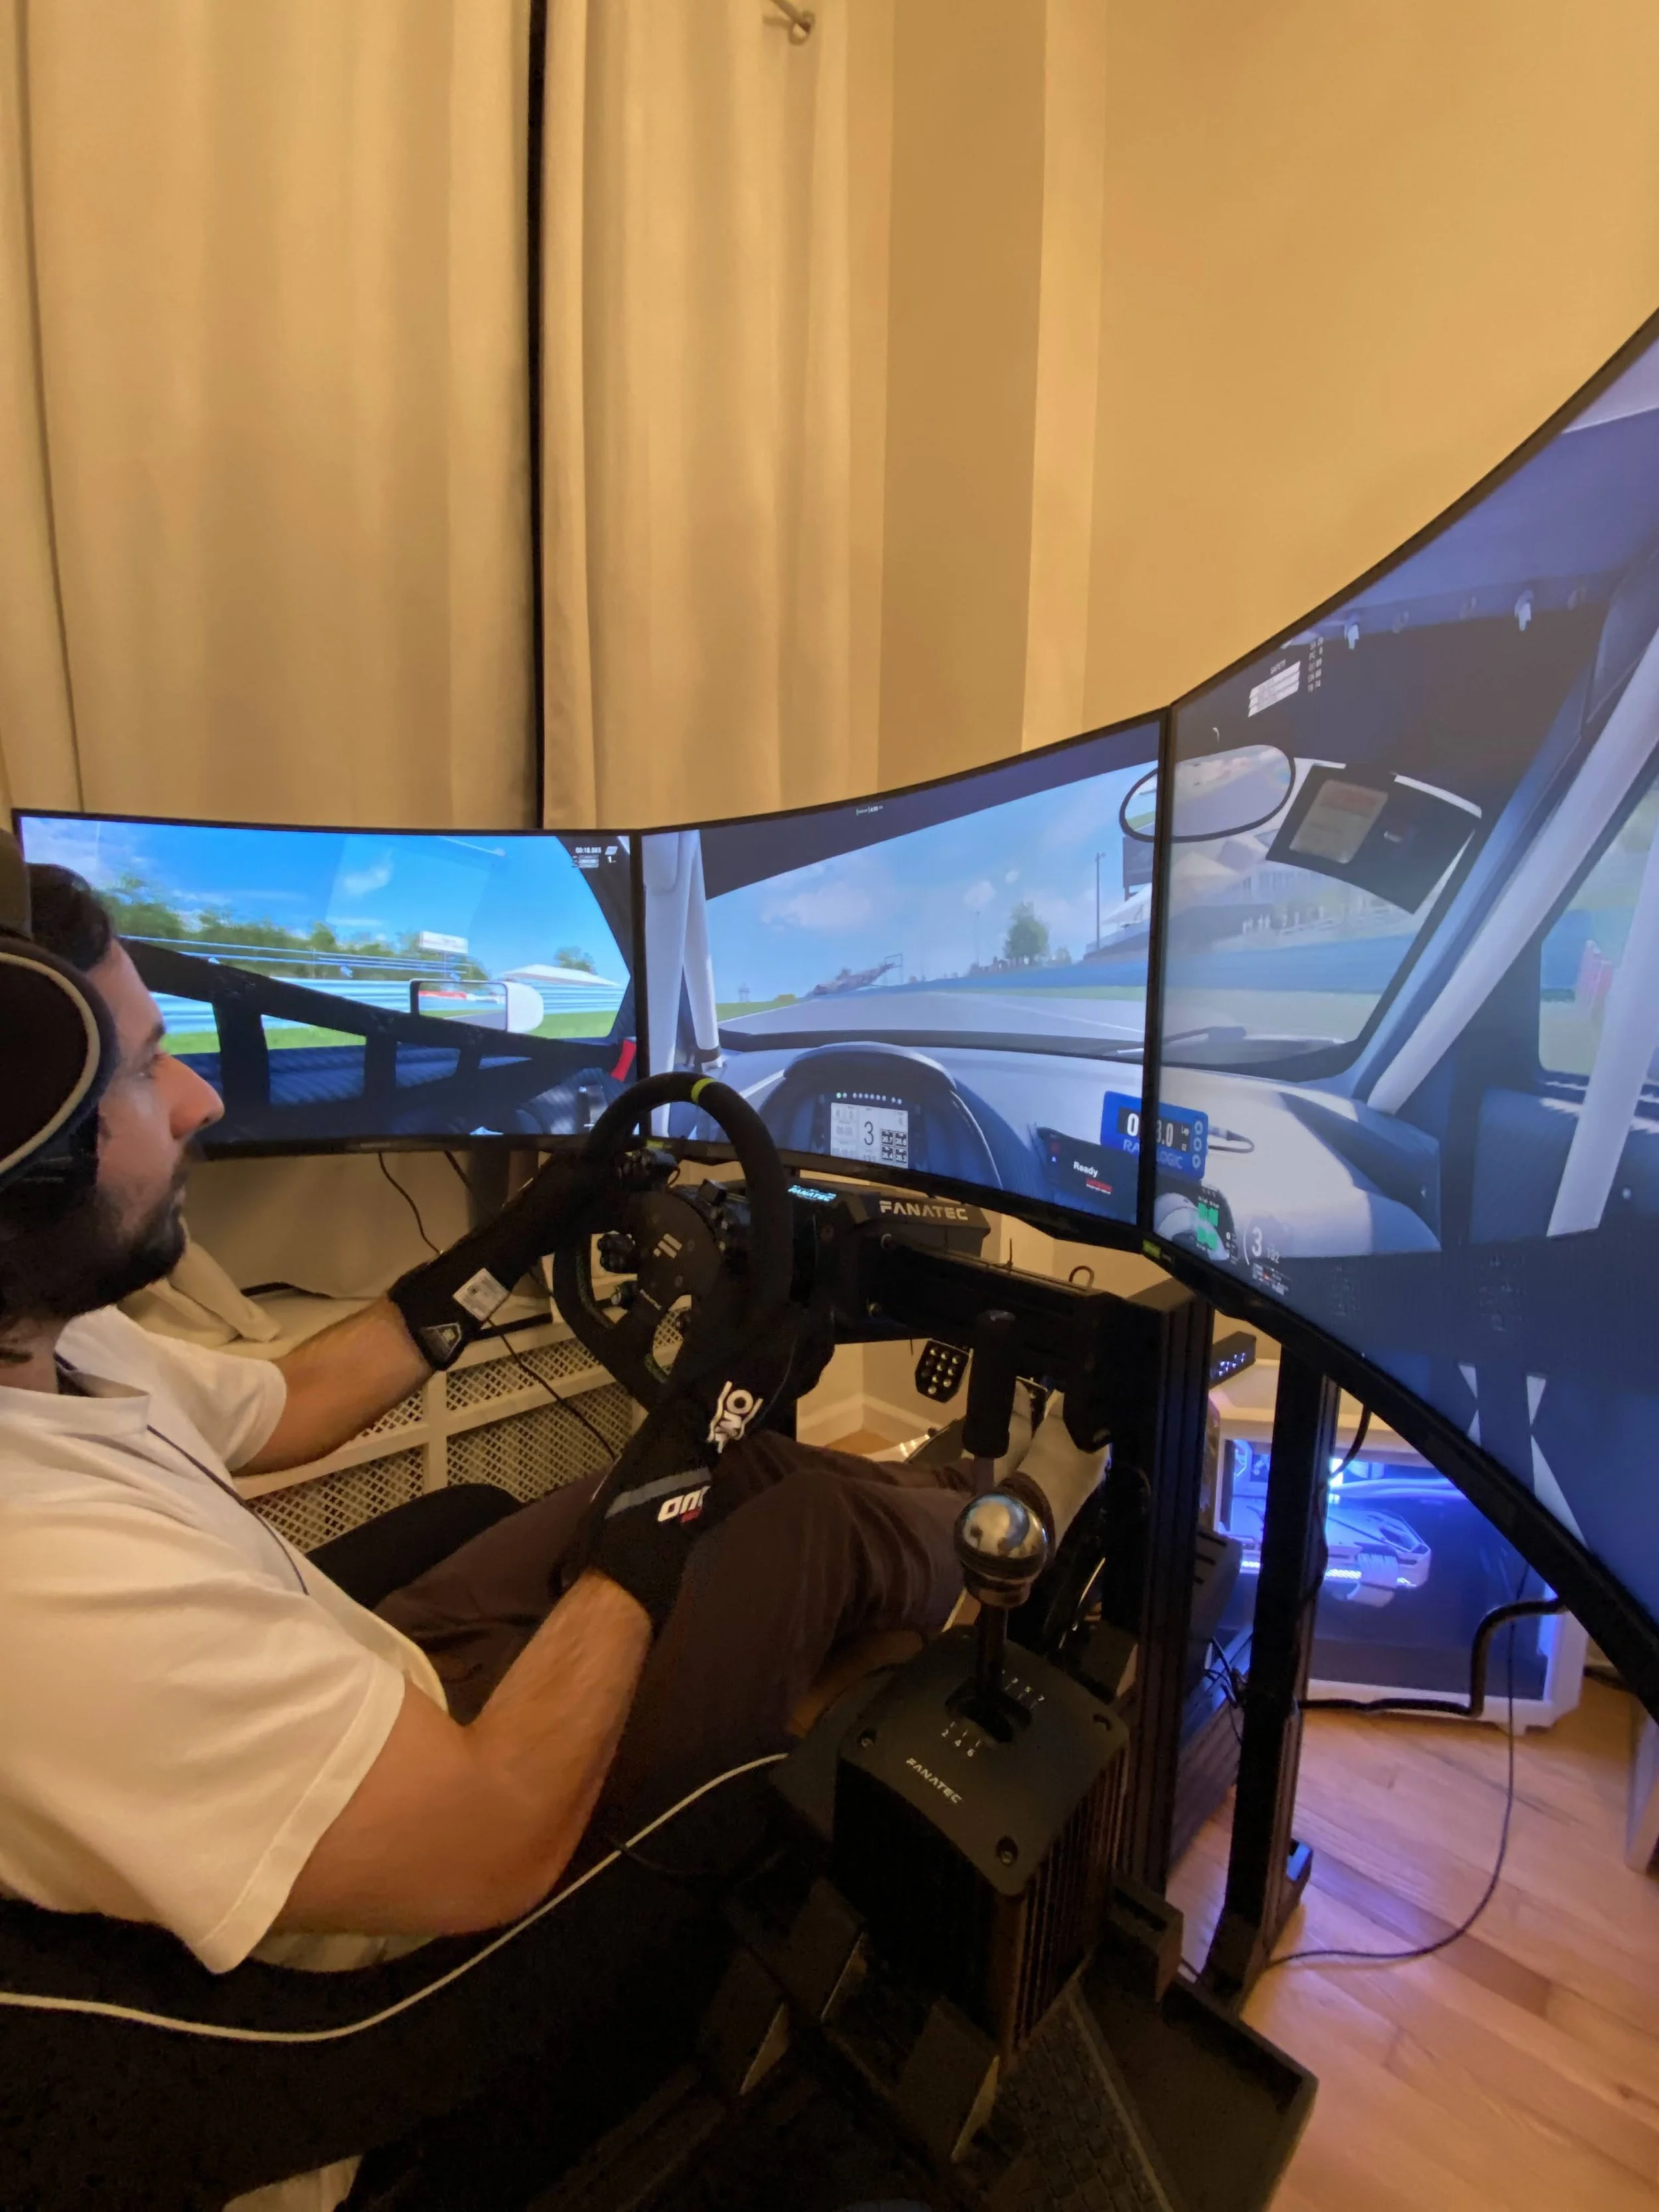
A few more tweaks to the components, while also adding a brand new custom fabricated handbrake. This simulator, other than going into a new phase of purpose, will live like this for the forseeable future. It blends perfectly my hyper-specific needs, competitiveness, accessibility, all while still being A DAMN GOOD TIME.
Sim Rig V3 Overhaul
The journey from v2 to v3.5
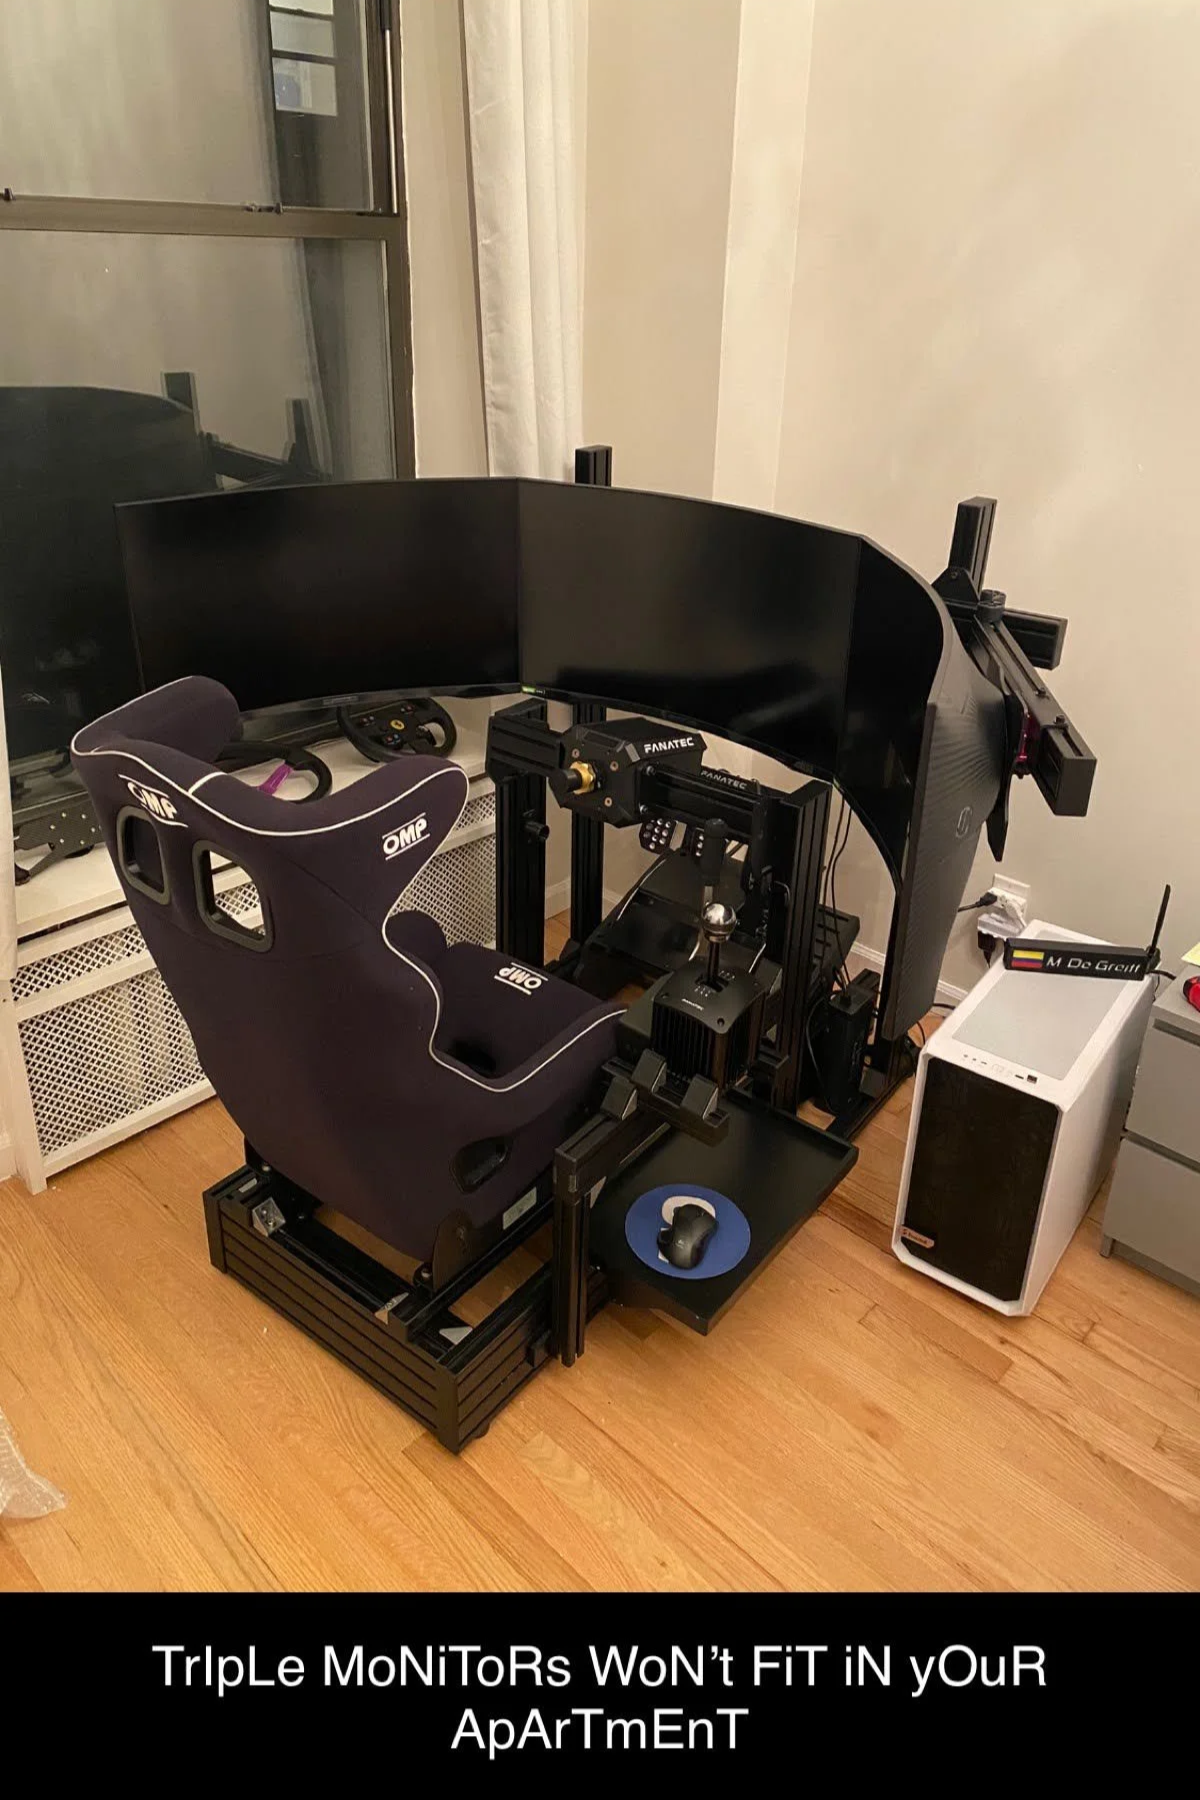
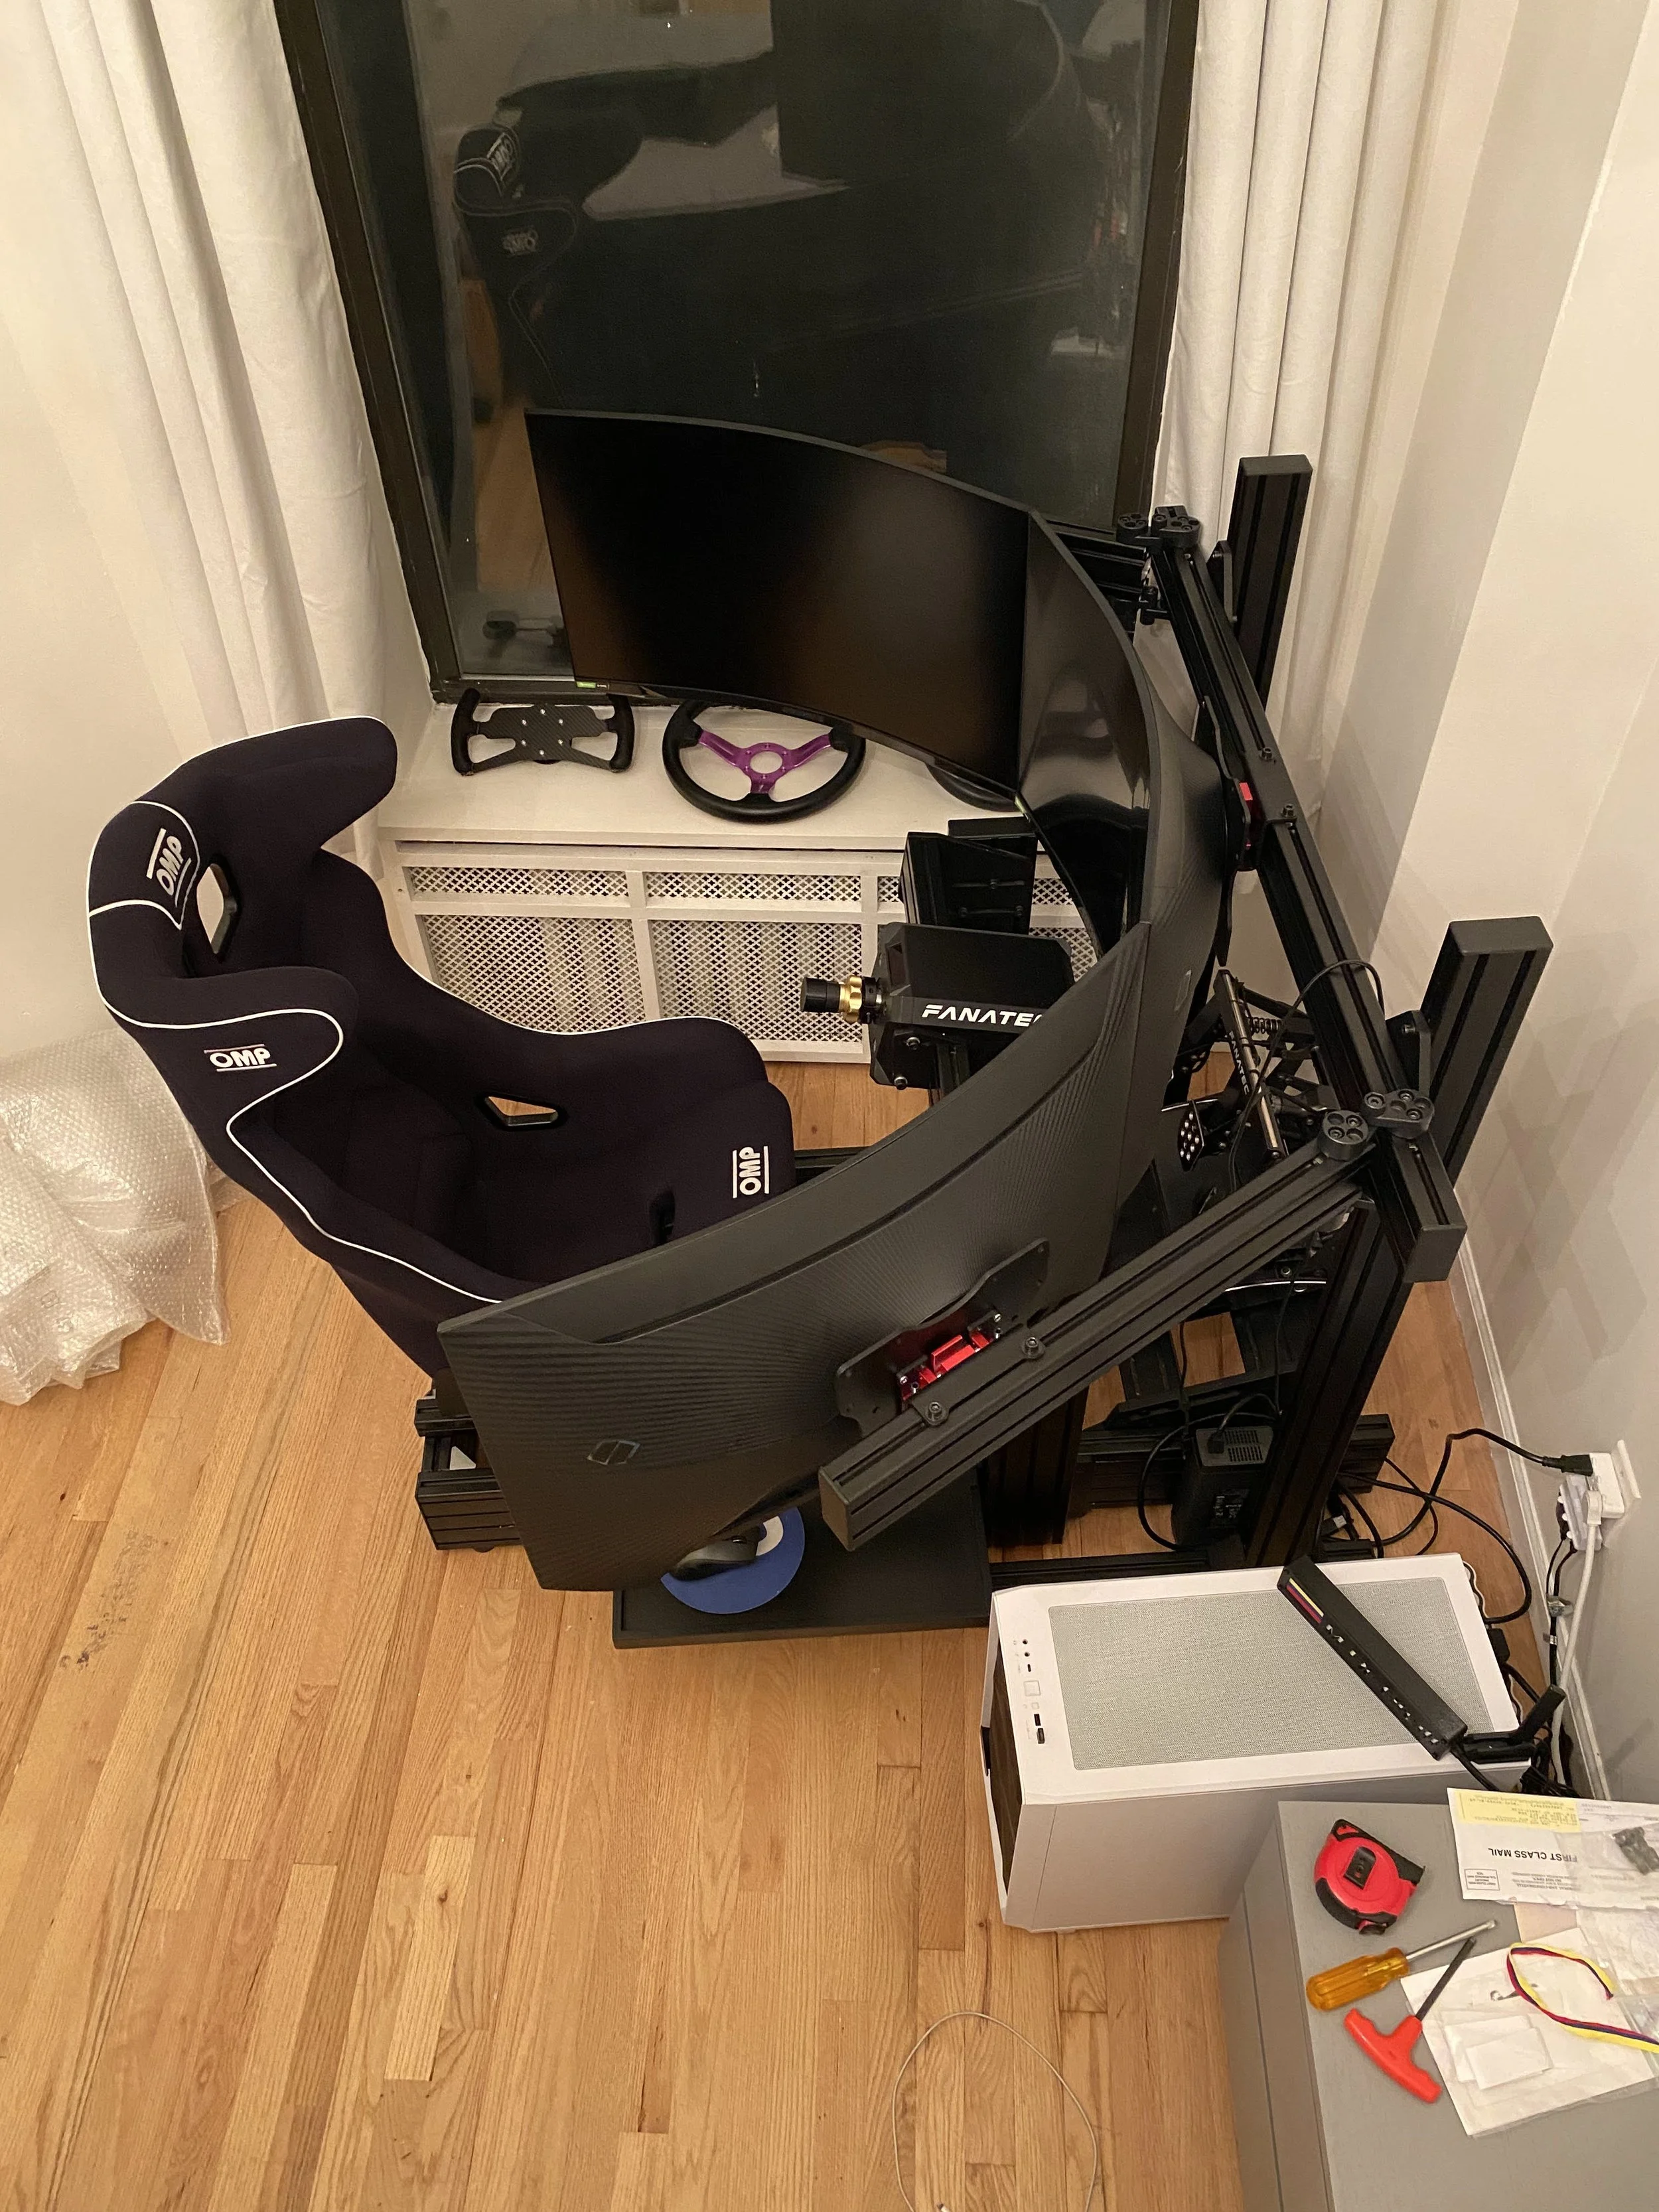
Let’s not forget that I was going from a huge sim rig cockpit + single TV monitor shoved next to my bed to a bit more space and with a freshly built PC and triple monitor stand on the way.
I was ecstatic, but nervous to make it all work. Here’s how I went from a single screen, Xbox-only driving titles, and a large cockpit (with a very empty bank account) to PC, triple monitors, all the accessories I could ever possibly need, and still, a very very empty bank account.
But that was just not going to work
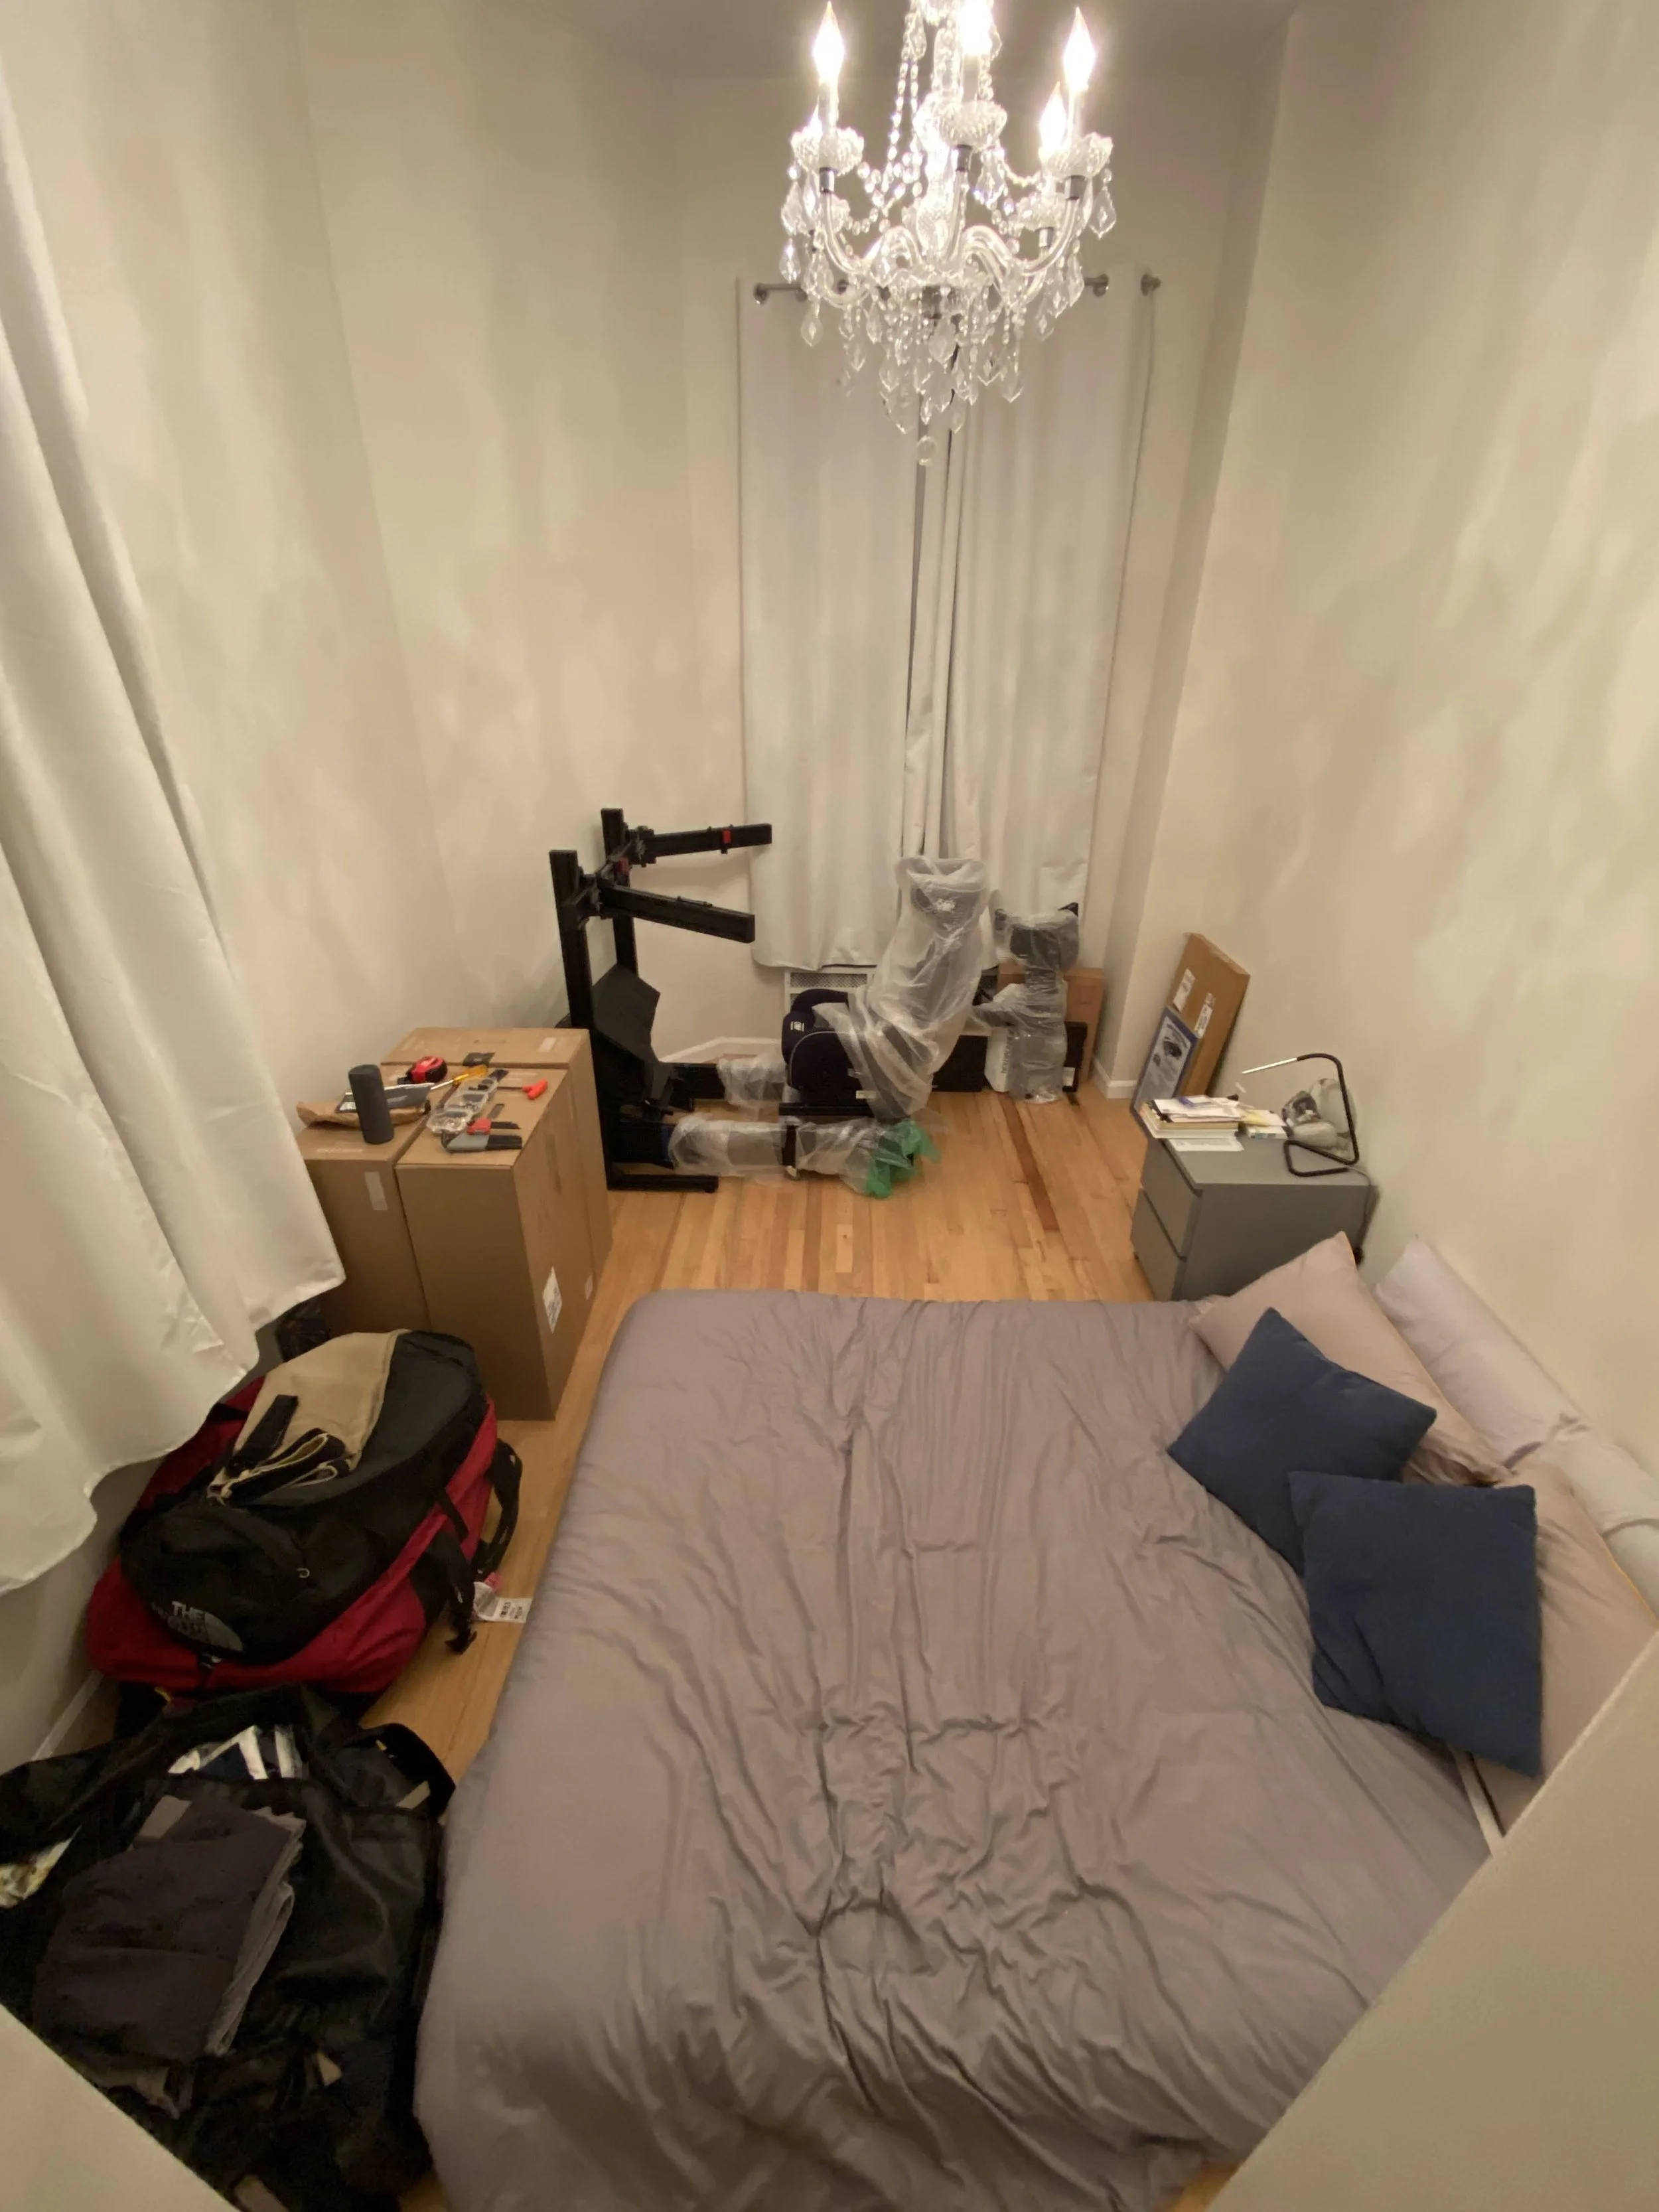
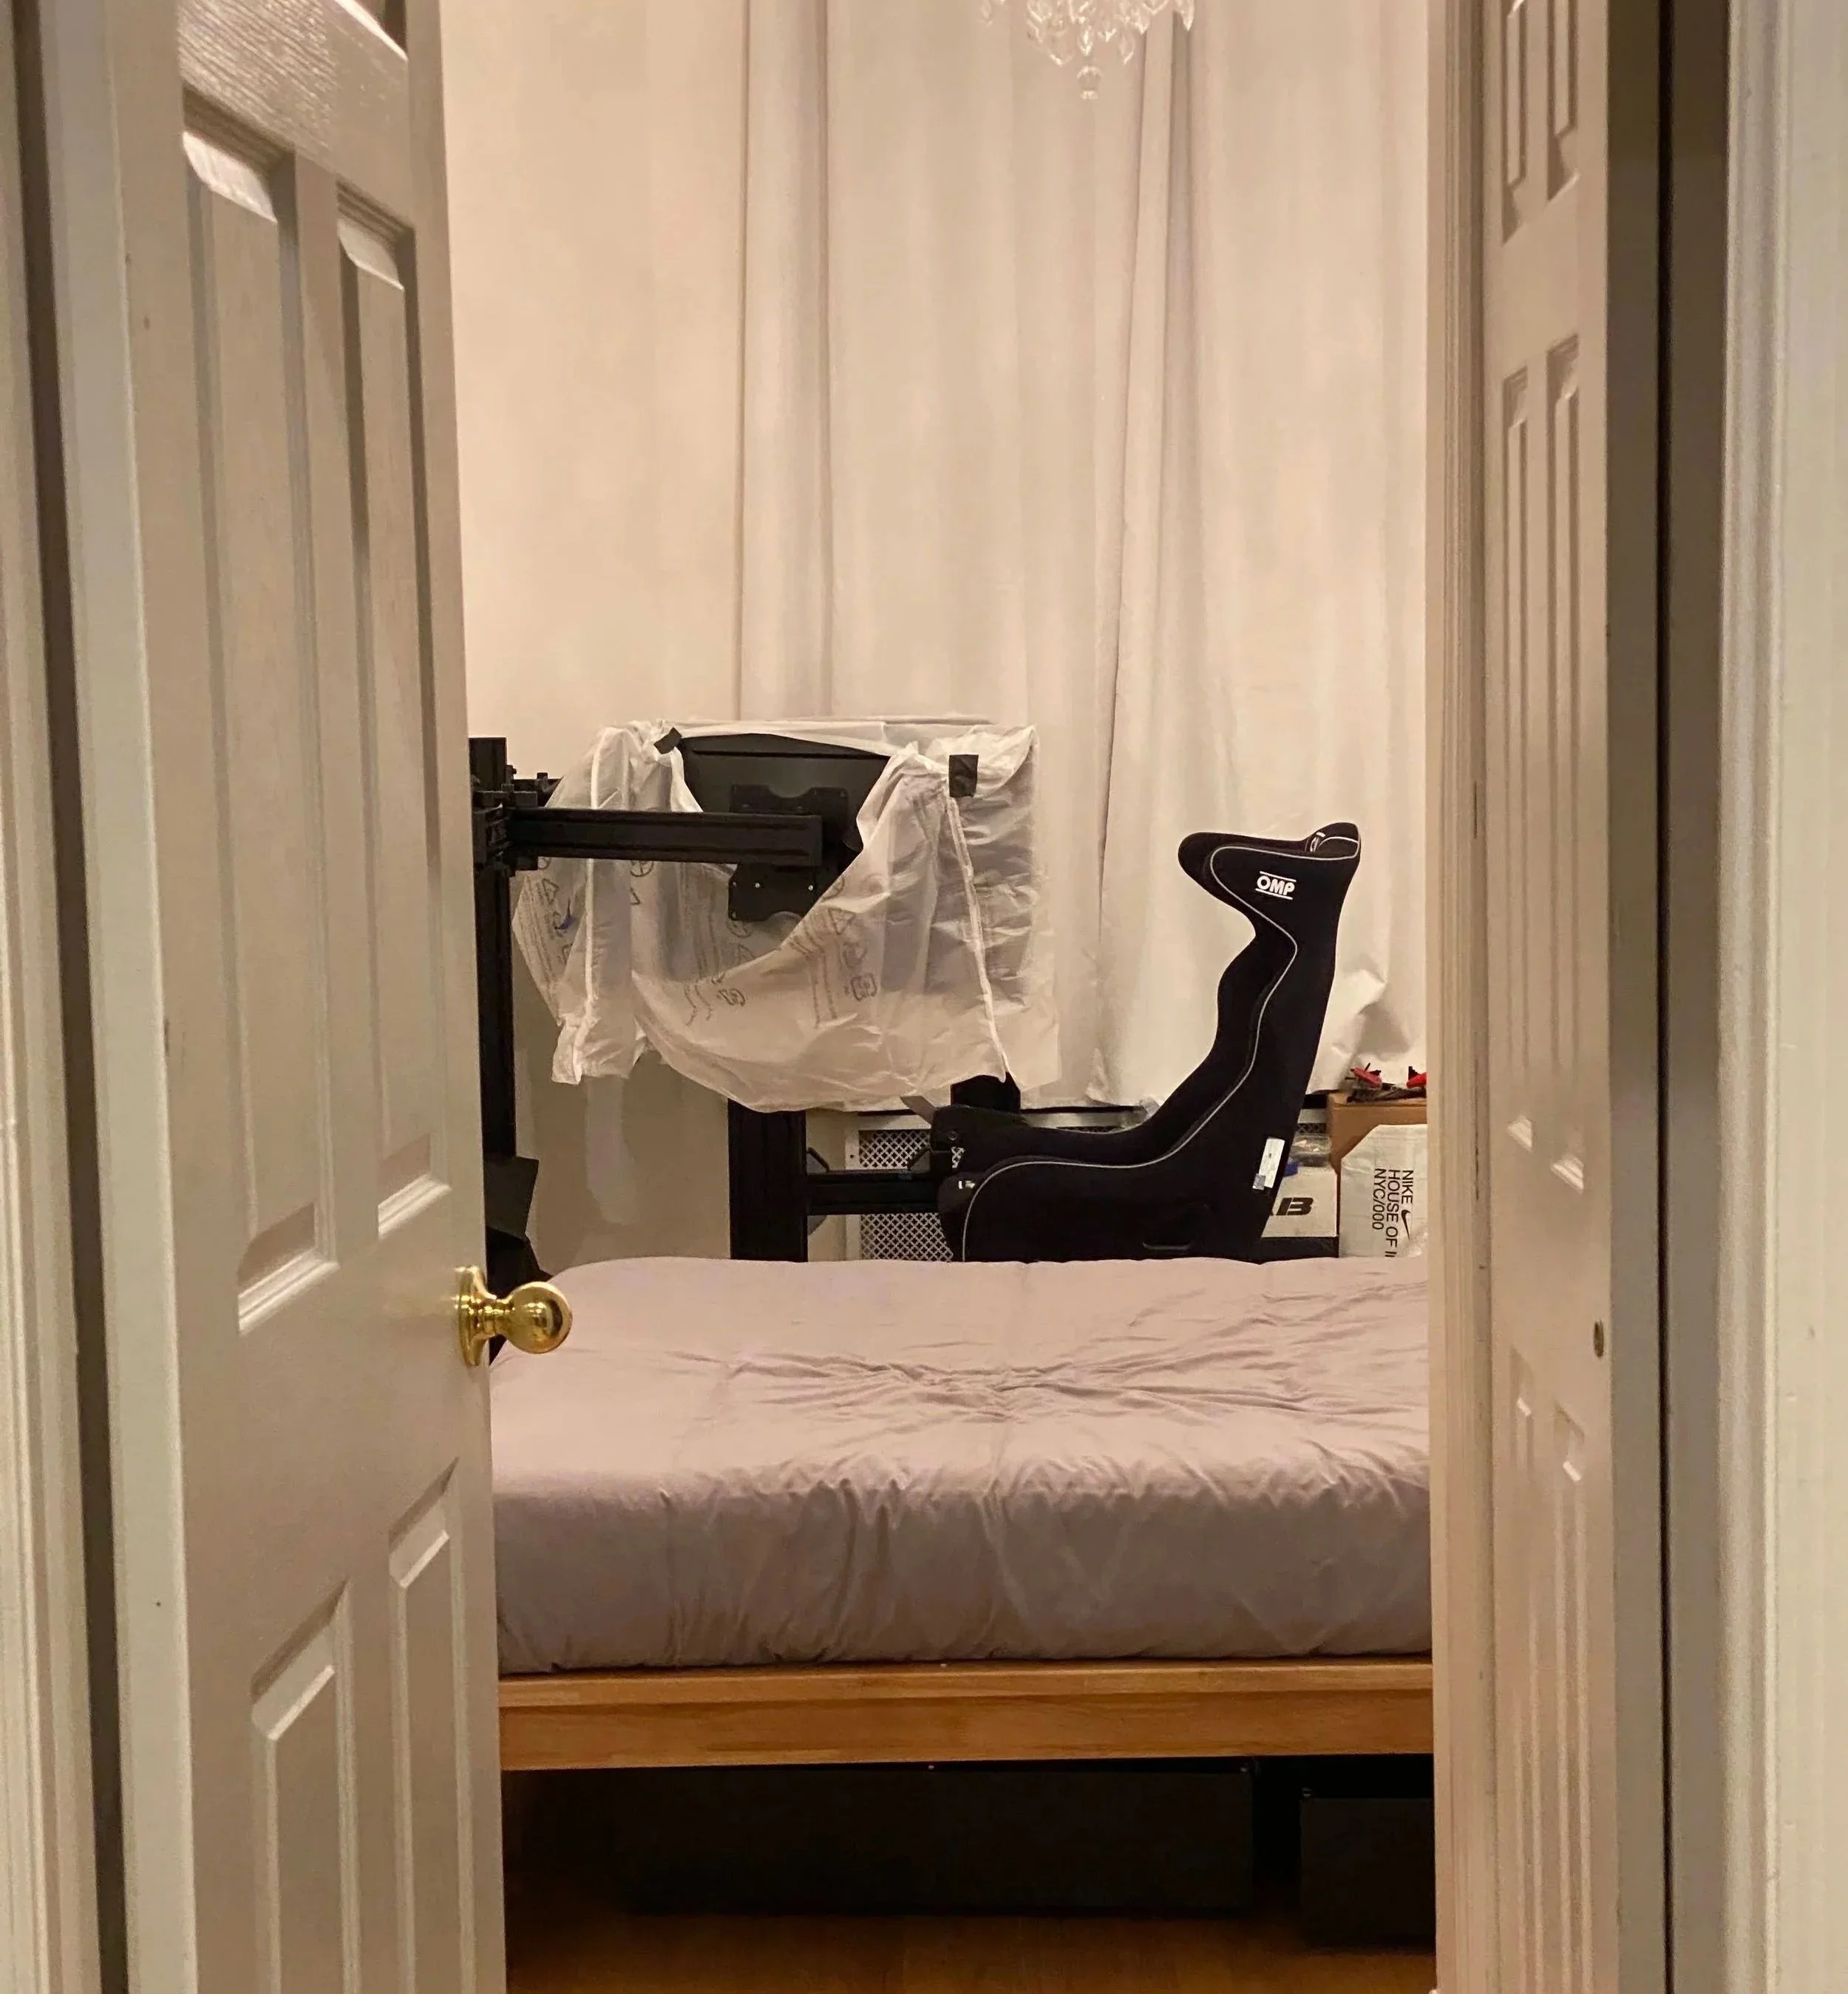
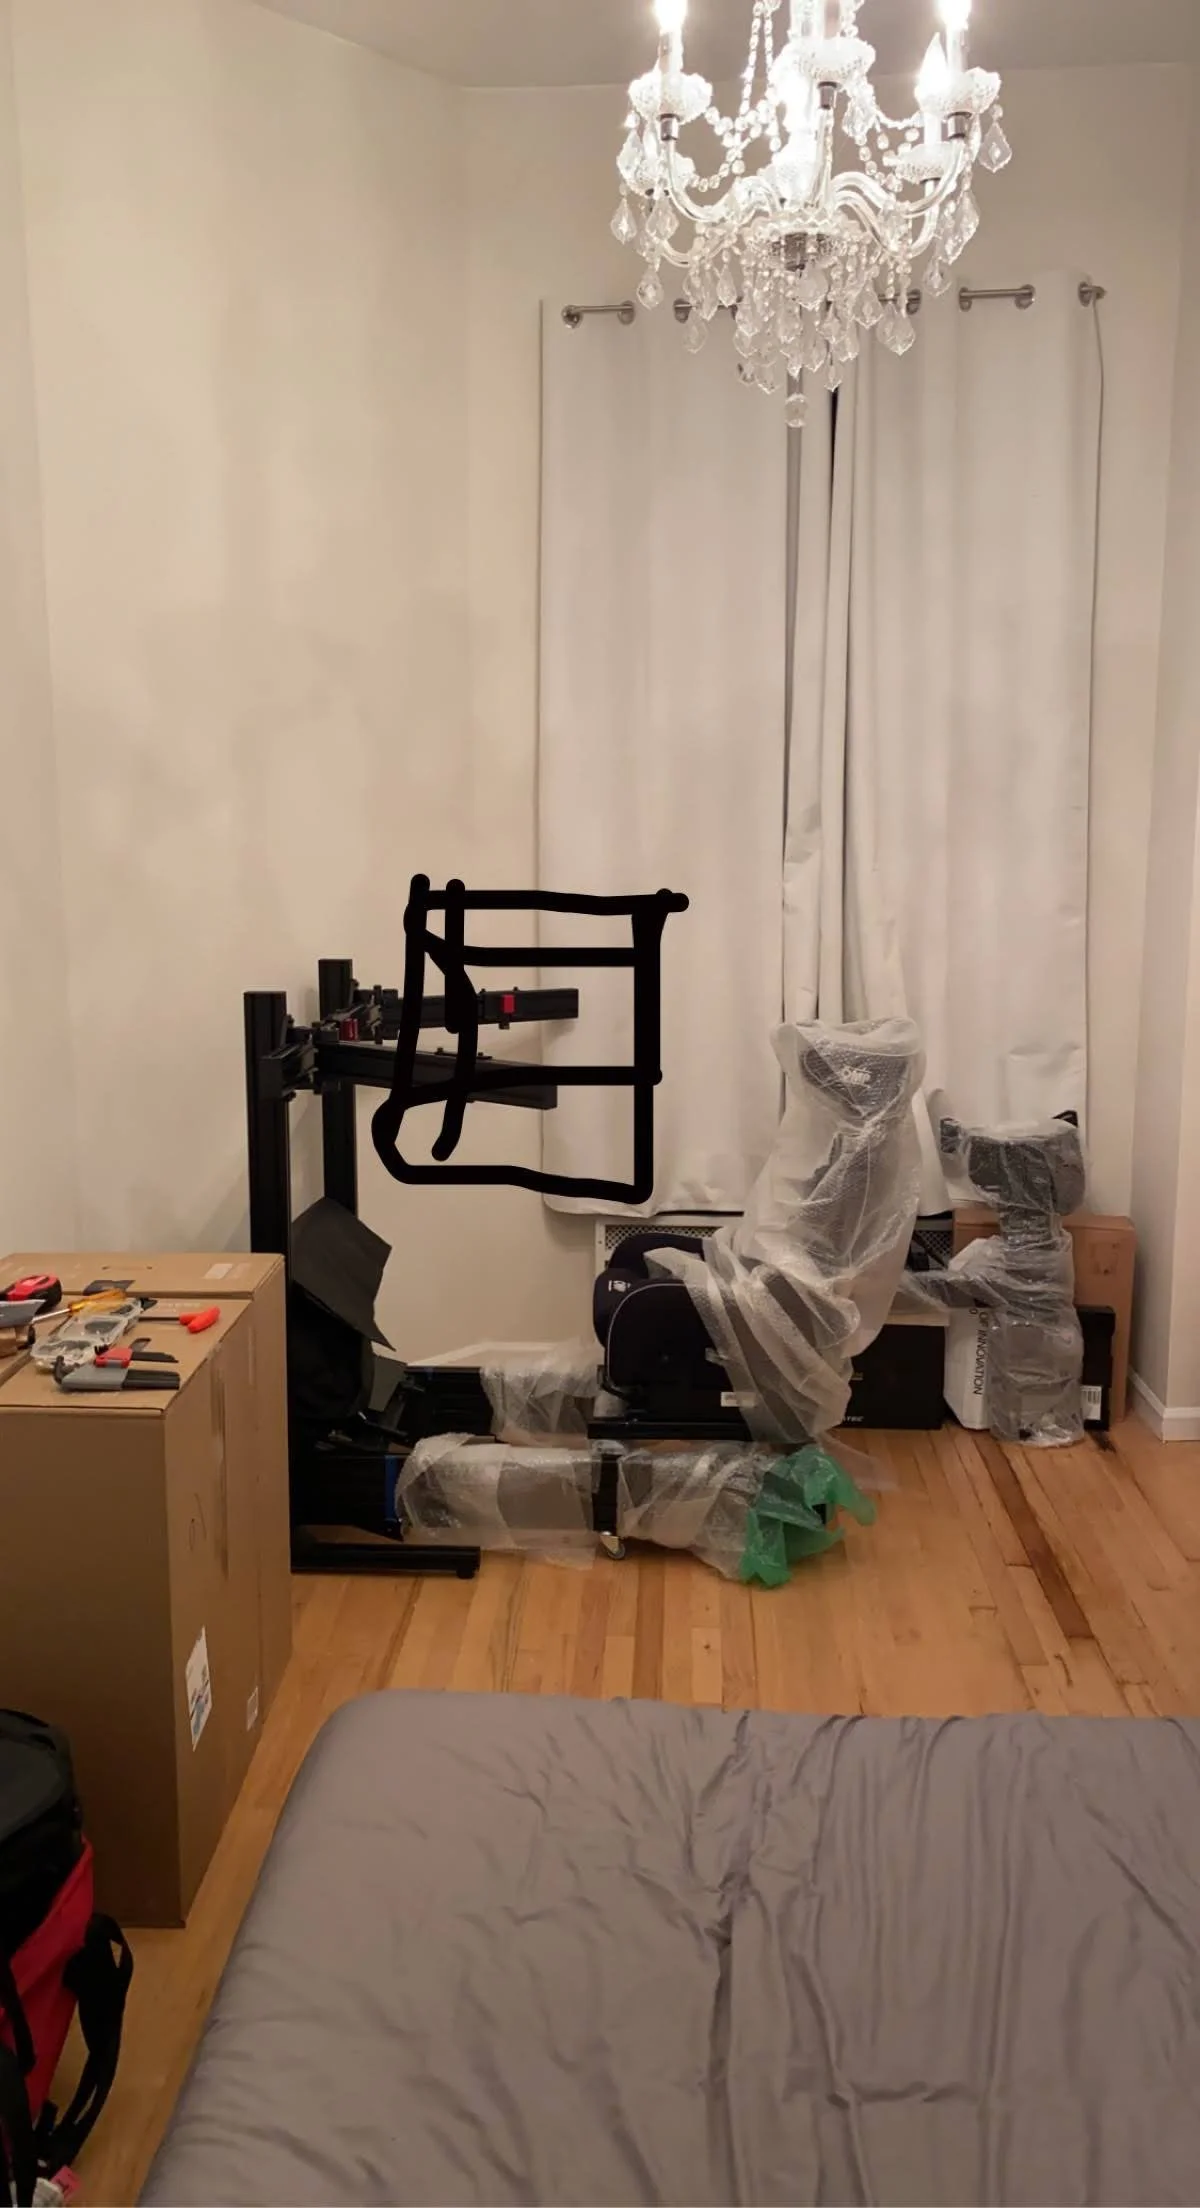
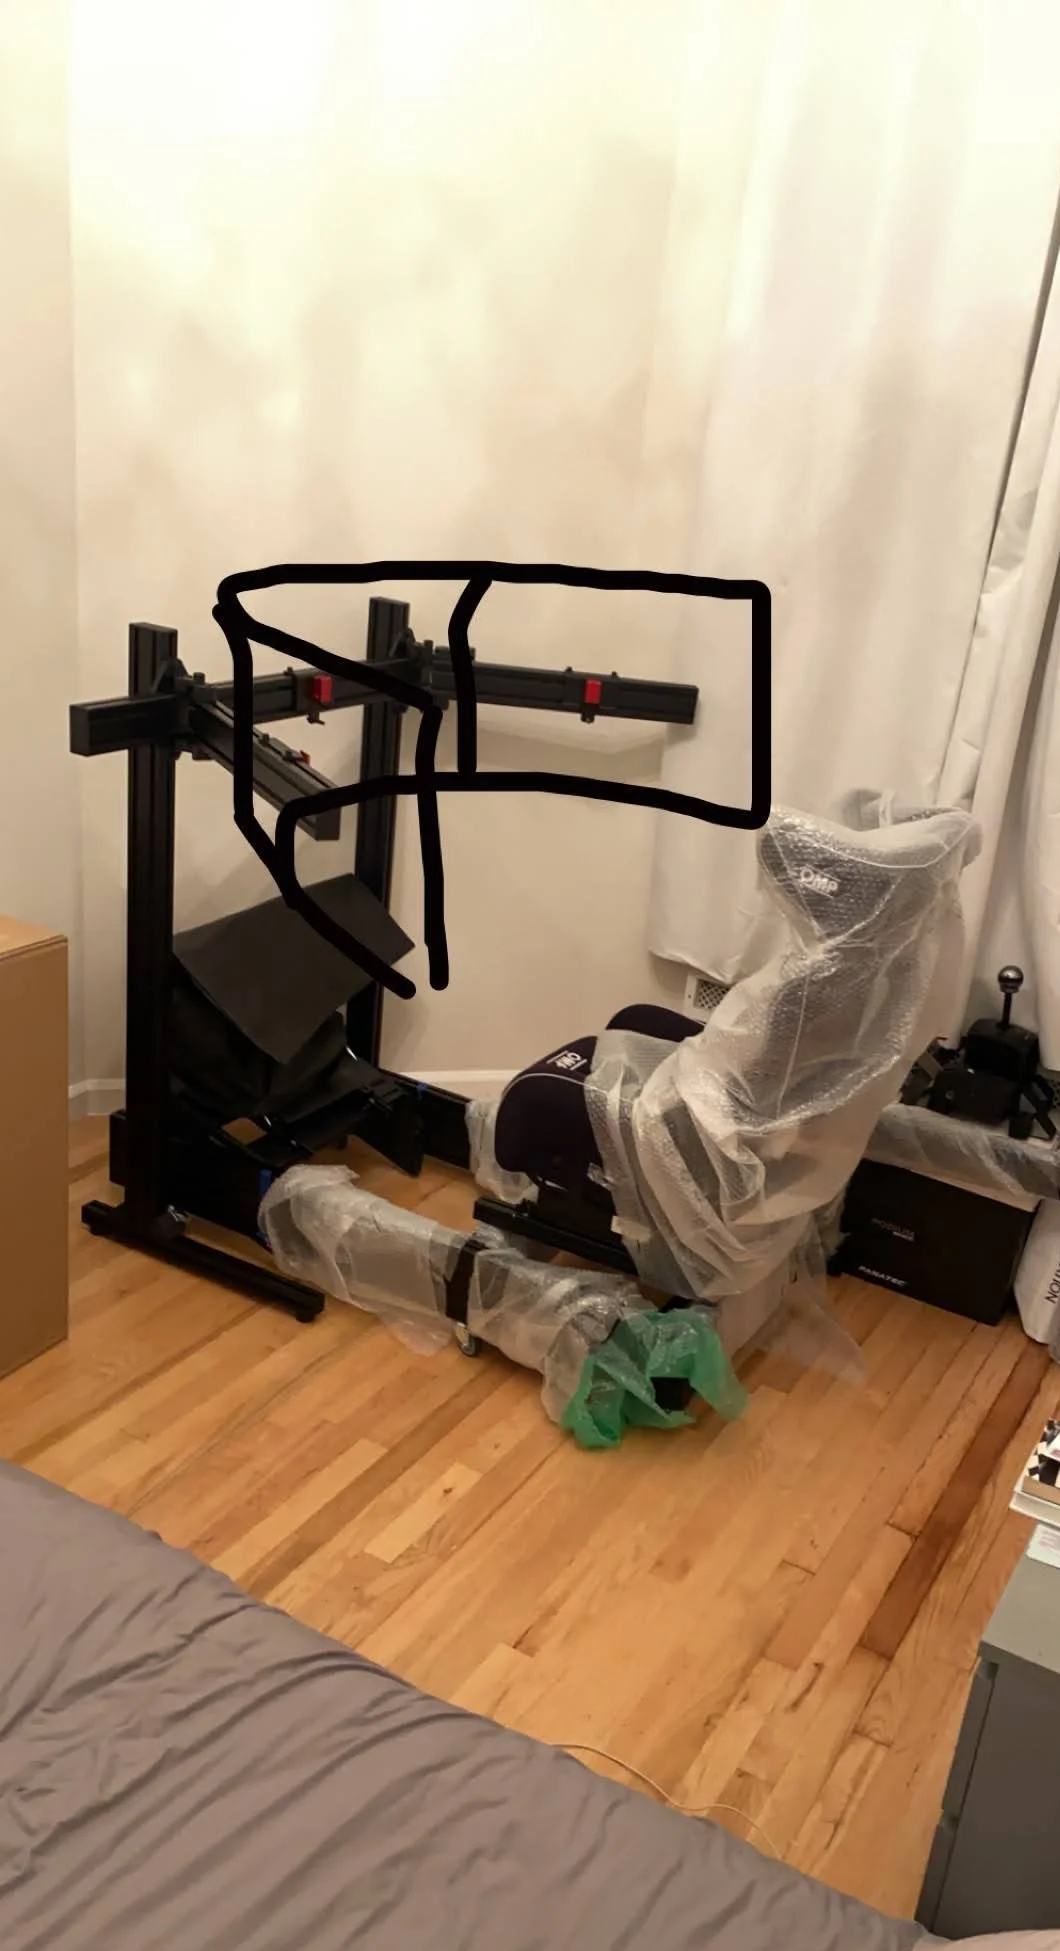
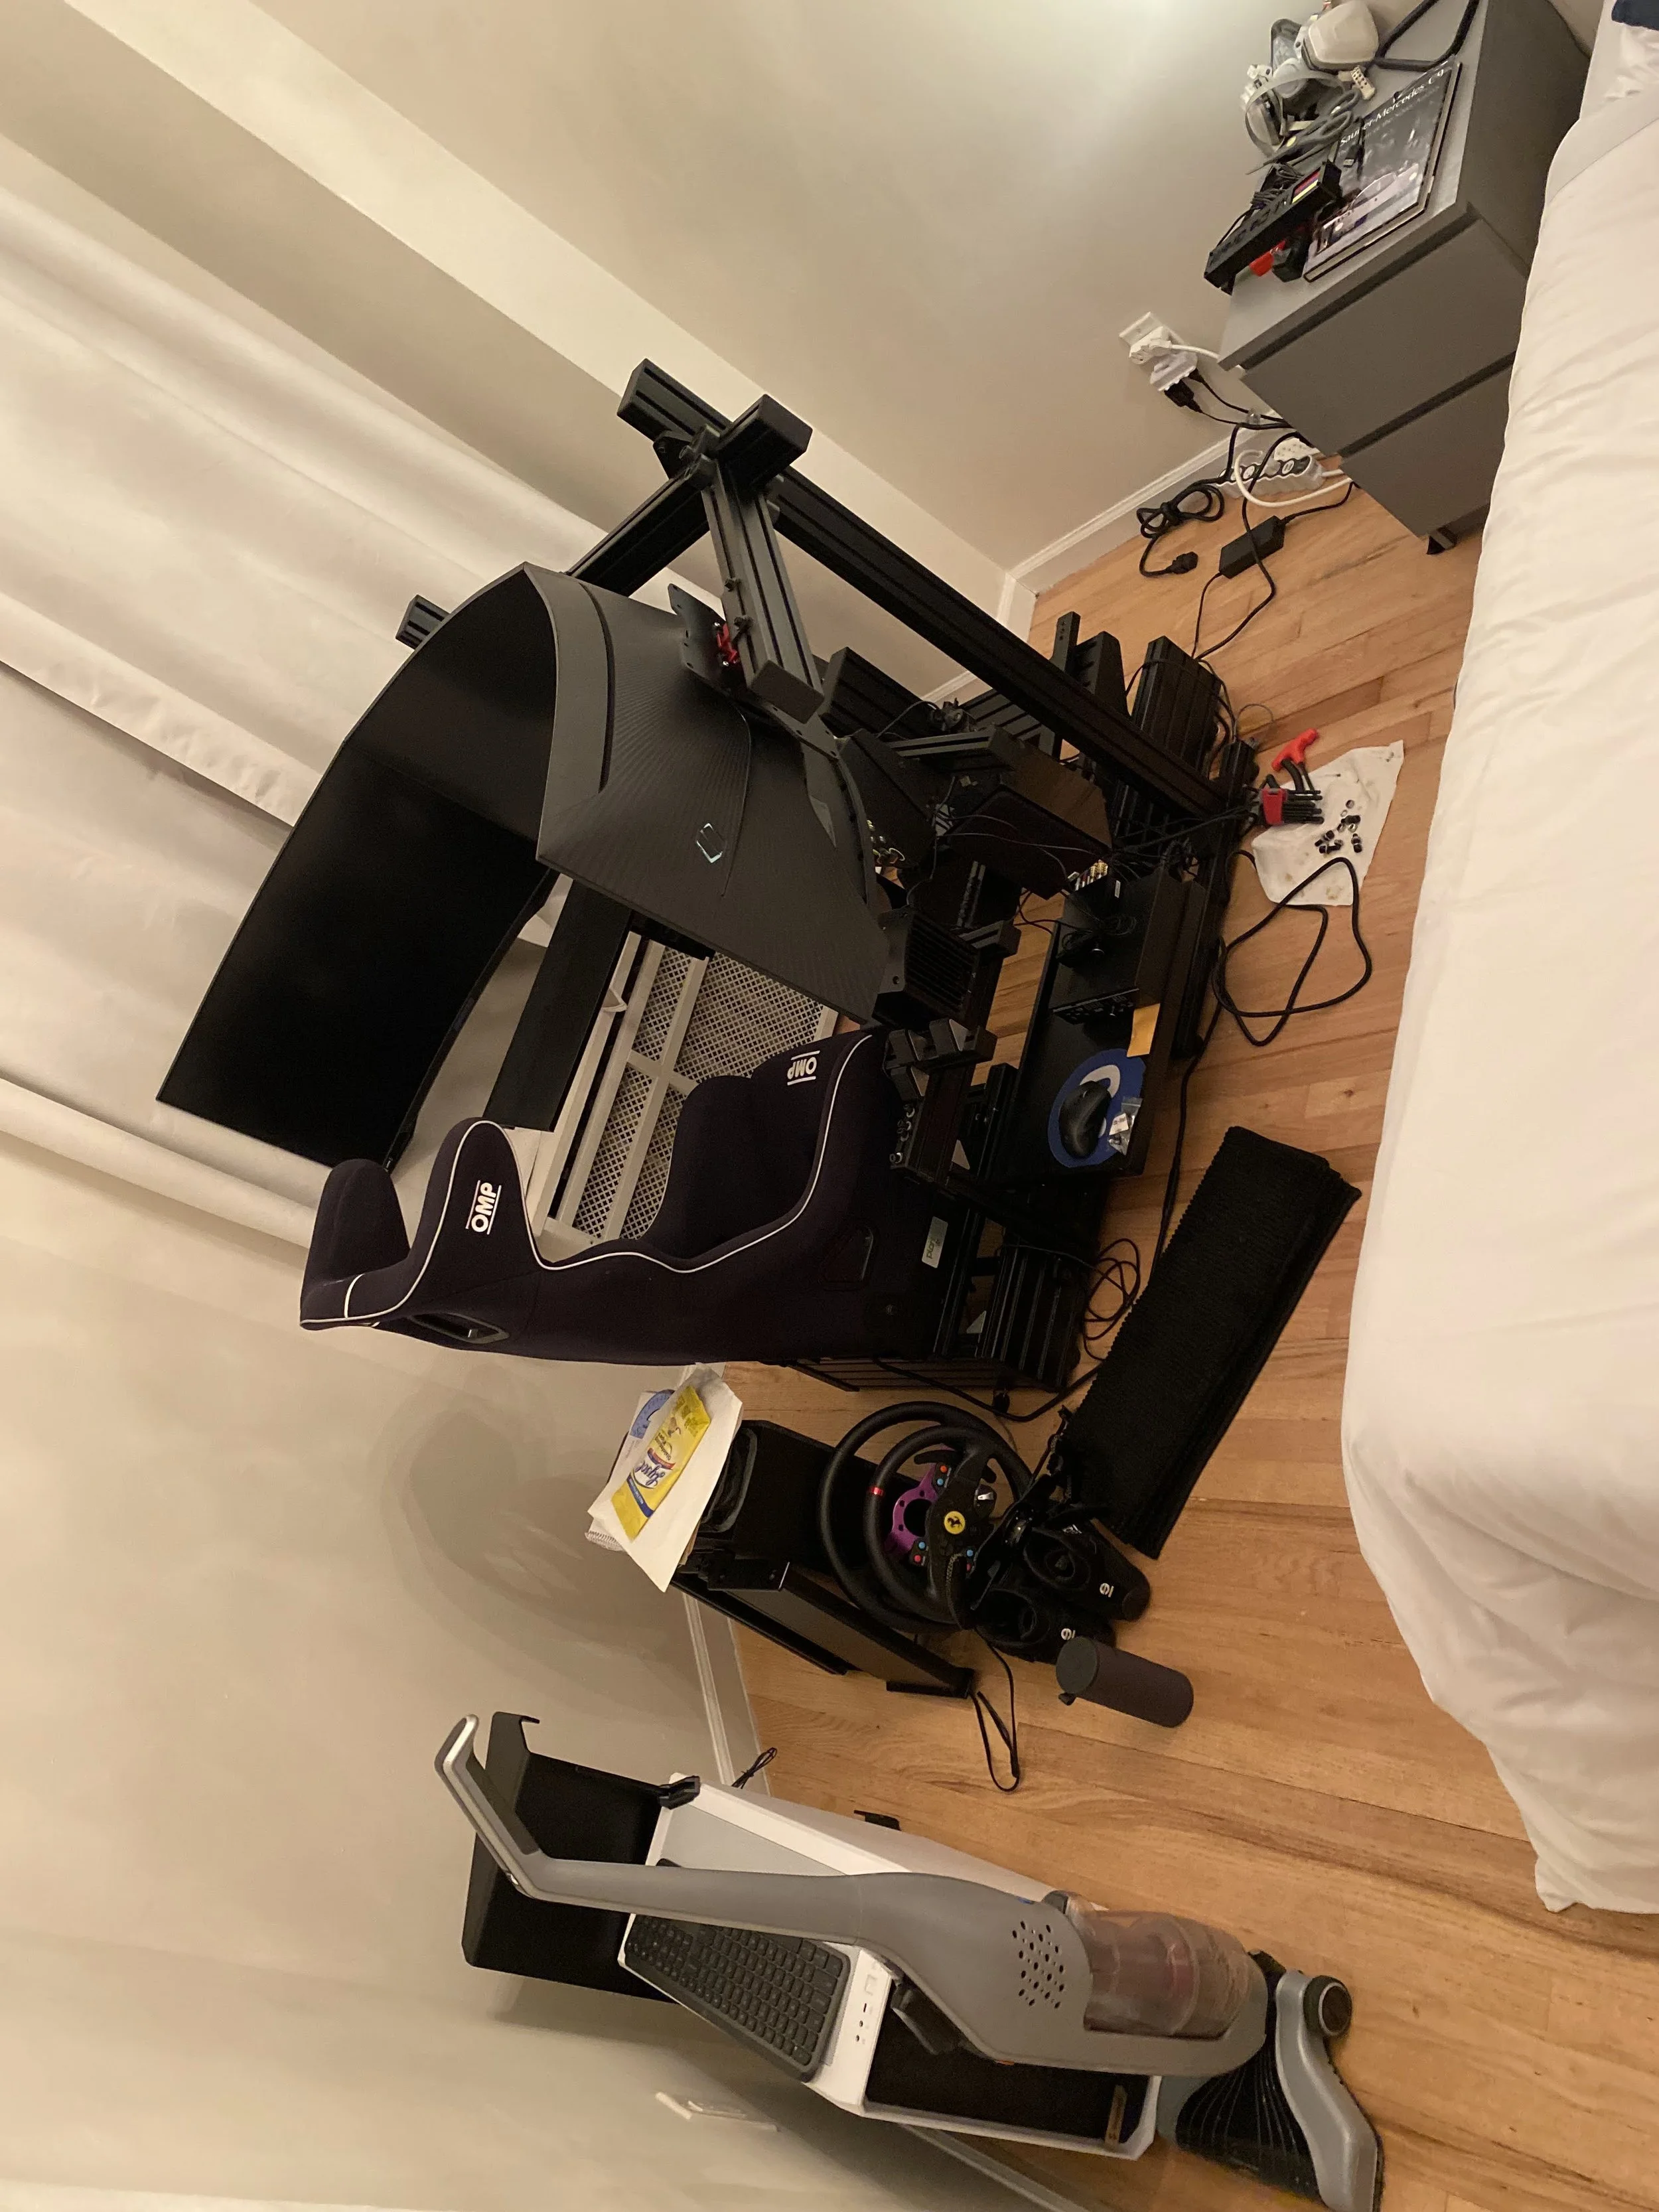
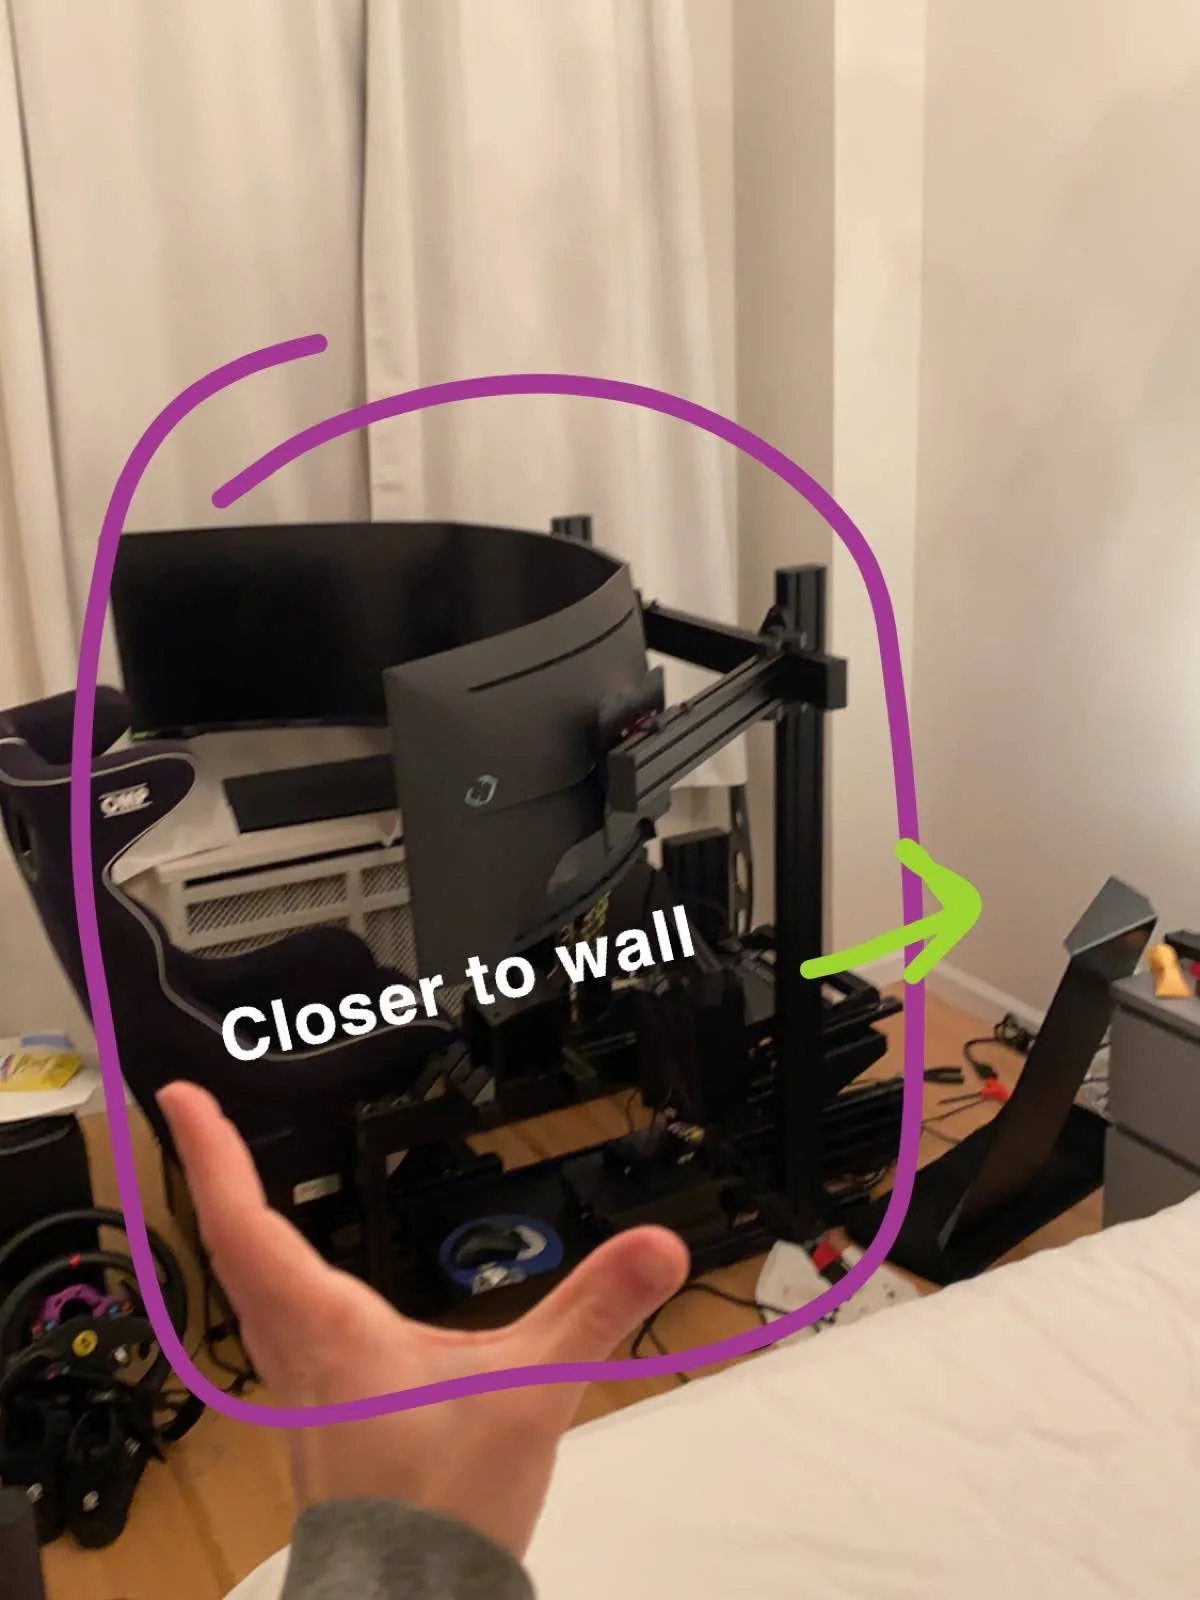
The first iteration of this build in the new space was going to go against the diagonal wall in the bedroom. I took pictures and started to draw the visualization of what this space would like with monitors.
The only tricky part is, I realized very quickly that this was simply not going to work. There was just no way I was going to be able to comfortably use the space (i.e. my bedroom) and not have a high risk of damaging the monitors or the PC.
It was time to reasses, and I hadn’t even plugged anything in yet…
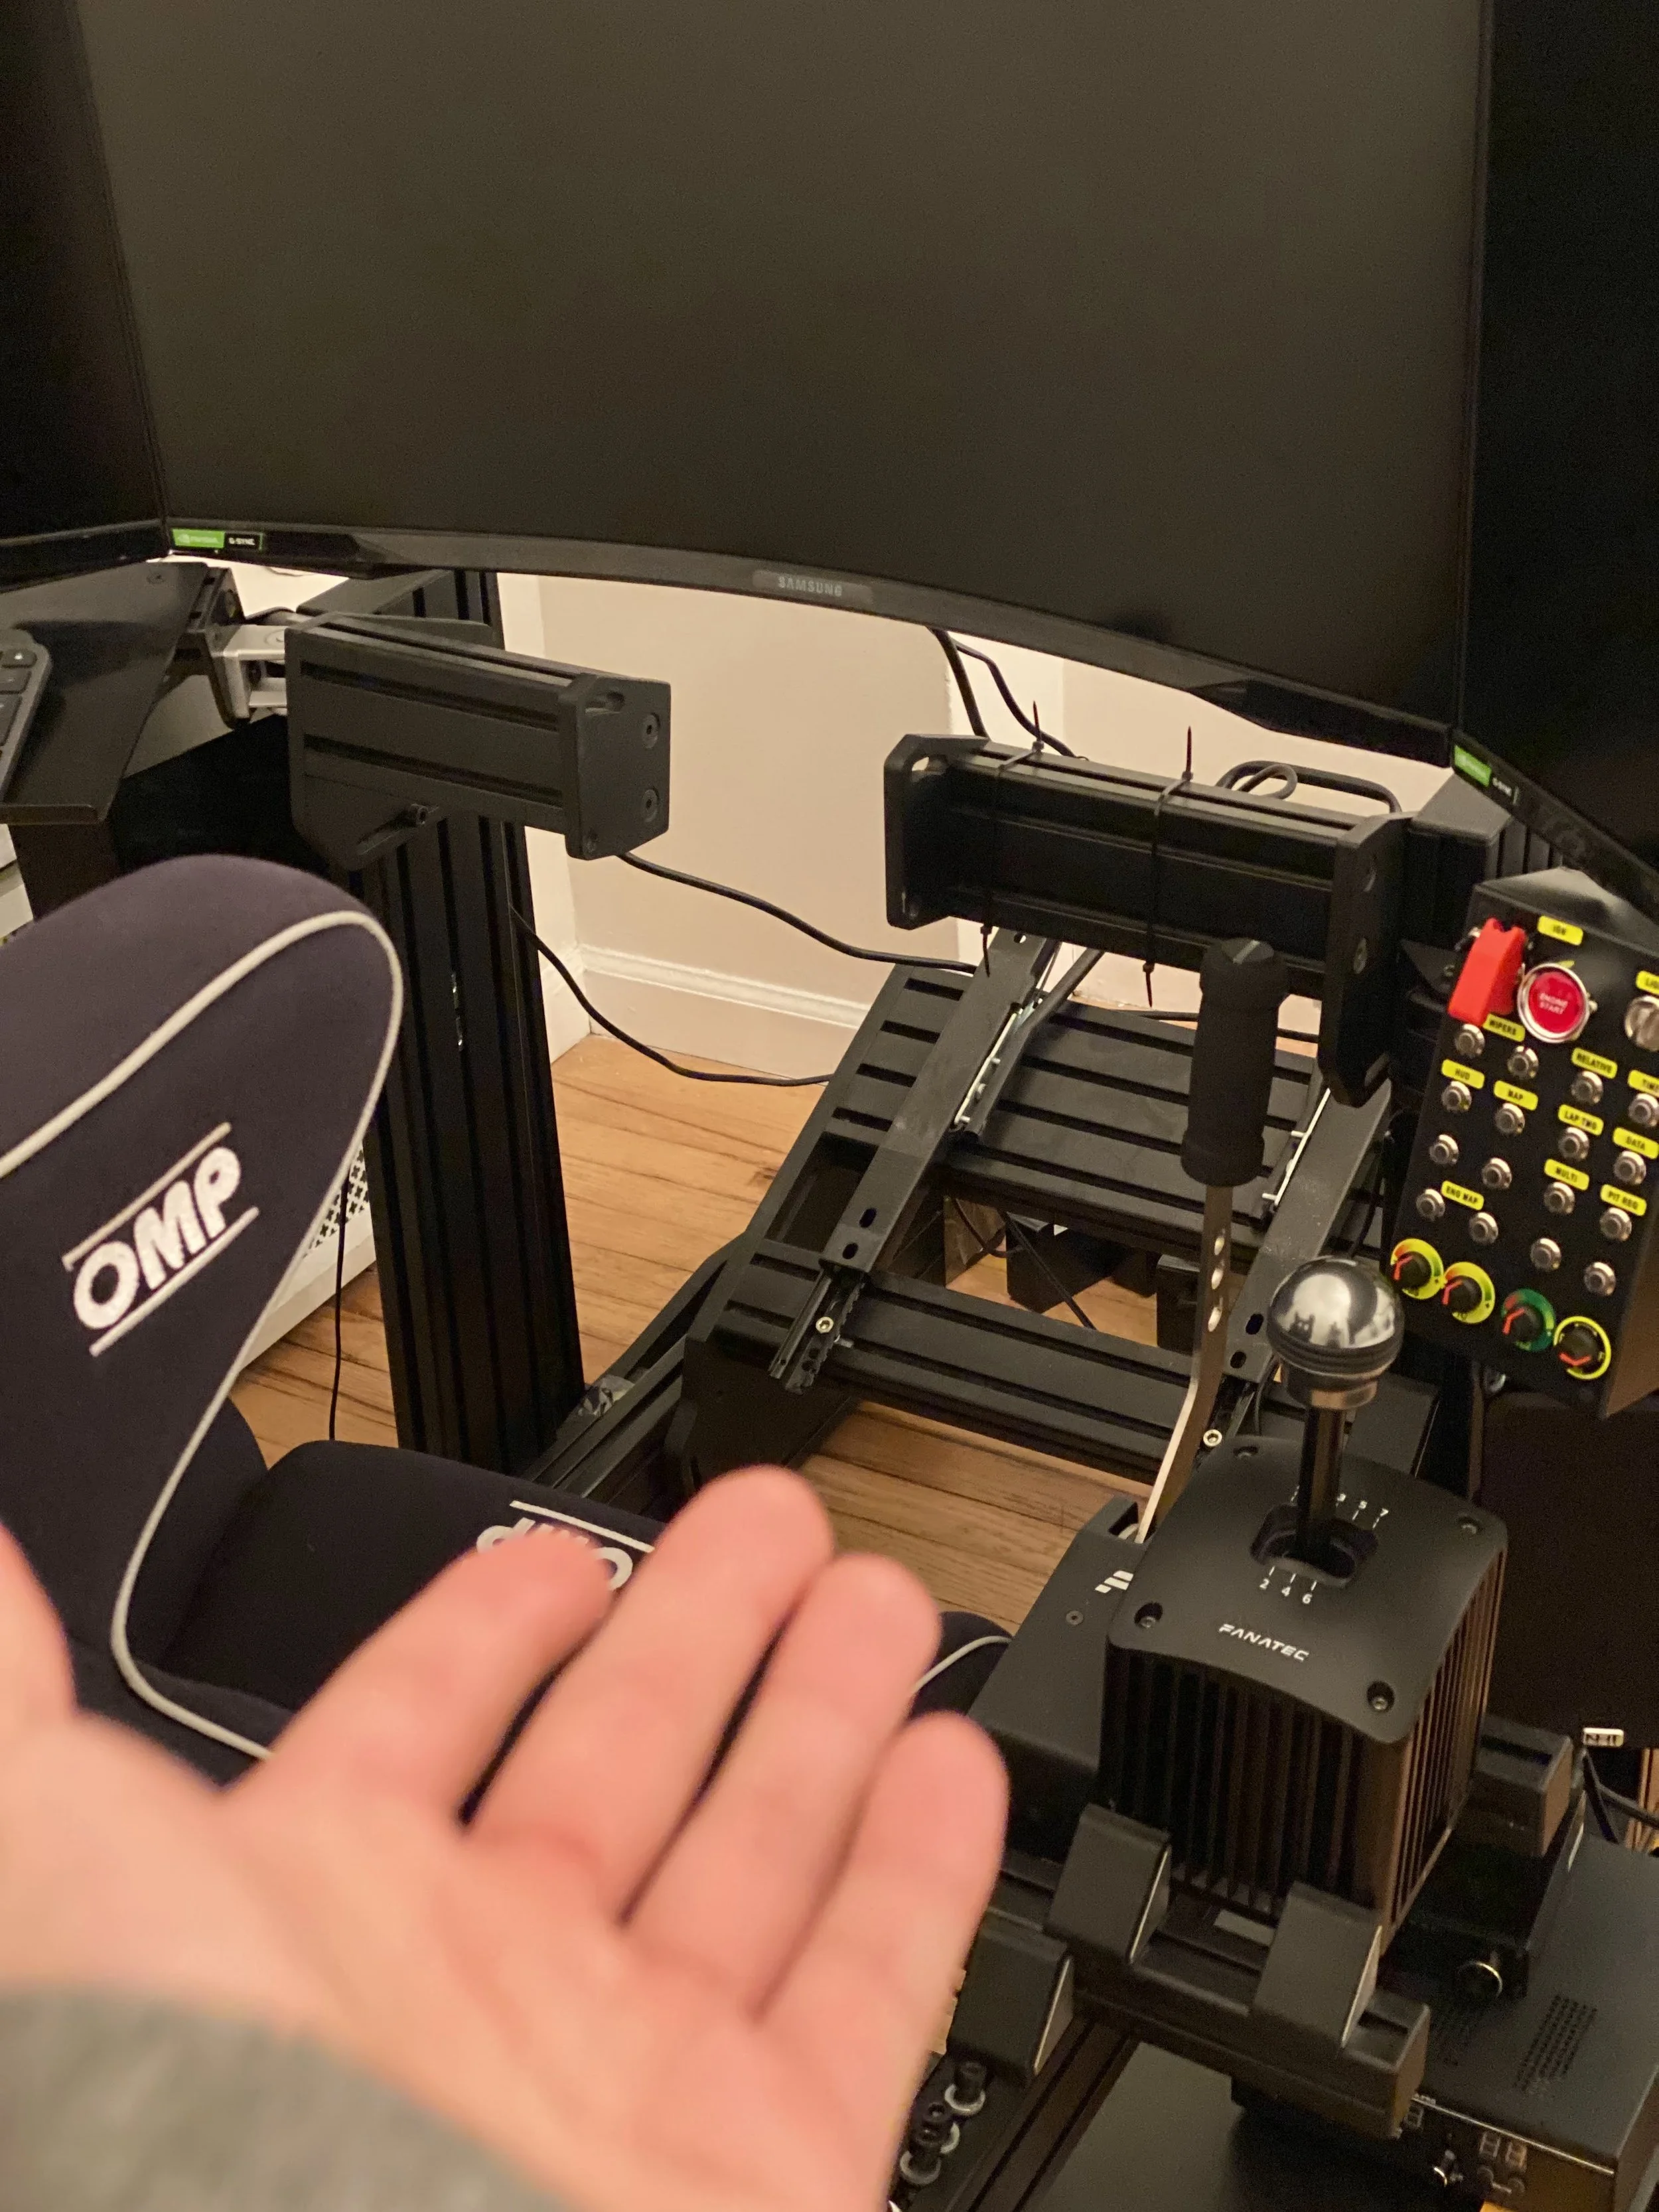
So with that, I flipped the rig 180 degrees, which is the orientation it lives in to this day. But you’ll notice that the rig was still at a weird angle, PC on the floor, and components strewn everywhere. I had no audio system yet, so the driver had to put on headphones. I also didn’t have the bezel delete kit, so you had huge bezels in your periphery as you drove. Not a fan.
This was a crucial period, as the compontent and cockpit foundation I had laid during V2 allowed me to get my bearings with the new PC system and everything that that involved (i.e. a lot)
I made sure the entire system worked as it should so when it was time for upgrades, I could send it.
SIGHTS WERE SET ON KEY UPGRADES…
Out with the old… and in with the new!
V3 BEGINS TO TAKE SHAPE
Here’s how I did it:
Refresher of where we were…
Preparation FOR v3:
Thinking & Planning
The first iteration of this build in the new space was going to go against the diagonal wall in the bedroom. I took some pictures and to drew the visualization of what this space would like with monitors.
With all the components purchased and new apartment moved in to, it was time to start thinking about how in holy hell I was going to fit this TRIPLE MONITOR RACING SIMULATOR into an apartment size of a microwave. It’s taken a while to get everything how it should be, but I am happy to say we got there.
oNCE v3 COMPONENTS STARTED ARRIVING, THERE WAS NO TURNING BACK. pLANNING & EXECUTION WERE IN FULL SWING
I had this pretty well documented from when I first started this V3 upgrade process, so I’m going to let the photos do some of the talking
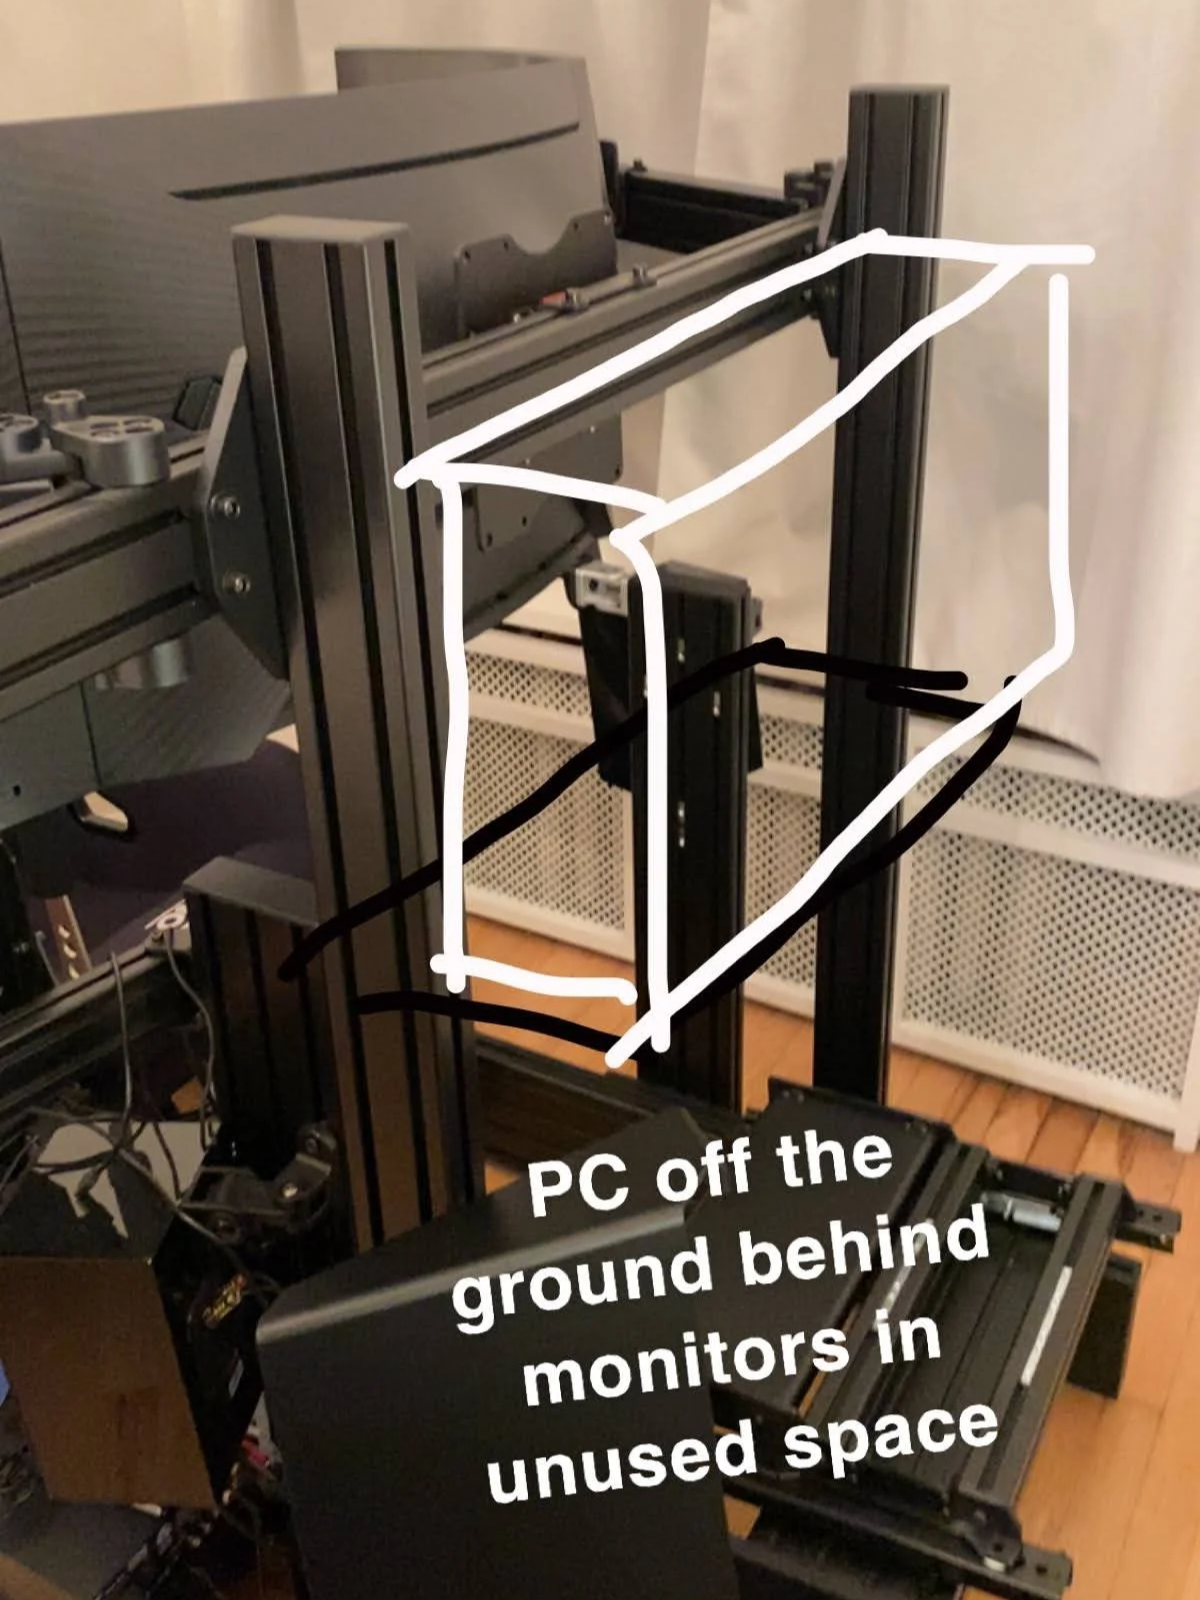
WHERE’D IT GO?
Prepping space
Movement!
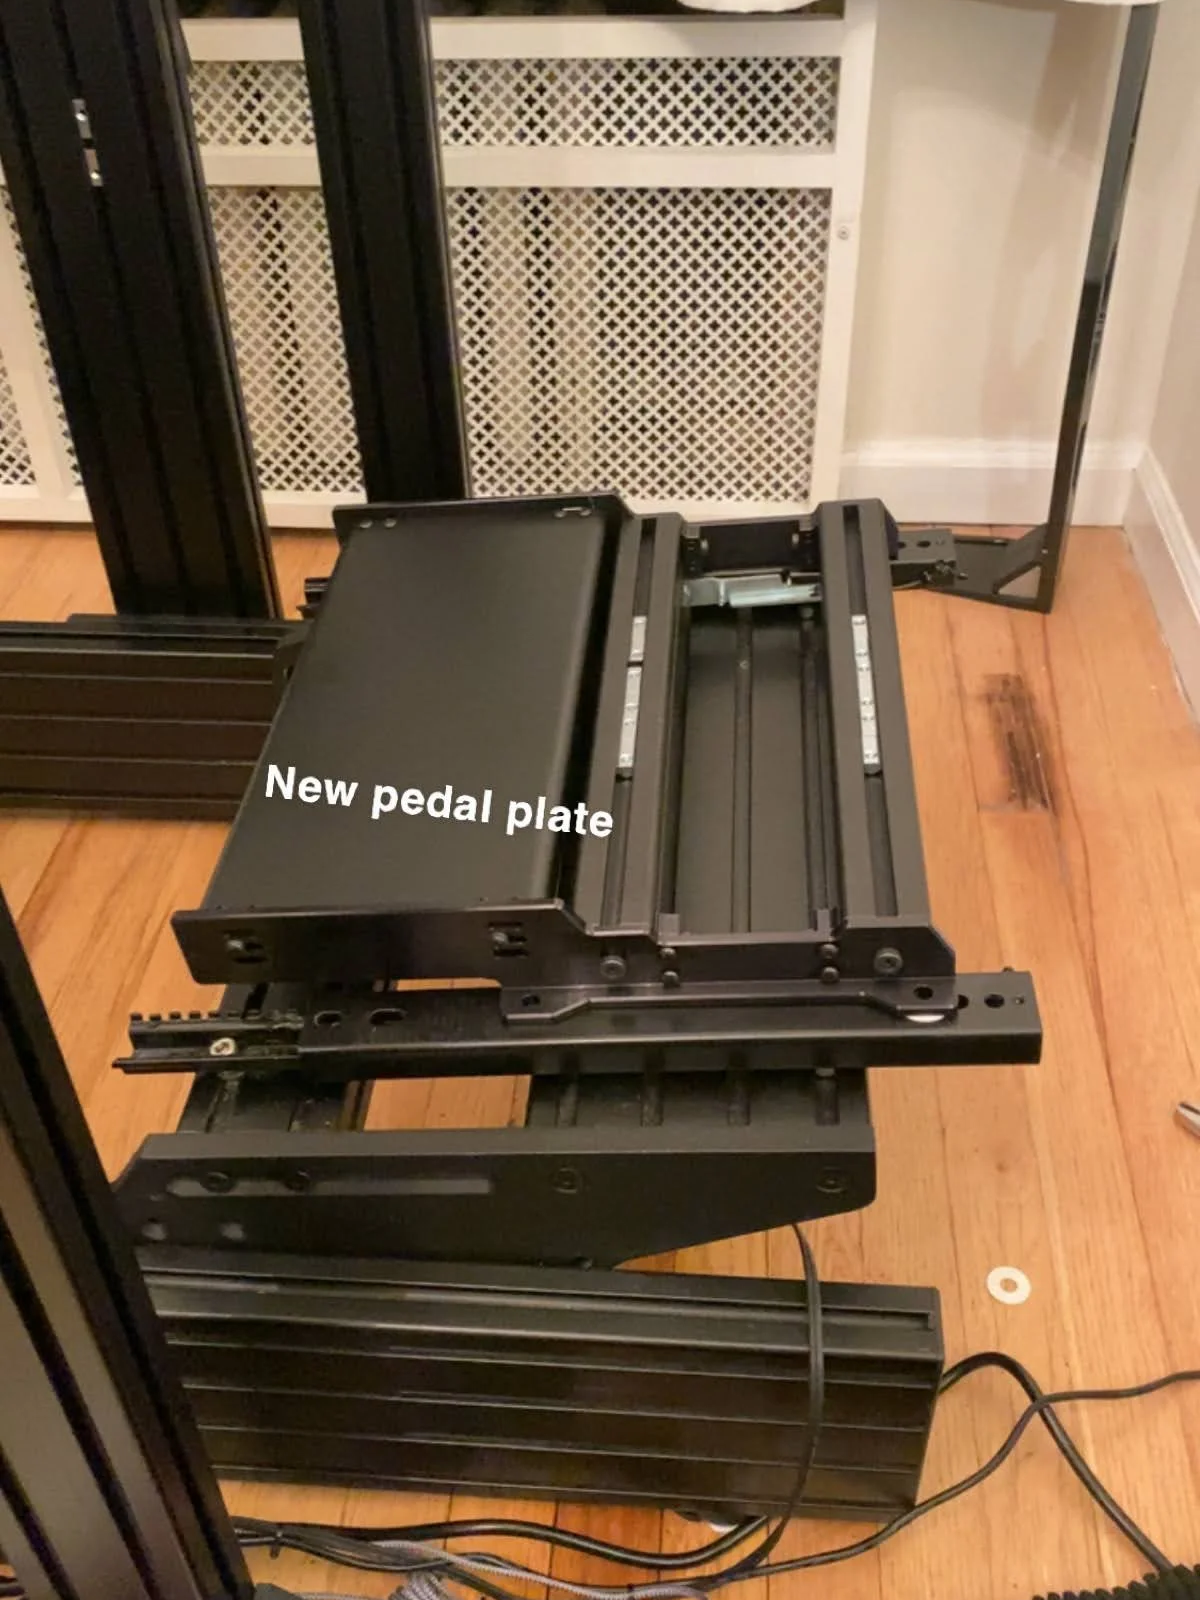
New COMPONENTS
Visualizing
(More) VisualIZING

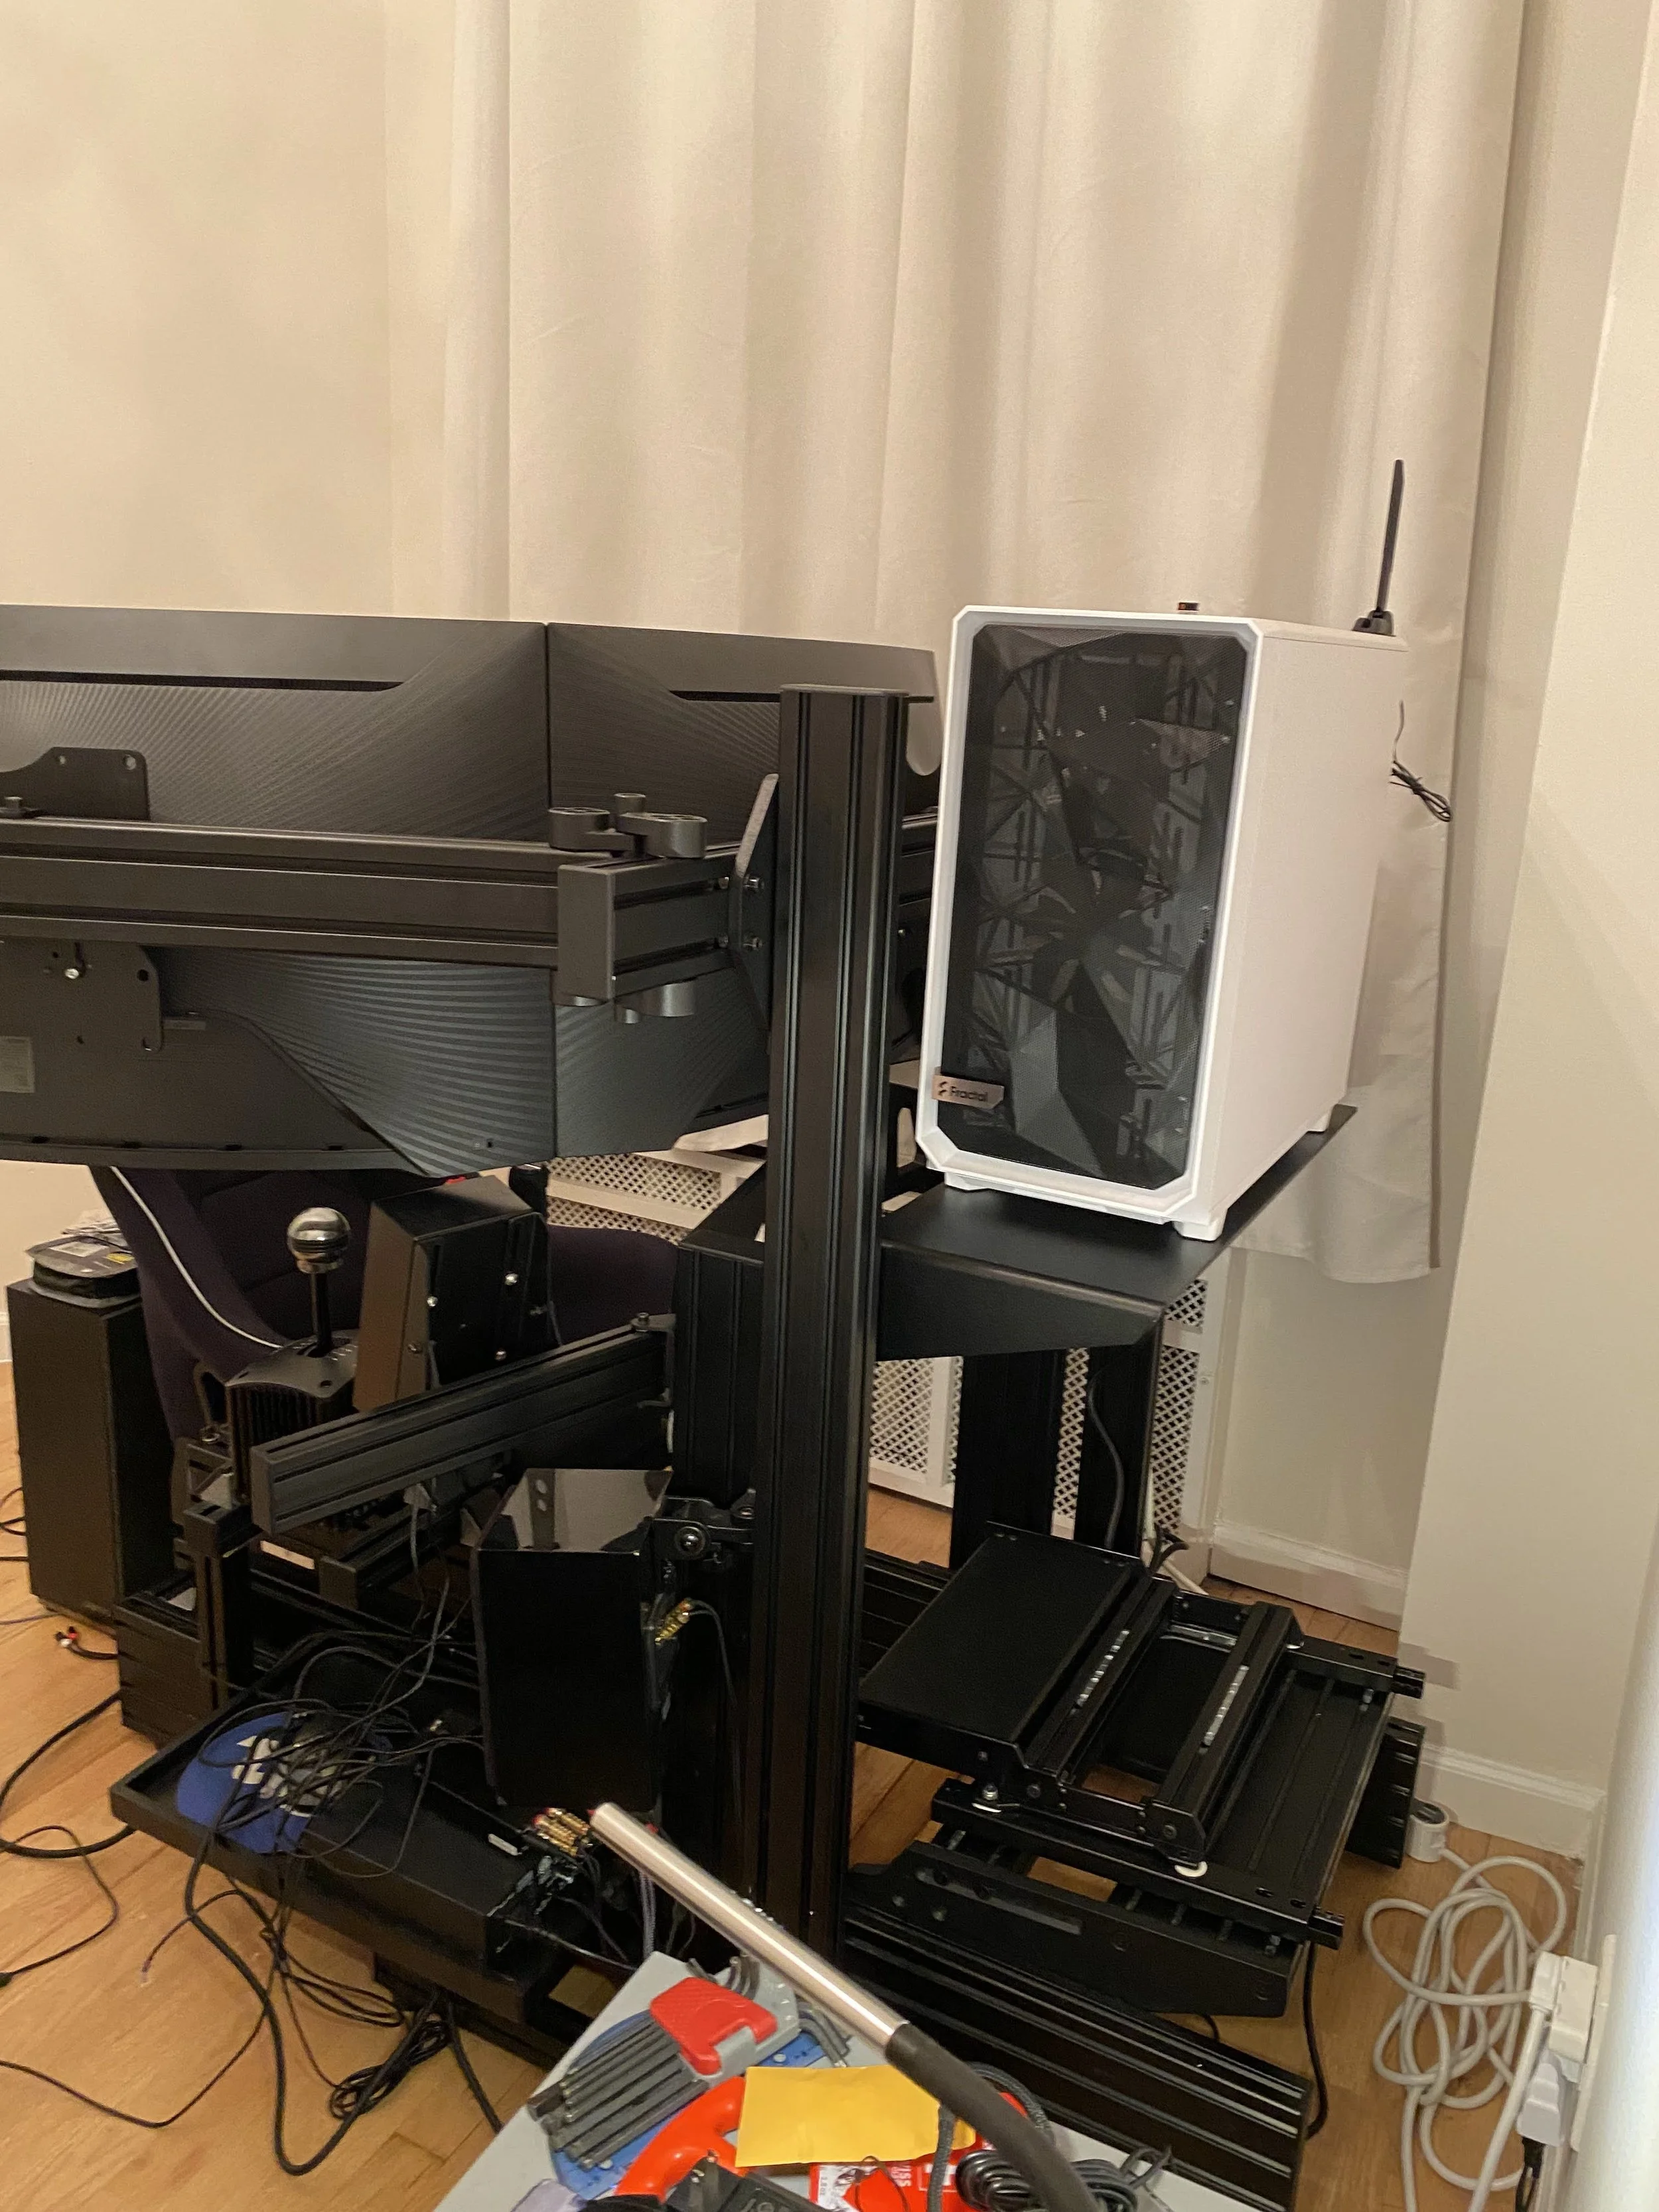
Much Better
Fresh Changes
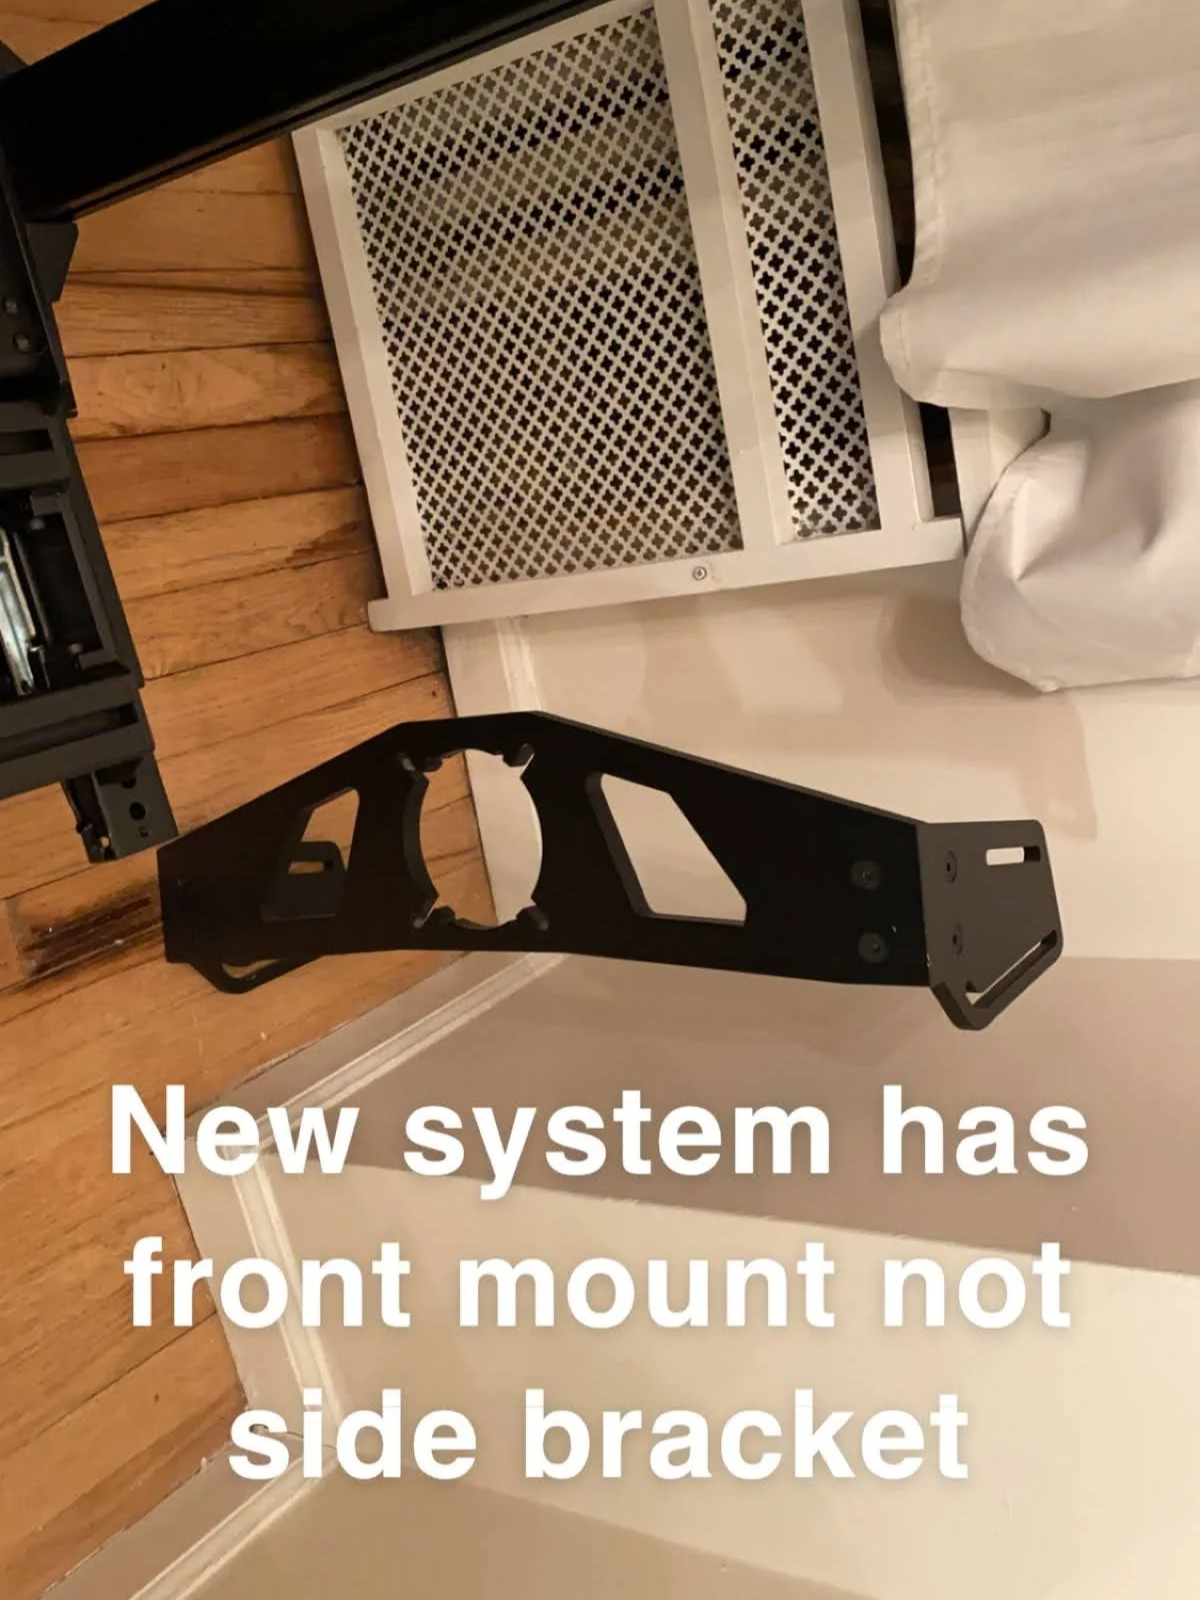
Sketchy Installs
Was it worth it? Yes
The real grind
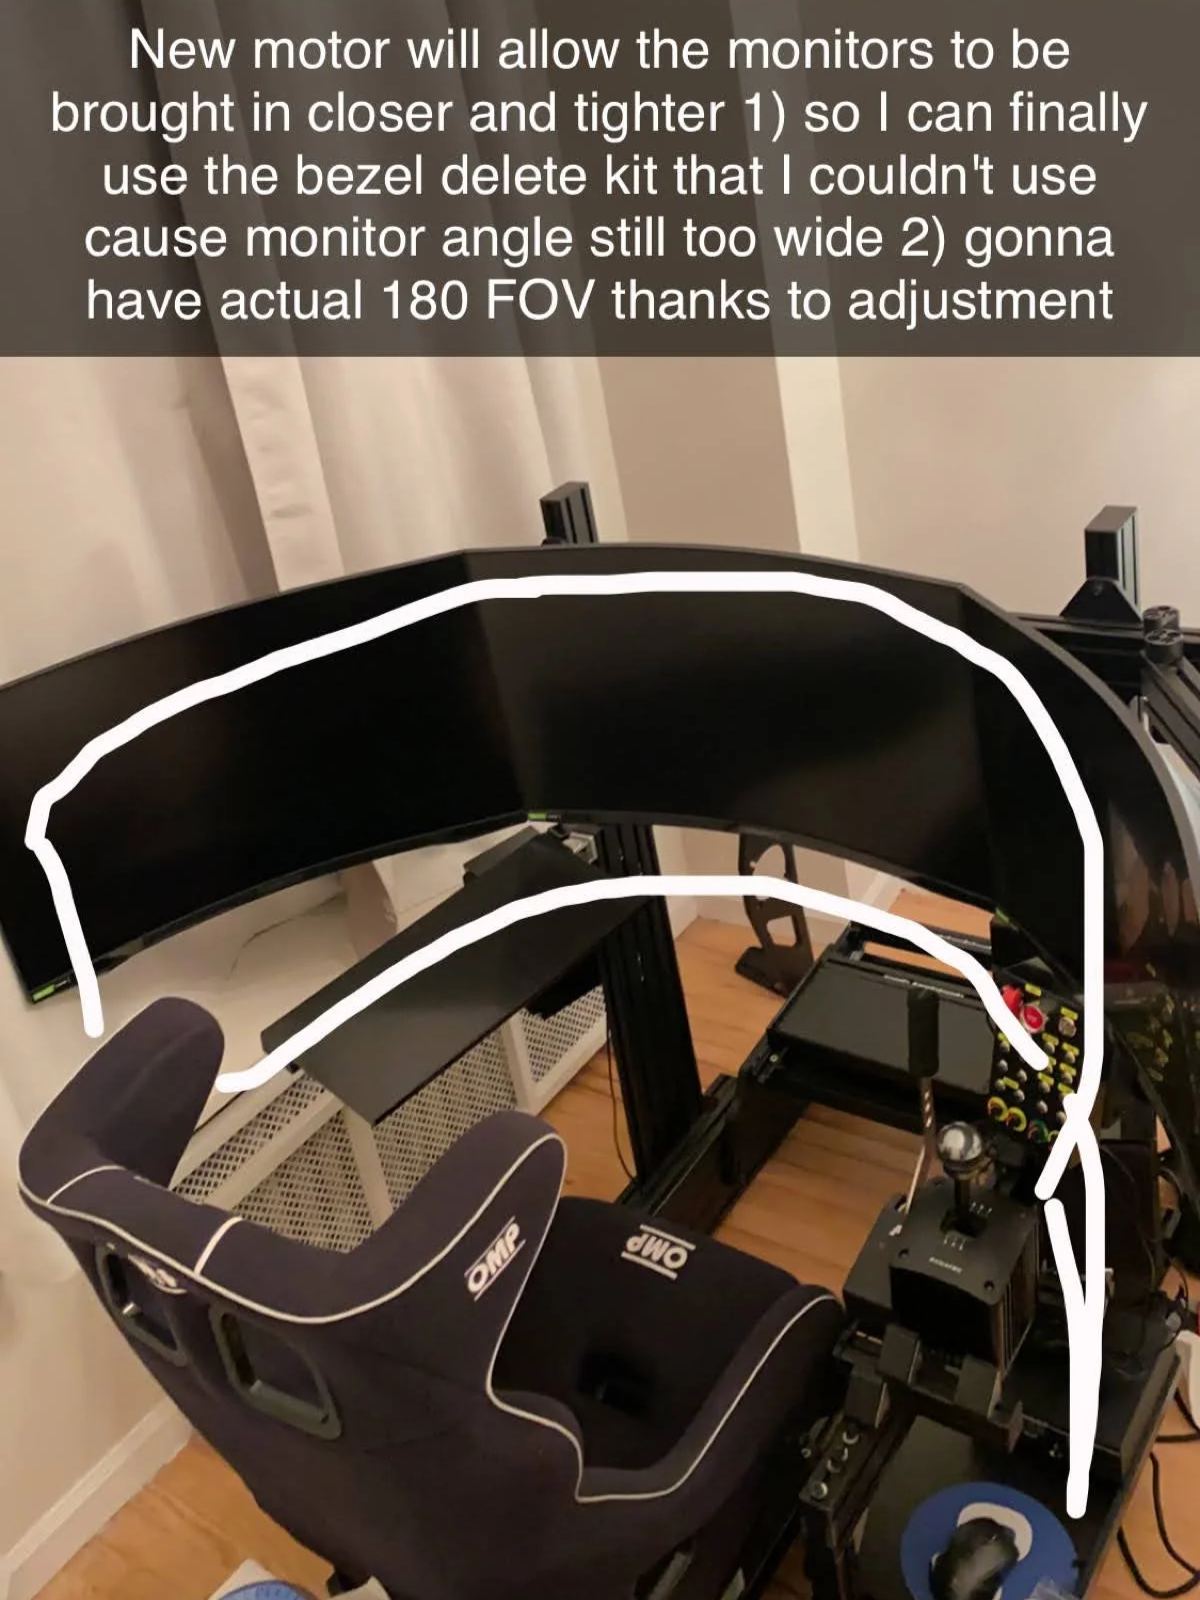
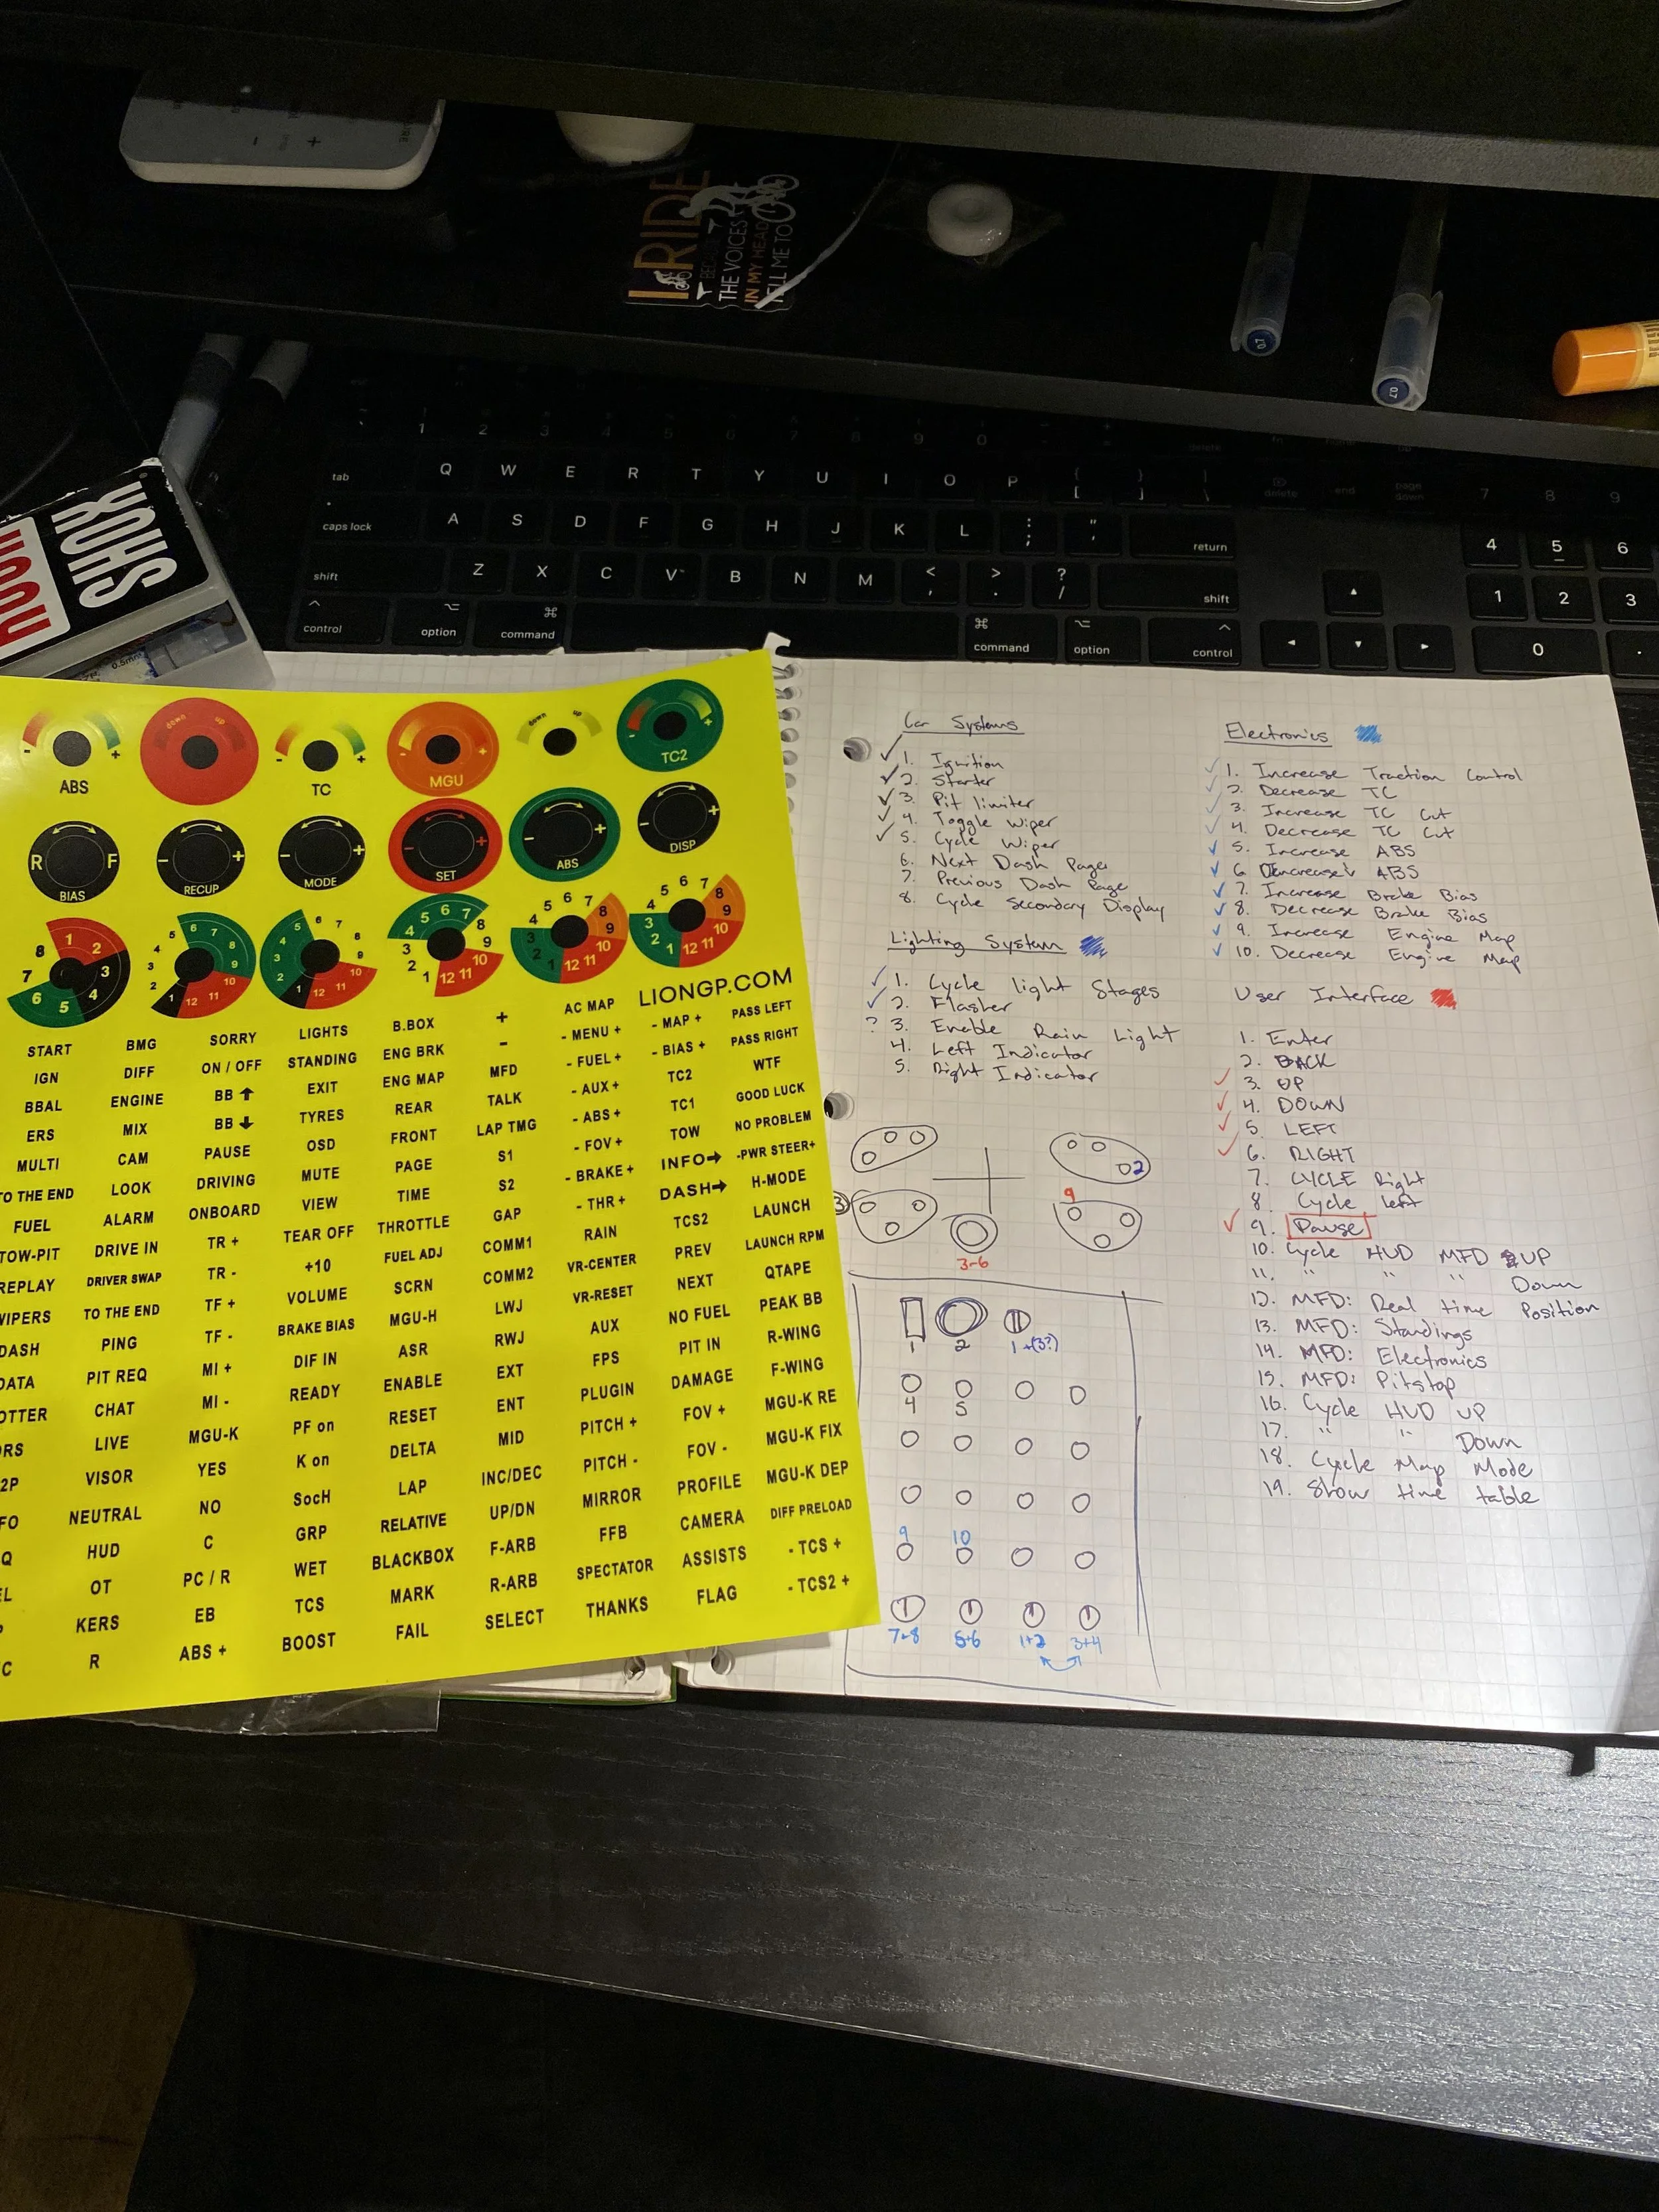
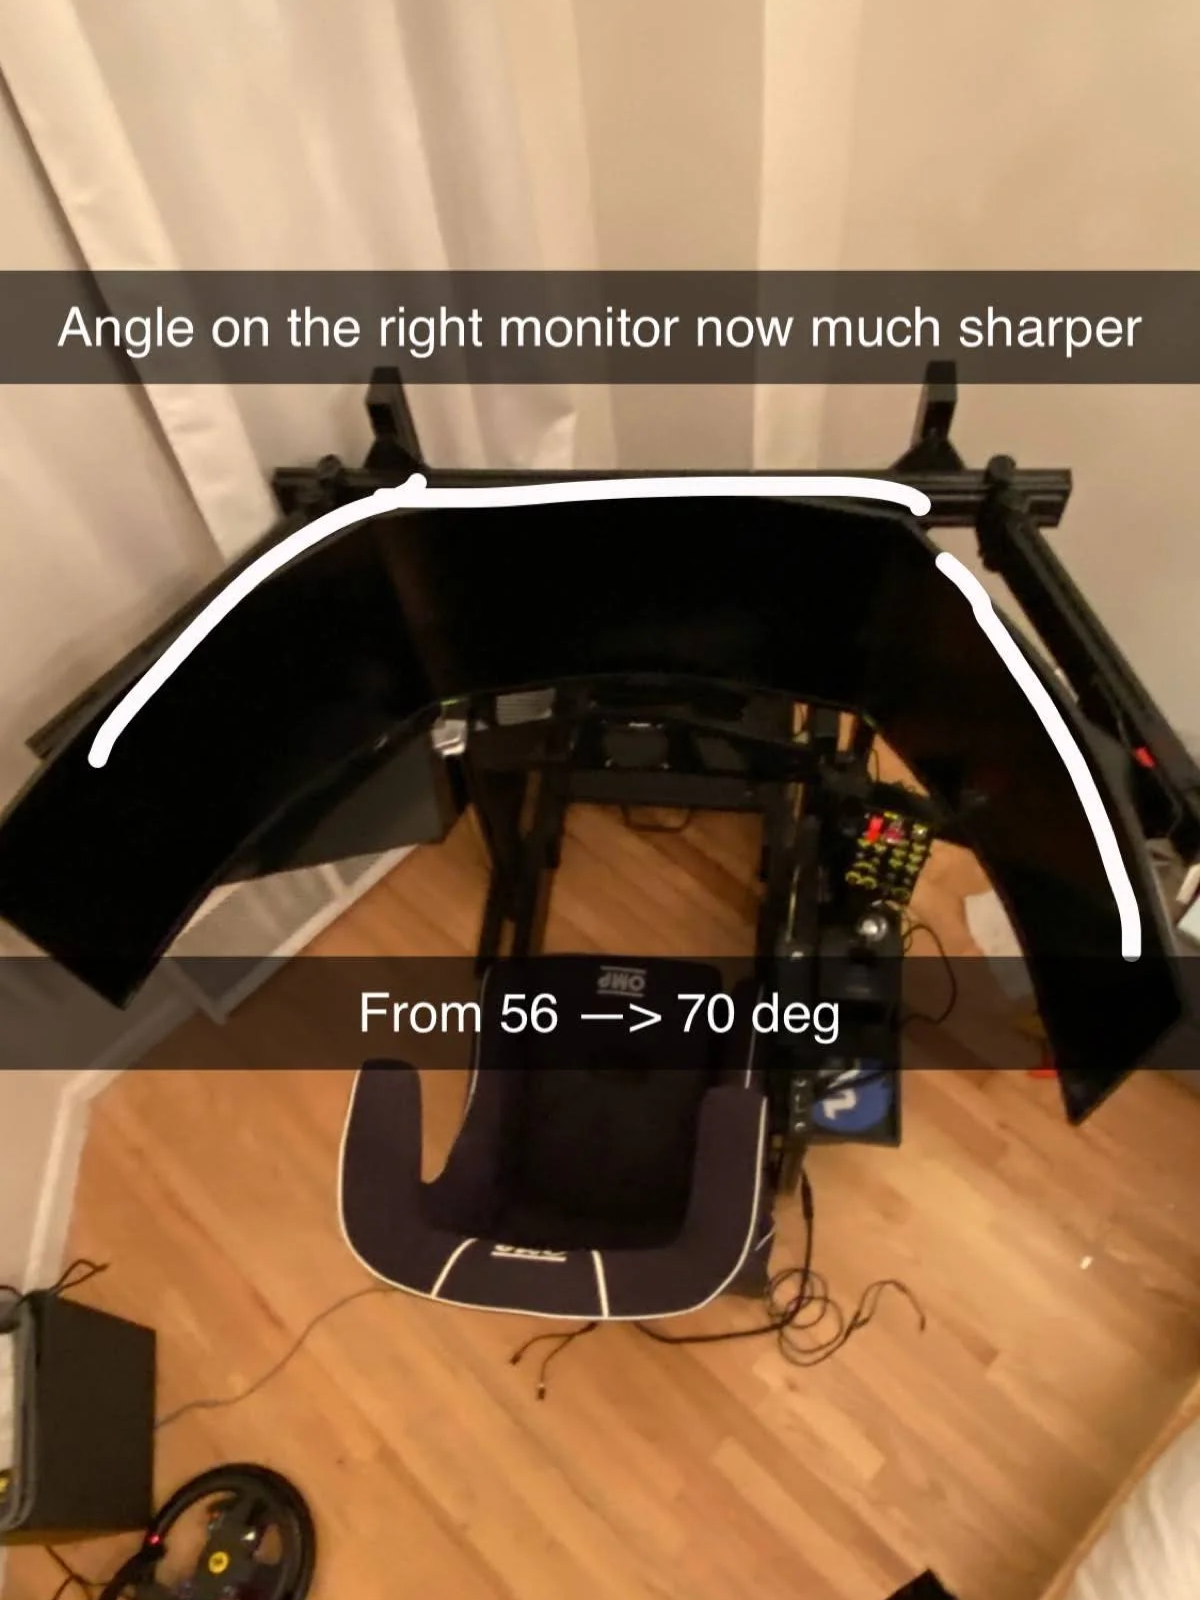
quick maths
a lot more buttons…